Blog
Book Review: Kotlin for Java Developers
11 December 2025

General information
- Pages: 414
- Published by: Packt
- Release date: October 2025
Disclaimer: I received this book as part of a collaboration with Packt
TL;DR
Essentially, this is a book that uses a "problem-reasoning-solution" approach to present the building blocks that make Kotlin interesting and different from Java. Hence, it isn't:
- A Kotlin reference book (i.e., it does not provide deep technical documentation)
- A book for learning how to program from scratch
In my opinion, it delivers what it promises.
About the book and how I read it
I work with both Java and Kotlin professionally. However, as a technical trainer I'm always looking for educational resources that can boost students' knowledge, either as a main reference or as a complementary resource. I think this book fits the latter category.
Right from the cover, the book states its value proposition:
Confidently transition from Java to Kotlin through hands-on examples and idiomatic Kotlin practices
I believe it achieves that, although at least in the first two chapters the writing style can make the book somewhat hard to read.
A rocket that takes time to launch but can reach Mars
The book is divided into four sections:
- Getting started with Kotlin
- Object-Oriented Programming
- Functional Programming
- Coroutines, Testing and DSLs
My least favorite section was the first, especially the first two chapters. The first chapter tries to give an overview of Kotlin versus Java, but it is too superficial and perhaps even unnecessary. I imagine the goal of this chapter is to spark interest in Kotlin, but it also anticipates that everything will be covered in more detail later. Personally, I almost skipped this chapter because I knew I would see the topics in more depth later. I suppose that's a matter of taste.
Then, the second chapter sketches out Maven and Gradle without going in depth, which felt redundant since the book is targeted at Java developers. I expected more detail in this section about which plugins are used in the build process, how they interact with Maven lifecycles, and other specific topics. But the book delegates this responsibility to the IDE wizard and that's it.
From chapter three onward something magical happens. The book finally launches and its value proposition starts to materialize. Starting in chapter three the writing style changes and consistently presents concept by concept. Almost every chapter is structured like this:
- A common problem is discussed, often respectfully from a Java perspective
- The Kotlin design decision is presented and how it aims to improve the problem
- A concise, self-contained Kotlin snippet explains the programming concept
This last part is what gives the book its value. Studying a programming language — especially when you already know how to program — is a different process than learning to program for the first time. This book recognizes that and discusses Kotlin's value propositions in technical terms, presenting self-contained snippets that readers can try in their IDE or download from the book's official repository.
If I were to use a rocket analogy, imagine that the following chapters are like Apollo 11 in full ascent from Cape Canaveral.
Part I
- Null and non-nullable types
- Extension Functions and the apply function
Part II
- Object-Oriented programming basics
- Generics and variance
- Data and sealed classes
Because this is not a reference book or official documentation, up to this point the book presents each concept well without diving into corner cases — which is fine. With practice, the book can be completed in about a week and provides a solid foundation for moving to the next level, whether that's Android development or Kotlin backend programming.
From Part III there is a noticeable shift: we leave the Java-centric atmosphere and enter idiomatic Kotlin territory. Java-only developers will likely notice this change, as we move into structures that are often too abstract to have direct equivalents in Java, including:
Part III - All this in the "Kotlin way"
- Basics of functional programming
- Lambdas
- Collections and sequences
Part IV
- Coroutines
- Synchronous and asynchronous programming
Finally, once we're in orbit the book presents two topics that are useful for day-to-day development but are not strictly part of the language:
- Kotlin testing
- Domain-specific languages (DSLs)
Things that could be improved
As with any review, this is the most difficult section to write. Besides the first two chapters, I noticed a few things that could cause confusion:
- The null safety chapter omits any mention of Java's
Optional - The coroutines section briefly mentions Virtual Threads but then presents Loom as a separate effort and likens it to Quasar (a library ecosystem). In reality, Virtual Threads are part of Project Loom
- The book inconsistently presents different JDK recommendations across chapters; sometimes it suggests Corretto while other times it simply suggests OpenJDK
- Also on the JVM side, most of the time it suggests Java 17. I imagine this was related to the time of writing. I can say that all samples worked just fine on Java 25 (the latest LTS at the time of this review), so you should be fine using that or Java 21 (officially supported by Kotlin compiler).
Most of these are not deal-breakers, this is still an enyojable book.
Who should read this book?
- Java developers exploring the Kotlin ecosystem, those interested in Android development, or developers considering switching to Kotlin as their primary language
Install VirtualBox over Fedora with SecureBoot enabled
24 March 2025
Not too long ago, I upgraded my computer and got a new Lenovo ThinkPad X1 Carbon (a great machine so far!).

Since I was accustomed to working on a gaming rig (Ryzen 7, 64GB RAM, 4TB) that I had set up about five years ago, I completely missed the Secure Boot and TPM trends—these weren’t relevant for my fixed workstation.
However, my goal with this new laptop is to work with both Linux and Windows on the go, making encryption mandatory. As a non-expert Windows user, I enabled encryption via BitLocker on Windows 11, which worked perfectly... until it didn’t.
The Issue with Secure Boot and VirtualBox/VMware
This week, I discovered that BitLocker leverages TPM (the encryption chip) and Secure Boot if they’re enabled during encryption. While this is beneficial for Windows users, it created an unexpected problem for me: virtualization on Linux.
Let me explain. Secure Boot is:
...an enhancement of the security of the pre-boot process of a UEFI system. When enabled, the UEFI firmware verifies the signature of every component used in the boot process. This results in boot files that are easily readable but tamper-evident.
This means components like the kernel, kernel modules, and firmware must be signed with a recognized signature, which must be installed on the computer.
This creates a tricky situation for Linux because virtualization software like VMware or VirtualBox typically compiles kernel modules on the user’s machine. These modules are unsigned by default, leading to errors when loading them:
# modprobe vboxdrv
modprobe: ERROR: could not insert 'vboxdrv': Key was rejected by service
A good way to diagnose this is to check dmesg for messages like:
[47921.605346] Loading of unsigned module is rejected
[47921.664572] Loading of unsigned module is rejected
[47932.035014] Loading of unsigned module is rejected
[47932.056838] Loading of unsigned module is rejected
[47947.224484] Loading of unsigned module is rejected
[47947.257641] Loading of unsigned module is rejected
[48291.102147] Loading of unsigned module is rejected
How to Fix the Issue with VirtualBox Using RPMFusion and Akmods
Oracle is aware of this issue, but their documentation is lacking. To quote:
If you are running on a system using UEFI (Unified Extensible Firmware Interface) Secure Boot, you may need to sign the following kernel modules before you can load them:
vboxdrv,vboxnetadp,vboxnetflt,vboxpci. See your system documentation for details of the kernel module signing process.
Fedora’s documentation is sparse, so I spent a lot of time researching manual kernel module signing (Fedora docs) and following user guides until I discovered that VirtualBox is available in RPMFusion with akmods support.
Some definitions:
- RPM Fusion is a community repository for Enterprise Linux (Fedora, RHEL, etc.) that provides packages not included in official distributions.
- Akmds automates the process of building and signing kernel modules.
Here’s the step-by-step solution:
1. Enable RPM Fusion (Free Repo)
Install the RPM Fusion free repository:
sudo dnf install https://mirrors.rpmfusion.org/free/fedora/rpmfusion-free-release-$(rpm -E %fedora).noarch.rpm

2. Install VirtualBox (with Akmods)
Ensure VirtualBox is installed from RPMFusion (akmods will be a dependency):
sudo dnf install virtualbox


3. Start Akmods to Generate Keys
Akmods will automatically sign the modules with a key stored in /etc/pki/akmods/certs:
sudo systemctl start akmods.service

4. Enroll the Key with Mokutil
Use mokutil to register the key in Secure Boot:
sudo mokutil --import /etc/pki/akmods/certs/public_key.der

You’ll be prompted for a case-sensitive password—remember it for the next step.
5. Reboot and Enroll the Key
After rebooting, the UEFI firmware will prompt you to enroll the new key.


If needed, you could also check for the key contents in that screen.

6. Start VirtualBox Kernel Modules
The modules are now signed and can be loaded. Enable these at boot:
sudo systemctl start vboxdrv
sudo systemctl enable vboxdrv
Verify they’re loaded:
lsmod | grep vbox
Output:
vboxnetadp             32768  0
vboxnetflt             40960  0
vboxdrv               708608  2 vboxnetadp,vboxnetflt
Now, VirtualBox runs on Fedora with Secure Boot and TPM enabled, without disabling BitLocker on Windows.

A practical guide to implement OpenTelemetry in Spring Boot
01 December 2024
In this tutorial I want to consolidate some practical ideas regarding OpenTelemetry and how to use it with Spring Boot.
This tutorial is composed by four sections
- OpenTelemetry practical concepts
- Setting up an observability stack with OpenTelemetry Collector, Grafana, Loki, Tempo and Podman
- Instrumenting Spring Boot applications for OpenTelemetry
- Testing and E2E sample
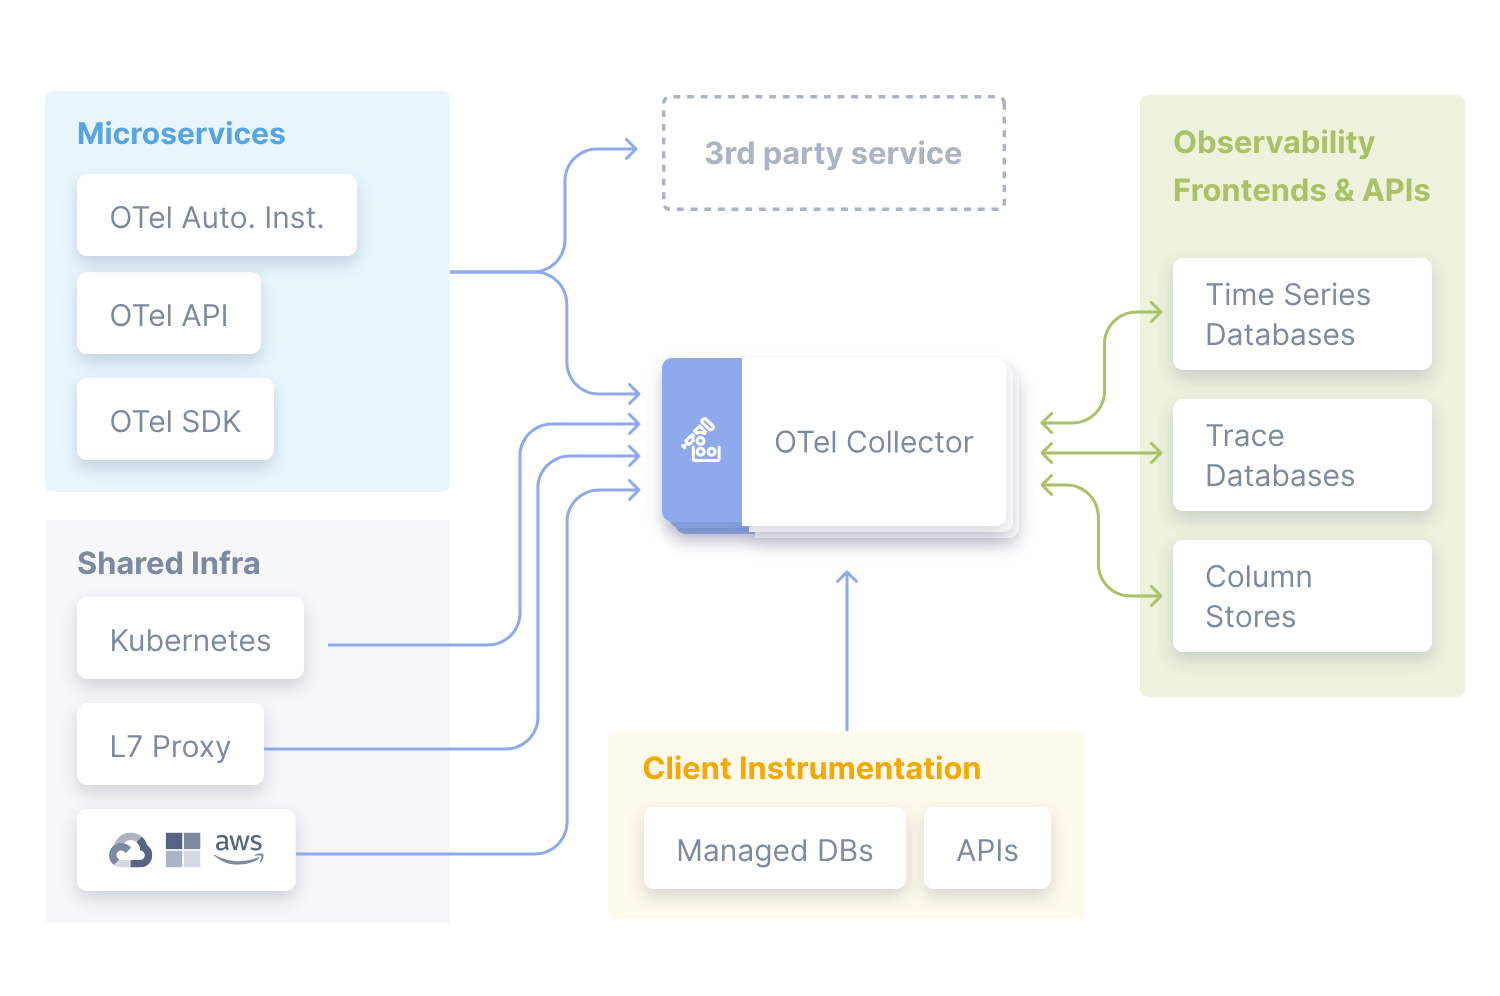
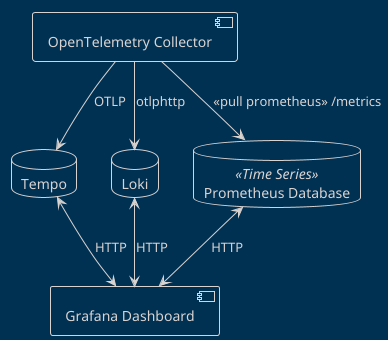
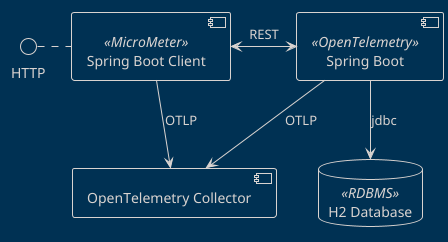
By the end of the tutorial, you should be able to implement the following architecture:

OpenTelemetry practical concepts
As the official documentation states, OpenTelemetry is
- An Observability framework and toolkit designed to create and manage telemetry data such as traces, metrics, and logs.
- Vendor and tool-agnostic, meaning that it can be used with a broad variety of Observability backends.
- Focused on the generation, collection, management, and export of telemetry. A major goal of OpenTelemetry is that you can easily instrument your applications or systems, no matter their language, infrastructure, or runtime environment.
Monitoring, observability and METL
To keep things short, monitoring is the process of collecting, processing and analyzing data to track the state of a (information) system. Then, monitoring is going to the next level, to actually understand the information that is being collected and do something with it, like defining alerts for a given system.
To achieve both goals it is necessary to collect three dimensions of data, specifically:
- Logs: Registries about processes and applications, with useful data like timestamps and context
- Metrics: Numerical data about the performance of applications and application modules
- Traces: Data that allow to estabilish the complete route that a given operation traverses through a series of dependent applications
Hence, when the state of a given system is altered in some way, we have an Event, that correlates and ideally generates data on the three dimensions.
Why is OpenTelemetry important and which problem does it solve?
Developers recognize by experience that monitoring and observability are important, either to evaluate the actual state of a system or to do post-mortem analysis after disasters. Hence, it is natural to think that observability has been implemented in various ways. For example if we think on a system constructed with Java we have at least the following collection points:
- Logs: Systemd, /var/log, /opt/tomcat, FluentD
- Metrics: Java metrics via JMX, OS Metrics, vendor specific metrics via Spring Actuator
- Tracing: Data via Jaeger or Zipkin tooling in our Java workloads
This variety in turn imposes a great amount of complexity in instrumenting our systems to provide information, that a- comes in different formats, from b- technology that is difficult to implement, often with c- solutions that are too tied to a given provider or in the worst cases, d- technologies that only work with certain languages/frameworks.
And that's the magic about OpenTelemetry proposal, by creating a working group under the CNCF umbrella the project is able to provide useful things like:
- Common protocols that vendors and communities can implement to talk each other
- Standards for software communities to implement instrumentation in libraries and frameworks to provide data in OpenTelemetry format
- A collector able to retrieve/receive data from diverse origins compatible with OpenTelemetry, process it and send it to ...
- Analysis platforms, databases and cloud vendors able to receive the data and provide added value over it
In short, OpenTelemetry is the reunion of various great monitoring ideas that overlapping software communities can implement to facilitate the burden of monitoring implementations.
OpenTelemetry data pipeline
For me, the easiest way to think about OpenTelemetry concepts is a data pipeline, in this data pipeline you need to
- Instrument your workloads to push (or offer) the telemetry data to a processing/collecting element -i.e. OpenTelemetry Collector-
- Configure OpenTelemetry Collector to receive or pull the data from diverse workloads
- Configure OpenTelemetry Collector to process the data -i.e adding special tags, filtering data-
- Configure OpenTelemetry Collector to push (or offer) the data to compatible backends
- Configure and use the backends to receive (or pull) the data from the collector, to allow analysis, alarms, AI ... pretty much any case that you can think about with data
Setting up an observability stack with OpenTelemetry Collector, Grafana, Prometheus, Loki, Tempo and Podman
As OpenTelemetry got popular various vendors have implemented support for it, to mention a few:
Self-hosted platforms
Cloud platforms
Hence, for development purposes, it is always useful to know how to bootstrap a quick observability stack able to receive and show OpenTelemetry capabilities.
For this purpose we will use the following elements:
- Prometheus as time-series database for metrics
- Loki as logs platform
- Tempo as a tracing platform
- Grafana as a web UI
And of course OpenTelemetry collector. This example is based on various Grafana examples, with a little bit of tweaking to demonstrate the different ways of collecting, processing and sending data to backends.
OpenTelemetry collector
As stated previously, OpenTelemetry collector acts as an intermediary that receives/pull information from data sources, processes this information and, forwards the information to destinations like analysis platforms or even other collectors. The collector is able to do this either with compliant workloads or via plugins that talk with the workloads using proprietary formats.
As the plugins collection can be increased or decreased, vendors have created their own distributions of OpenTelemetry collectors, for reference I've used successfully in the real world:
- Amazon ADOT
- Splunk Distribution of OpenTelemetry Collector
- Grafana Alloy
- OpenTelemetry Collector (the reference implementation)
You could find a complete list directly on OpenTelemetry website.
For this demonstration, we will create a data pipeline using the contrib version of the reference implementation which provides a good amount of receivers, exporters and processors. In our case Otel configuration is designed to:
- Receive data from Spring Boot workloads (ports 4317 and 4318)
- Process the data adding a new tag to metrics
- Expose an endpoint for Prometheus scrapping (port 8889)
- Send logs to Loki (port 3100) using otlphttp format
- Send traces to Tempo (port 9411) using otlp format
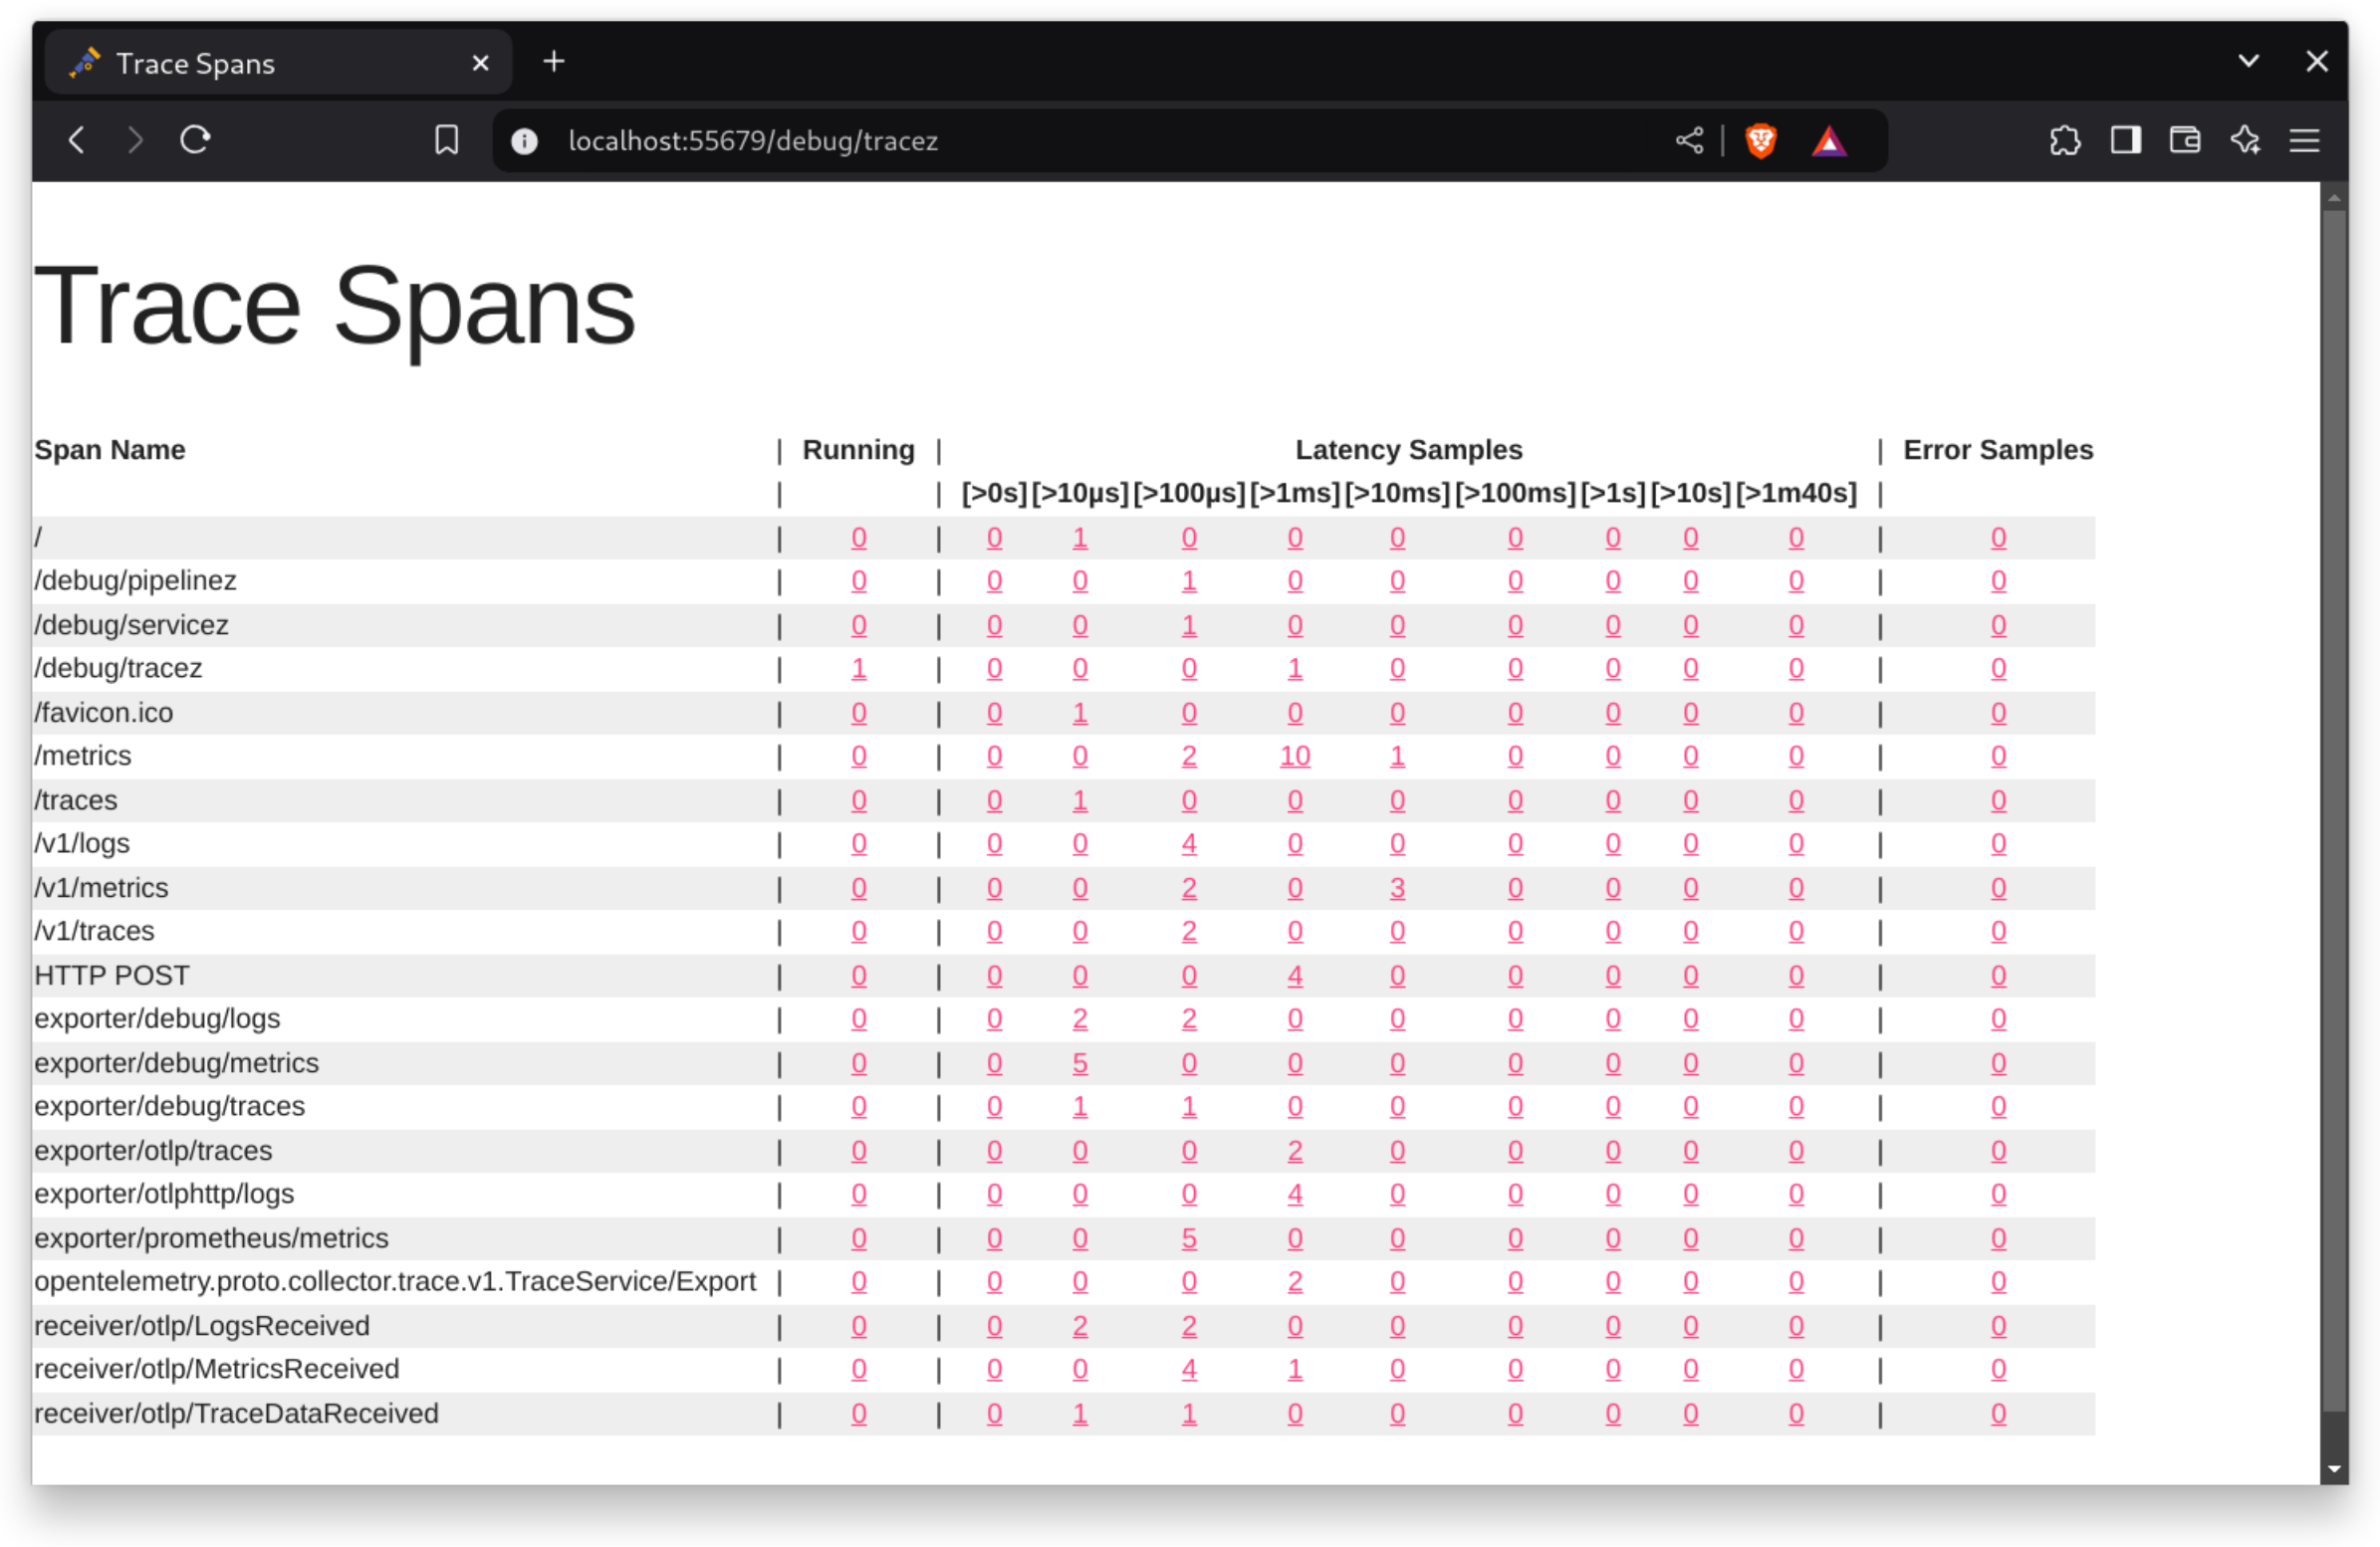
- Exposes a rudimentary dashboard from the collector, called zpages. Very useful for debugging.
otel-config.yaml
receivers:
  otlp:
    protocols:
      grpc:
        endpoint: 0.0.0.0:4317
      http:
        endpoint: 0.0.0.0:4318
processors:
  attributes:
    actions:
      - key: team
        action: insert
        value: vorozco
exporters:
  debug:
  prometheus:
    endpoint: "0.0.0.0:8889"
  otlphttp:
    endpoint: http://loki:3100/otlp
  otlp:
    endpoint: tempo:4317
    tls:
      insecure: true
service:
  extensions: [zpages]
  pipelines:
    metrics:
      receivers: [otlp]
      processors: [attributes]
      exporters: [debug,prometheus]
    traces:
      receivers: [otlp]
      exporters: [debug, otlp]
    logs:
      receivers: [otlp]
      exporters: [debug, otlphttp]
extensions:
  zpages:
    endpoint: "0.0.0.0:55679"
Prometheus
Prometheus is a well known analysis platform, that among other things offers dimensional data and a performant time-series storage.
By default it works as a metrics scrapper, then, workloads provide a http endpoint offering data using the Prometheus format. For our example we configured Otel to offer metrics to the prometheus host via port 8889.
prometheus:
    endpoint: "prometheus:8889"
Then, whe need to configure Prometheus to scrape the metrics from the Otel host. You would notice two ports, the one that we defined for the active workload data (8889) and another for metrics data for the collector itself (8888).
prometheus.yml
scrape_configs:
- job_name: "otel"
  scrape_interval: 10s
  static_configs:
    - targets: ["otel:8889"]
    - targets: ["otel:8888"]
It is worth highlighting that Prometheus also offers a way to ingest information instead of scrapping it, and, the official support for OpenTelemetry ingestion is coming on the new versions.
Loki
As described in the website, Loki is a specific solution for log aggregation heavily inspired by Prometheus, with the particular design decision to NOT format in any way the log contents, leaving that responsibility to the query system.
To configure the project for local environments, the project offers a configuration that is usable for most of the development purposes. The following configuration is an adaptation to preserve the bare minimum to work with temporal files and memory.
loki.yaml
auth_enabled: false

server:
  http_listen_port: 3100
  grpc_listen_port: 9096

common:
  instance_addr: 127.0.0.1
  path_prefix: /tmp/loki
  storage:
    filesystem:
      chunks_directory: /tmp/loki/chunks
      rules_directory: /tmp/loki/rules
  replication_factor: 1
  ring:
    kvstore:
      store: inmemory

query_range:
  results_cache:
    cache:
      embedded_cache:
        enabled: true
        max_size_mb: 100

schema_config:
  configs:
    - from: 2020-10-24
      store: tsdb
      object_store: filesystem
      schema: v13
      index:
        prefix: index_
        period: 24h

ruler:
  alertmanager_url: http://localhost:9093

limits_config:
  allow_structured_metadata: true
Then, we configure an exporter to deliver the data to the loki host using oltphttp format.
otlphttp:
  endpoint: http://loki:3100/otlp
Tempo
In similar fashion than Loki, Tempo is an Open Source project created by grafana that aims to provide a distributed tracing backend. On a personal note, for me besides performance it shines for being compatible not only with OpenTelemetry, it can also ingest data in Zipkin and Jaeger formats.
To configure the project for local environments, the project offers a configuration that is usable for most of the development purposes. The following configuration is an adaptation to remove the metrics generation and simplify the configuration, however with this we loose the service graph feature.
tempo.yaml
stream_over_http_enabled: true
server:
  http_listen_port: 3200
  log_level: info

query_frontend:
  search:
    duration_slo: 5s
    throughput_bytes_slo: 1.073741824e+09
    metadata_slo:
      duration_slo: 5s
      throughput_bytes_slo: 1.073741824e+09
  trace_by_id:
    duration_slo: 5s

distributor:
  receivers:
    otlp:
      protocols:
        http:
        grpc:

ingester:
  max_block_duration: 5m               # cut the headblock when this much time passes. this is being set for demo purposes and should probably be left alone normally

compactor:
  compaction:
    block_retention: 1h                # overall Tempo trace retention. set for demo purposes

storage:
  trace:
    backend: local                     # backend configuration to use
    wal:
      path: /var/tempo/wal             # where to store the wal locally
    local:
      path: /var/tempo/blocks
Then, we configure an exporter to deliver the data to Tempo host using oltp/grpc format.
otlp:
    endpoint: tempo:4317
    tls:
      insecure: true
Grafana
Loki, Tempo and (to some extent) Prometheus are data storages, but we still need to show this data to the user. Here, Grafana enters the scene.
Grafana offers a good selection of analysis tools, plugins, dashboards, alarms, connectors and a great community that empowers observability. Besides having a great compatibility with Prometheus, it offers of course a perfect compatibility with their other offerings.
To configure Grafana you just need to plug compatible datasources and the rest of work will be on the web ui.
grafana.yaml
apiVersion: 1

datasources:
  - name: Otel-Grafana-Example
    type: prometheus
    url: http://prometheus:9090
    editable: true
  - name: Loki
    type: loki
    access: proxy
    orgId: 1
    url: http://loki:3100
    basicAuth: false
    isDefault: true
    version: 1
    editable: false
  - name: Tempo
    type: tempo
    access: proxy
    orgId: 1
    url: http://tempo:3200
    basicAuth: false
    version: 1
    editable: false
    apiVersion: 1
    uid: tempo
Podman (or Docker)
At this point you may have noticed that I've referred to the backends using single names, this is because I intend to set these names using a Podman Compose deployment.
otel-compose.yml
version: '3'
services:
  otel:
    container_name: otel
    image: otel/opentelemetry-collector-contrib:latest
    command: [--config=/etc/otel-config.yml]
    volumes:
      - ./otel-config.yml:/etc/otel-config.yml
    ports:
      - "4318:4318"
      - "4317:4317"
      - "55679:55679"
  prometheus:
    container_name: prometheus
    image: prom/prometheus
    command: [--config.file=/etc/prometheus/prometheus.yml]
    volumes:
      - ./prometheus.yml:/etc/prometheus/prometheus.yml
    ports:
      - "9091:9090"
  grafana:
    container_name: grafana
    environment:
      - GF_AUTH_ANONYMOUS_ENABLED=true
      - GF_AUTH_ANONYMOUS_ORG_ROLE=Admin
    image: grafana/grafana
    volumes:
      - ./grafana.yml:/etc/grafana/provisioning/datasources/default.yml
    ports:
      - "3000:3000"
  loki:
    container_name: loki
    image: grafana/loki:3.2.0
    command: -config.file=/etc/loki/local-config.yaml
    volumes:
      - ./loki.yaml:/etc/loki/local-config.yaml
    ports:
      - "3100"
  tempo:
    container_name: tempo
    image: grafana/tempo:latest
    command: [ "-config.file=/etc/tempo.yaml" ]
    volumes:
      - ./tempo.yaml:/etc/tempo.yaml
    ports:
      - "4317"  # otlp grpc
      - "4318"
At this point the compose description is pretty self-descriptive, but I would like to highlight some things:
- Some ports are open to the host -e.g. 4318:4318 - while others are closed to the default network that compose will be created among containers -e.g. 3100-
- This stack is designed to avoid any permanent data. Again, this is my personal way to boot quickly an observability stack to allow tests during deployment. To make it ready for production you probably would want to preserve the data in some volumes
Once the configuration is ready, you can launch it using the compose file
cd podman
podman compose -f otel-compose.yml up
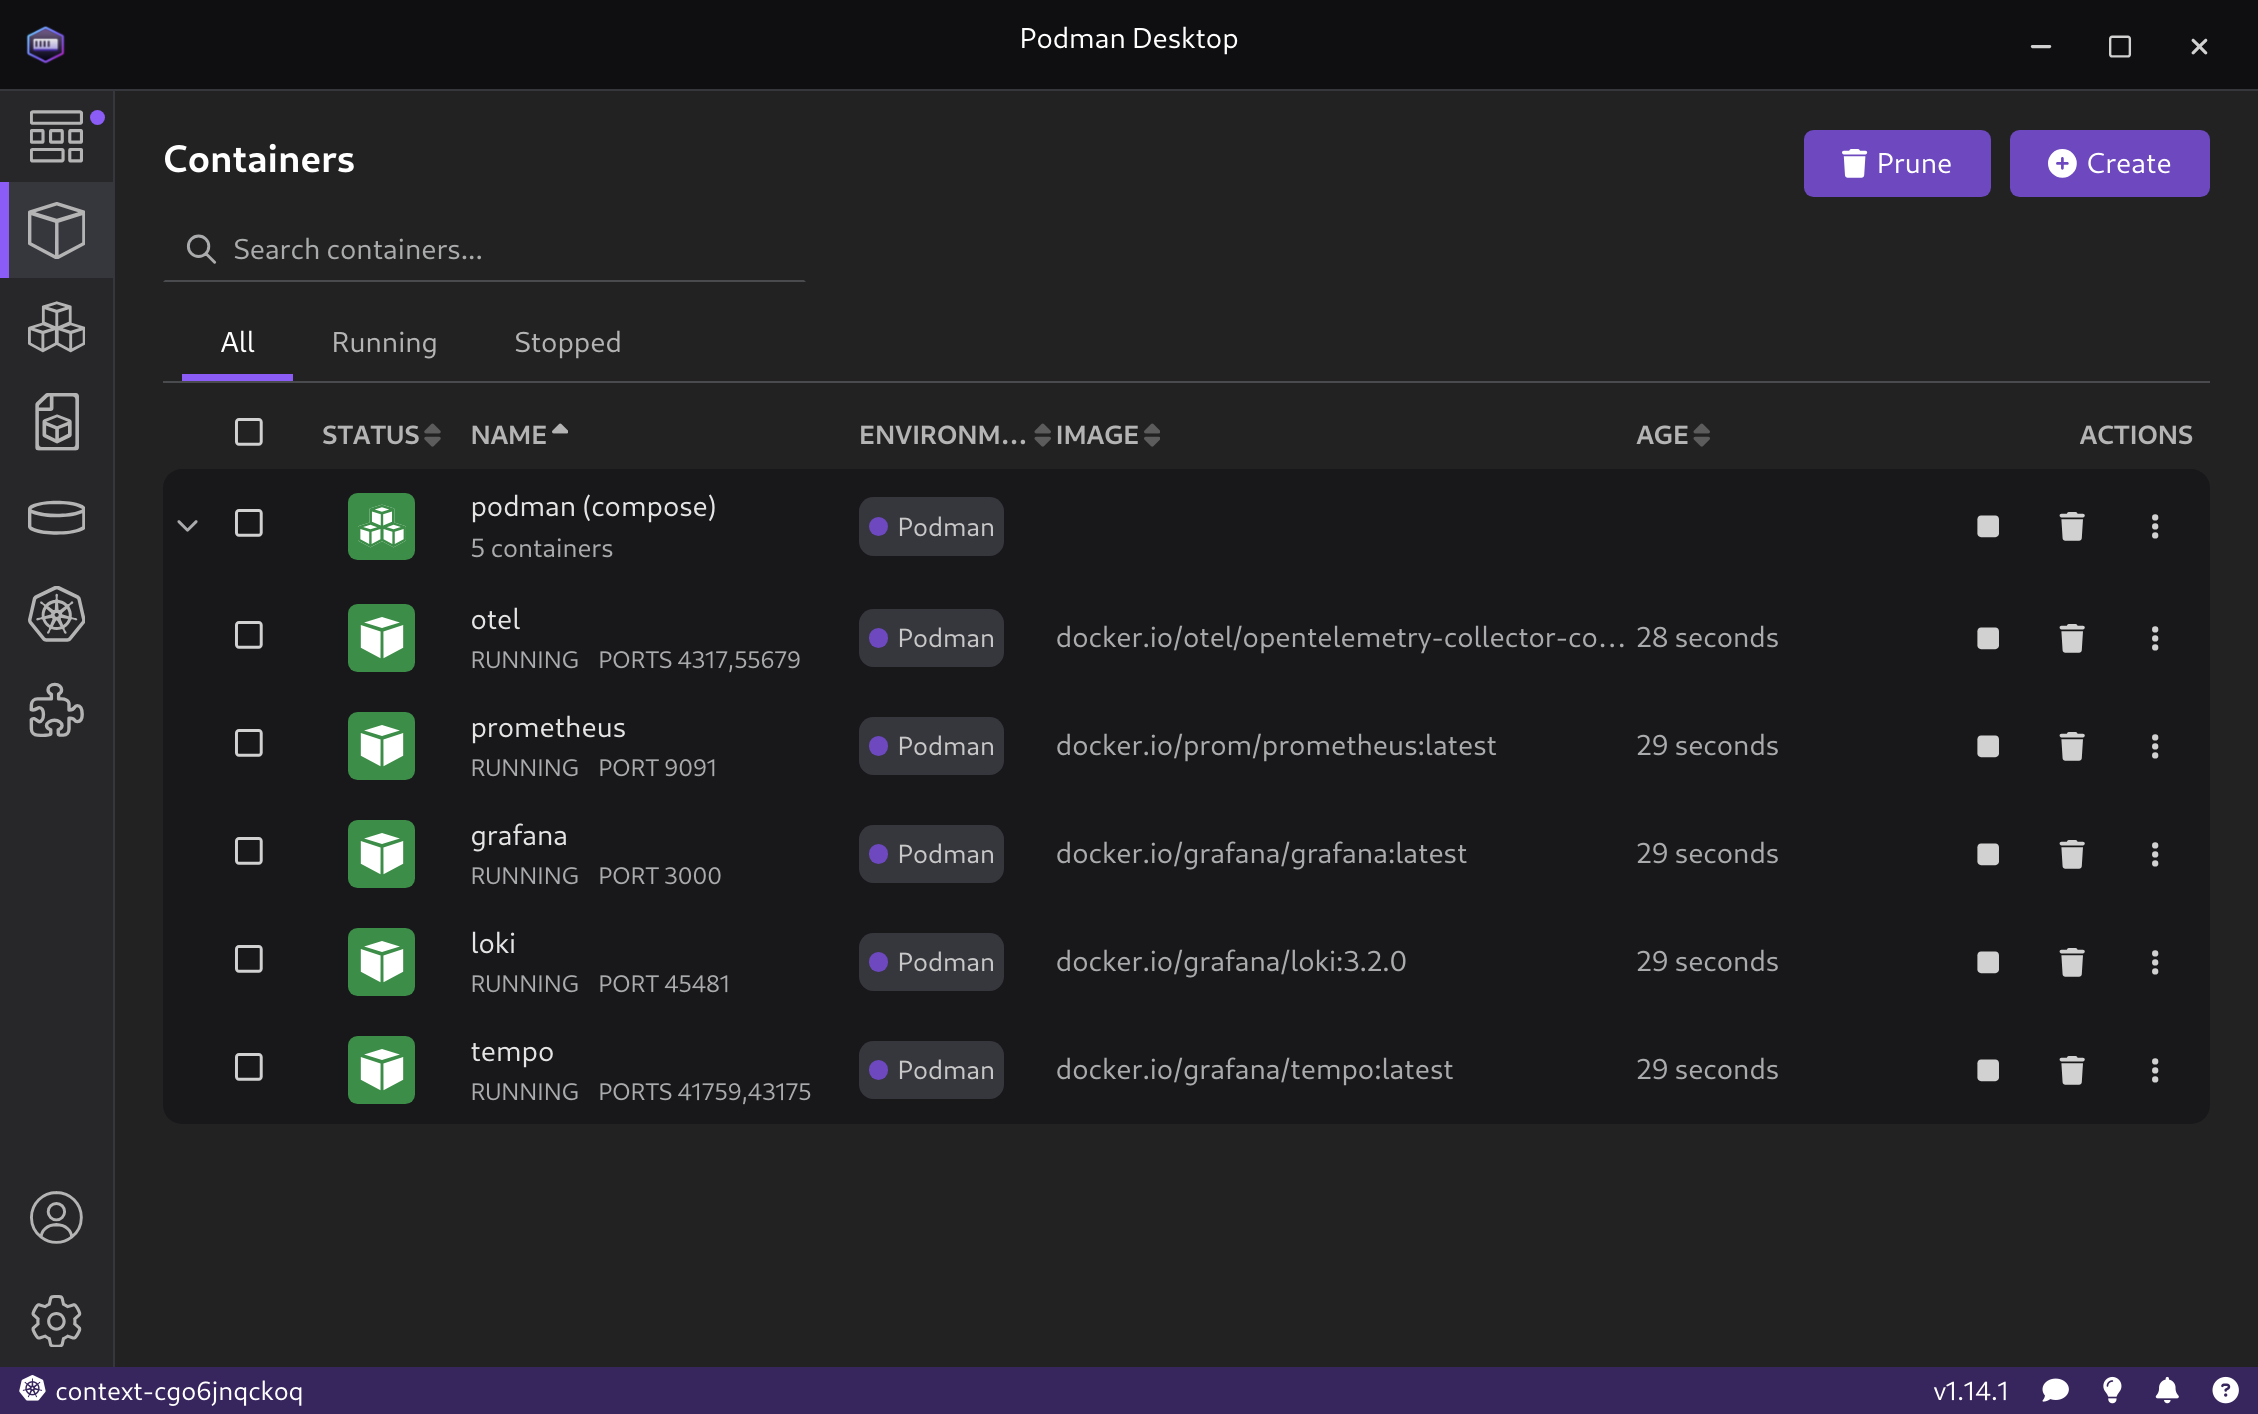
If the configuration is ok, you should have five containers running without errors.
Instrumenting Spring Boot applications for OpenTelemetry
As part of my daily activities I was in charge of a major implementation of all these concepts. Hence it was natural for me to create a proof of concept that you could find at my GitHub.
For demonstration purposes we have two services with different HTTP endpoints:
springboot-demo:8080- Useful to demonstrate local and database tracing, performance, logs and OpenTelemetry instrumentation/books- A books CRUD using Spring Data/fibo- A Naive Fibonacci implementation that generates CPU load and delays/log- Which generate log messages using the different SLF4J levels
springboot-client-demo:8081- Useful to demonstrate tracing capabilities, Micrometer instrumentation and Micrometer Tracing instrumentation/trace-demo- A quick OpenFeing client that invokes books GetAll Books demo
Instrumentation options
Given the popularity of OpenTelemetry, developers can expect also multiple instrumentation options.
First of all, the OpenTelemetry project offers a framework-agnostic instrumentation that uses bytecode manipulation, for this instrumentation to work you need to include a Java Agent via Java Classpath. In my experience this instrumentation is preferred if you don't control the workload or if your platform does not offer OpenTelemetry support at all.
However, instrumentation of workloads can become really specific -e.g. instrumentation of a Database pool given a particular IoC mechanism-. For this, the Java world provides a good ecosystem, for example:
And of course Spring Boot.
Spring Boot is a special case with TWO major instrumentation options
Both options use Spring concepts like decorators and interceptors to capture and send information to the destinations. The only rule is to create the clients/services/objects in the Spring way (hence via Spring IoC).
I've used both successfully and my heavily opinionated conclusion is the following:
- Micrometer collects more information about spring metrics. Besides OpenTelemetry backend, it supports a plethora of backends directly without any collector intervention. If you cannot afford a collector, this is the way. From Micrometer perspective OpenTelemetry is just another backend
- Micrometer Tracing is the evolution of Spring Cloud Sleuth, hence if you have workloads with Spring Boot 2 and 3, you have to support both tools (or maybe migrate everything to Spring boot 3?)
- The Micrometer family does not offer a way to collect logs and send these to a backend, hence devs have to solve this by using an appender specific to your logging library. On the other hand OpenTelemetry Spring Boot starter offers this out of the box if you use Spring Boot default (SLF4J over Logback)
As these libraries are mutually exclusive, if the decision is mine, I would pick OpenTelemetry's Spring Boot starter. It offers logs support OOB and also a bridge for micrometer Metrics.
Instrumenting springboot-demo with OpenTelemetry SpringBoot starter
As always, it is also good to consider the official documentation.
Otel instrumentation with the Spring started is activated in three steps:
- You need to include both OpenTelemetry Bom and OpenTelemetry dependency. If you are planning to also use micrometer metrics, it is also a good idea to include Spring Actuator
<dependencyManagement>
    <dependencies>
        <dependency>
            <groupId>io.opentelemetry.instrumentation</groupId>
            <artifactId>opentelemetry-instrumentation-bom</artifactId>
            <version>2.10.0</version>
            <type>pom</type>
            <scope>import</scope>
        </dependency>
    </dependencies>
</dependencyManagement>
...
<dependency>
    <groupId>org.springframework.boot</groupId>
    <artifactId>spring-boot-starter-actuator</artifactId>
</dependency>
<dependency>
    <groupId>io.opentelemetry.instrumentation</groupId>
    <artifactId>opentelemetry-spring-boot-starter</artifactId>
</dependency>
-
There is a set of optional libraries and adapters that you can configure if your workloads already diverged from the "Spring Way"
-
You need to activate (or not) the dimensions of observability (metrics, traces and logs). Also, you can finetune the exporting parameter like ports, urls or exporting periods. Either by using Spring Properties or env variables
#Configure exporters
otel.logs.exporter=otlp
otel.metrics.exporter=otlp
otel.traces.exporter=otlp

#Configure metrics generation
otel.metric.export.interval=5000 #Export metrics each five seconds
otel.instrumentation.micrometer.enabled=true #Enabe Micrometer metrics bridge
Instrumenting springboot-client-demo with Micrometer and Micrometer Tracing
Again, this instrumentation does not support logs exporting. Also, it is a good idea to check the latest documentation for Micrometer and Micrometer Tracing.
- As in the previous example, you need to enable Spring Actuator (which includes Micrometer). As OpenTelemetry is just a backend from Micrometer perspective, you just need to ehable the corresponding OTLP registry which will export metrics to localhost by default.
<dependency>
    <groupId>org.springframework.boot</groupId>
    <artifactId>spring-boot-starter-actuator</artifactId>
</dependency>
<dependency>
    <groupId>io.micrometer</groupId>
    <artifactId>micrometer-registry-otlp</artifactId>
</dependency>
- In a similar way you need to Metrics, once actuator is enabled you just need to add support for the tracing backend
<dependency>
  <groupId>io.micrometer</groupId>
  <artifactId>micrometer-tracing-bridge-otel</artifactId>
</dependency>
- Finally, you can finetune the configuration using Spring properties. For example, you can decide if 100% of traces are reproted or how often the metrics are reported to the backend.
management.otlp.tracing.endpoint=http://localhost:4318/v1/traces
management.otlp.tracing.timeout=10s
management.tracing.sampling.probability=1

management.otlp.metrics.export.url=http://localhost:4318/v1/metrics
management.otlp.metrics.export.step=5s
management.opentelemetry.resource-attributes."service-name"=${spring.application.name}
Testing and E2E sample
Generating workload data
The POC provides the following structure
├── podman # Podman compose config files
├── springboot-client-demo #Spring Boot Client instrumented with Actuator, Micrometer and MicroMeter tracing
└── springboot-demo #Spring Boot service instrumented with OpenTelemetry Spring Boot Starter
- The first step is to boot the observability stack we created previously.
cd podman
podman compose -f otel-compose.yml up
This will provide you an instance of Grafana on port 3000

Then, it is time to boot the first service!. You only need Java 21 on the active shell:
cd springboot-demo
mvn spring-boot:run
If the workload is properly configured, you will see the following information on the OpenTelemetry container standard output. Which basically says you are successfully reporting data.
[otel]       | 2024-12-01T22:10:07.730Z info    Logs    {"kind": "exporter", "data_type": "logs", "name": "debug", "resource logs": 1, "log records": 24}
[otel]       | 2024-12-01T22:10:10.671Z info    Metrics {"kind": "exporter", "data_type": "metrics", "name": "debug", "resource metrics": 1, "metrics": 64, "data points": 90}
[otel]       | 2024-12-01T22:10:10.672Z info    Traces  {"kind": "exporter", "data_type": "traces", "name": "debug", "resource spans": 1, "spans": 5}
[otel]       | 2024-12-01T22:10:15.691Z info    Metrics {"kind": "exporter", "data_type": "metrics", "name": "debug", "resource metrics": 1, "metrics": 65, "data points": 93}
[otel]       | 2024-12-01T22:10:15.833Z info    Metrics {"kind": "exporter", "data_type": "metrics", "name": "debug", "resource metrics": 1, "metrics": 65, "data points": 93}
[otel]       | 2024-12-01T22:10:15.835Z info    Logs    {"kind": "exporter", "data_type": "logs", "name": "debug", "resource logs": 1, "log records": 5}
The data is being reported over the OpenTelemetry ports (4317 and 4318) which are open from Podman to the host. By default all telemetry libraries report to localhost, but this can be configured for other cases like FaaS or Kubernetes.
Also, you could verify the reporting status in ZPages
Finally let's do the same with Spring Boot client:
cd springboot-client-demo
mvn spring-boot:run
As described in the previous section, I created a set of interactions to:
Generate CPU workload using Naive fibonacci
curl http://localhost:8080/fibo\?n\=45
Generate logs in different levels
curl http://localhost:8080/fibo\?n\=45
Persist data using a CRUD
curl -X POST --location "http://localhost:8080/books" \
-H "Content-Type: application/json" \
-d '{
"author": "Miguel Angel Asturias",
"title": "El señor presidente",
"isbn": "978-84-376-0494-7",
"publisher": "Editorial planeta"
}'
And then retrieve the data using a secondary service
curl http://localhost:8081/trace-demo
This asciicast shows the interaction:
Grafana results
Once the data is accesible by Grafana, the what to do with data is up to you, again, you could:
- Create dashboards
- Configure alarms
- Configure notifications from alarms
The quickest way to verify if the data is reported correctly is to verify directly in Grafana explore.
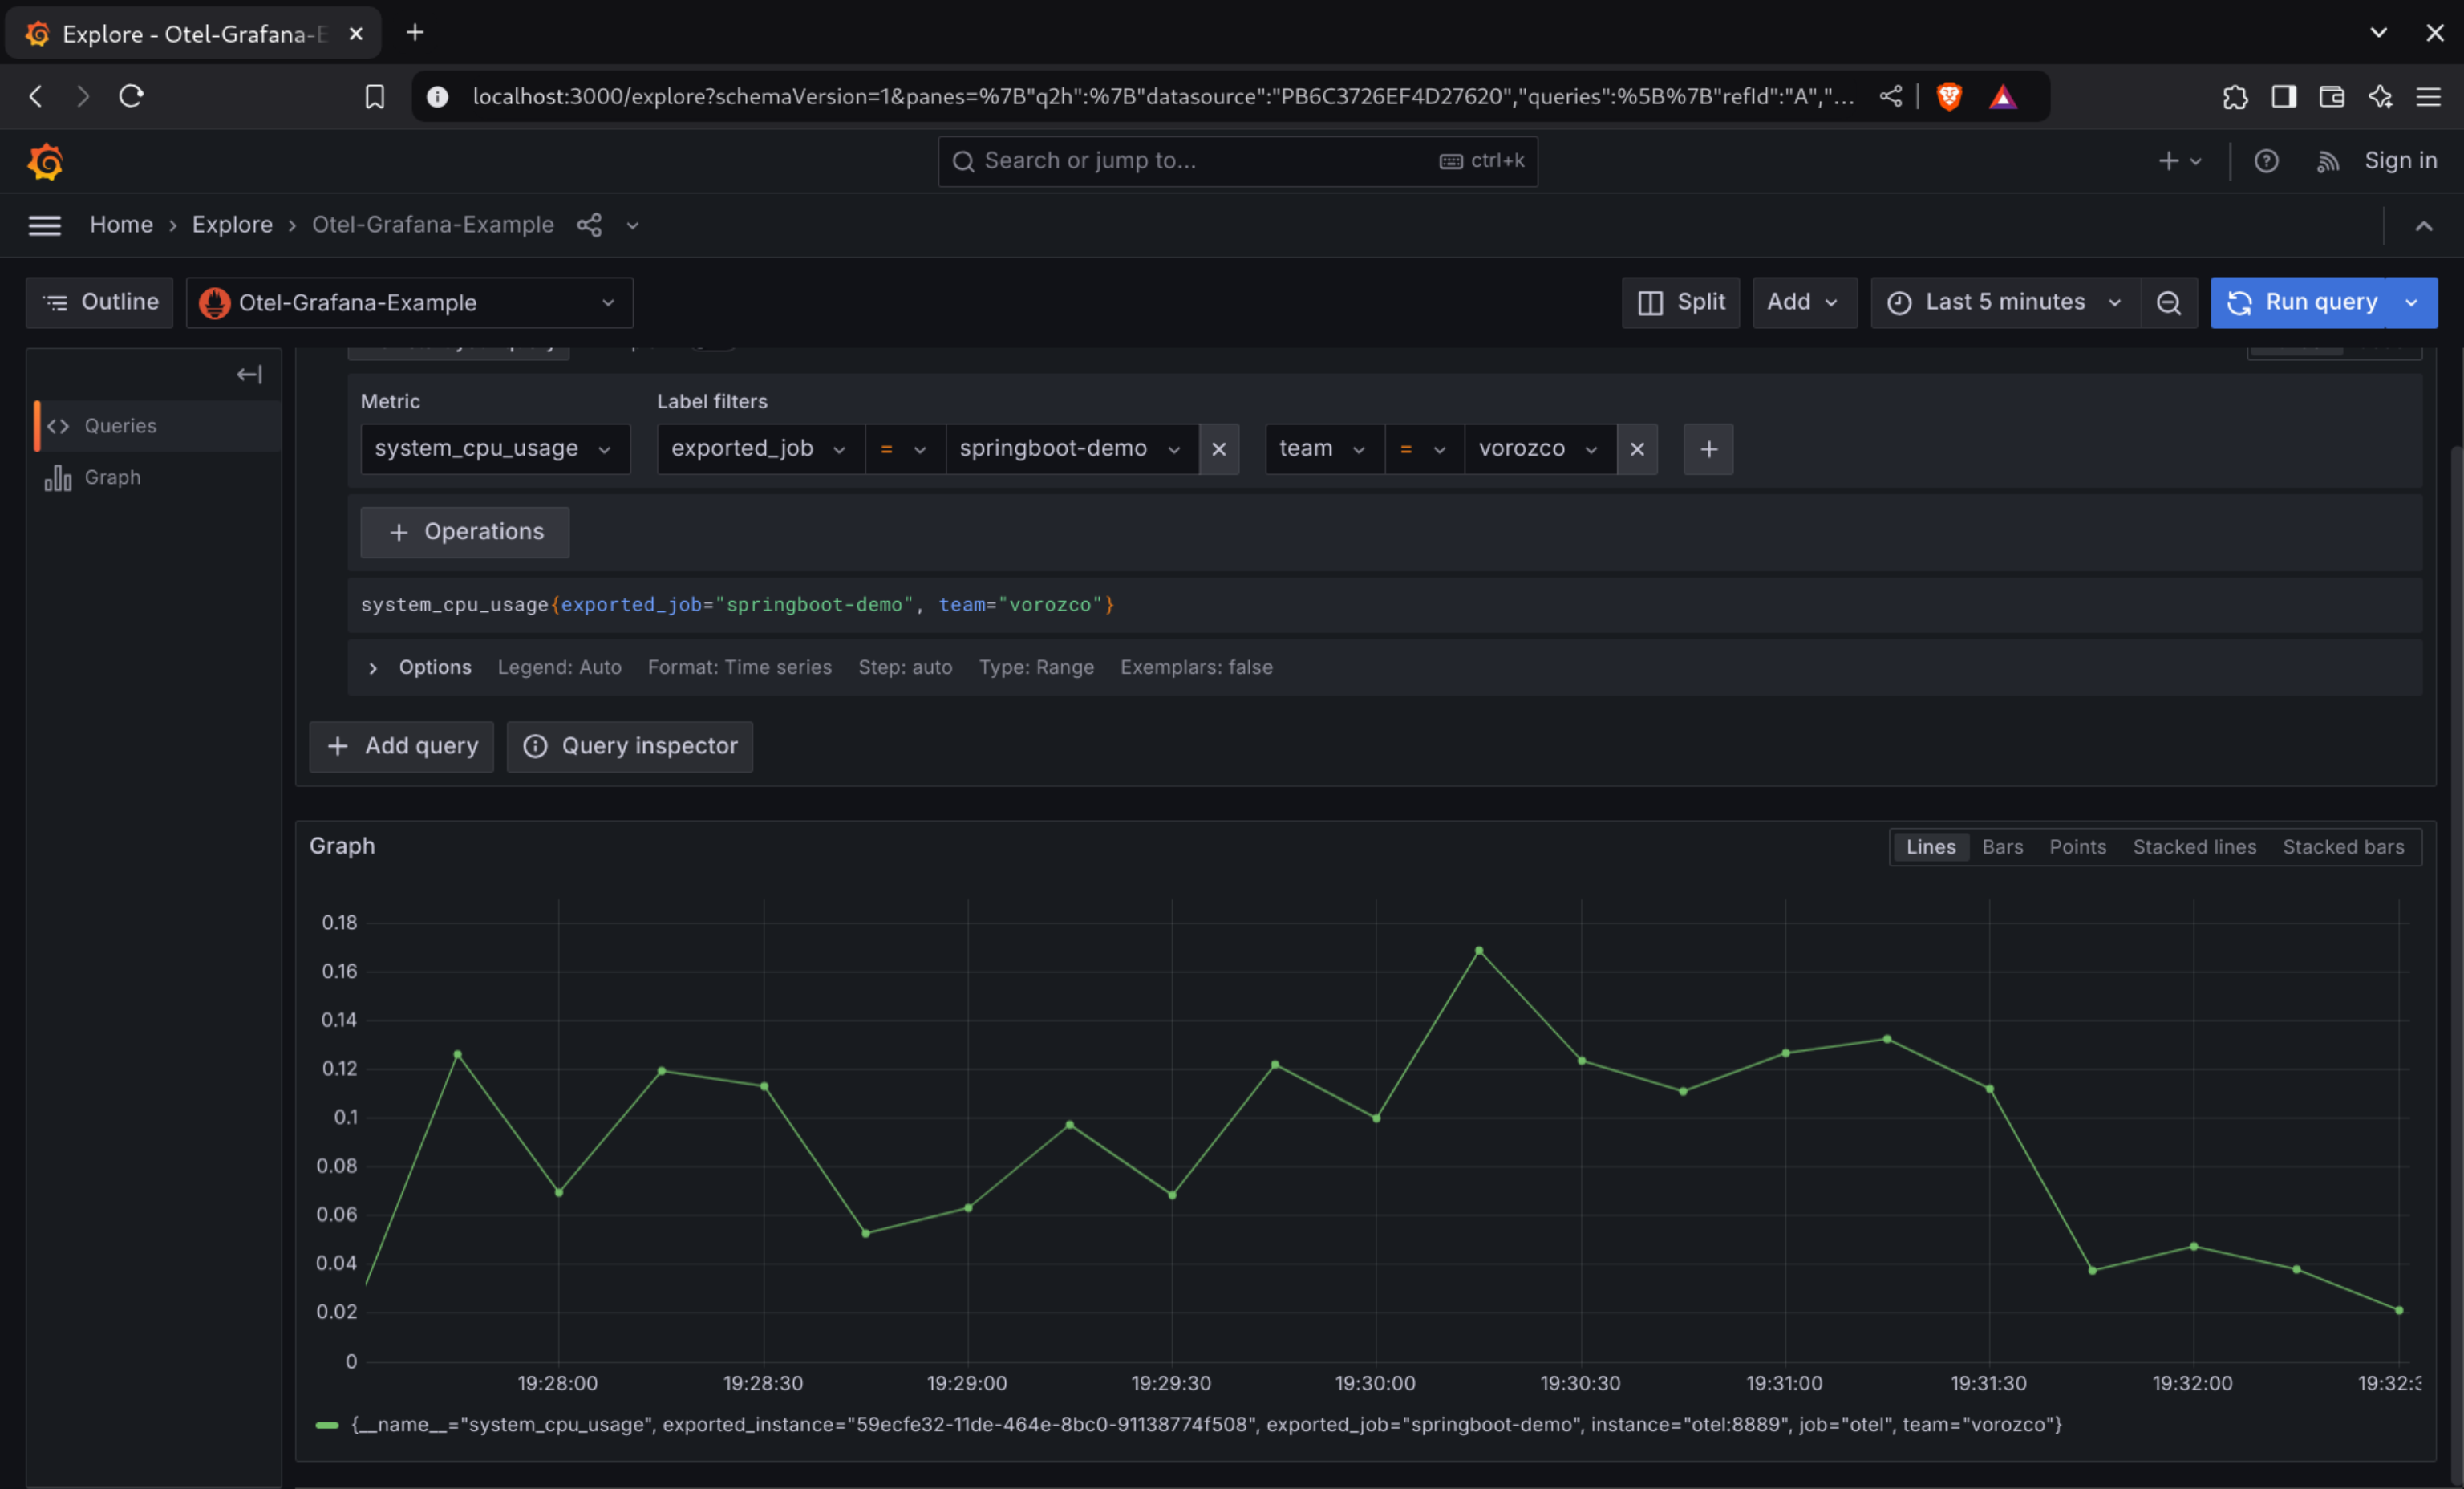
First, we can check some metrics like system_cpu_usage and filter by service name. In this case I used springboot-demo which has the CPU demo using naive fibonacci, I can even filter by my own tag (which was added by Otel processor):
In the same way, logs are already stored in Loki:
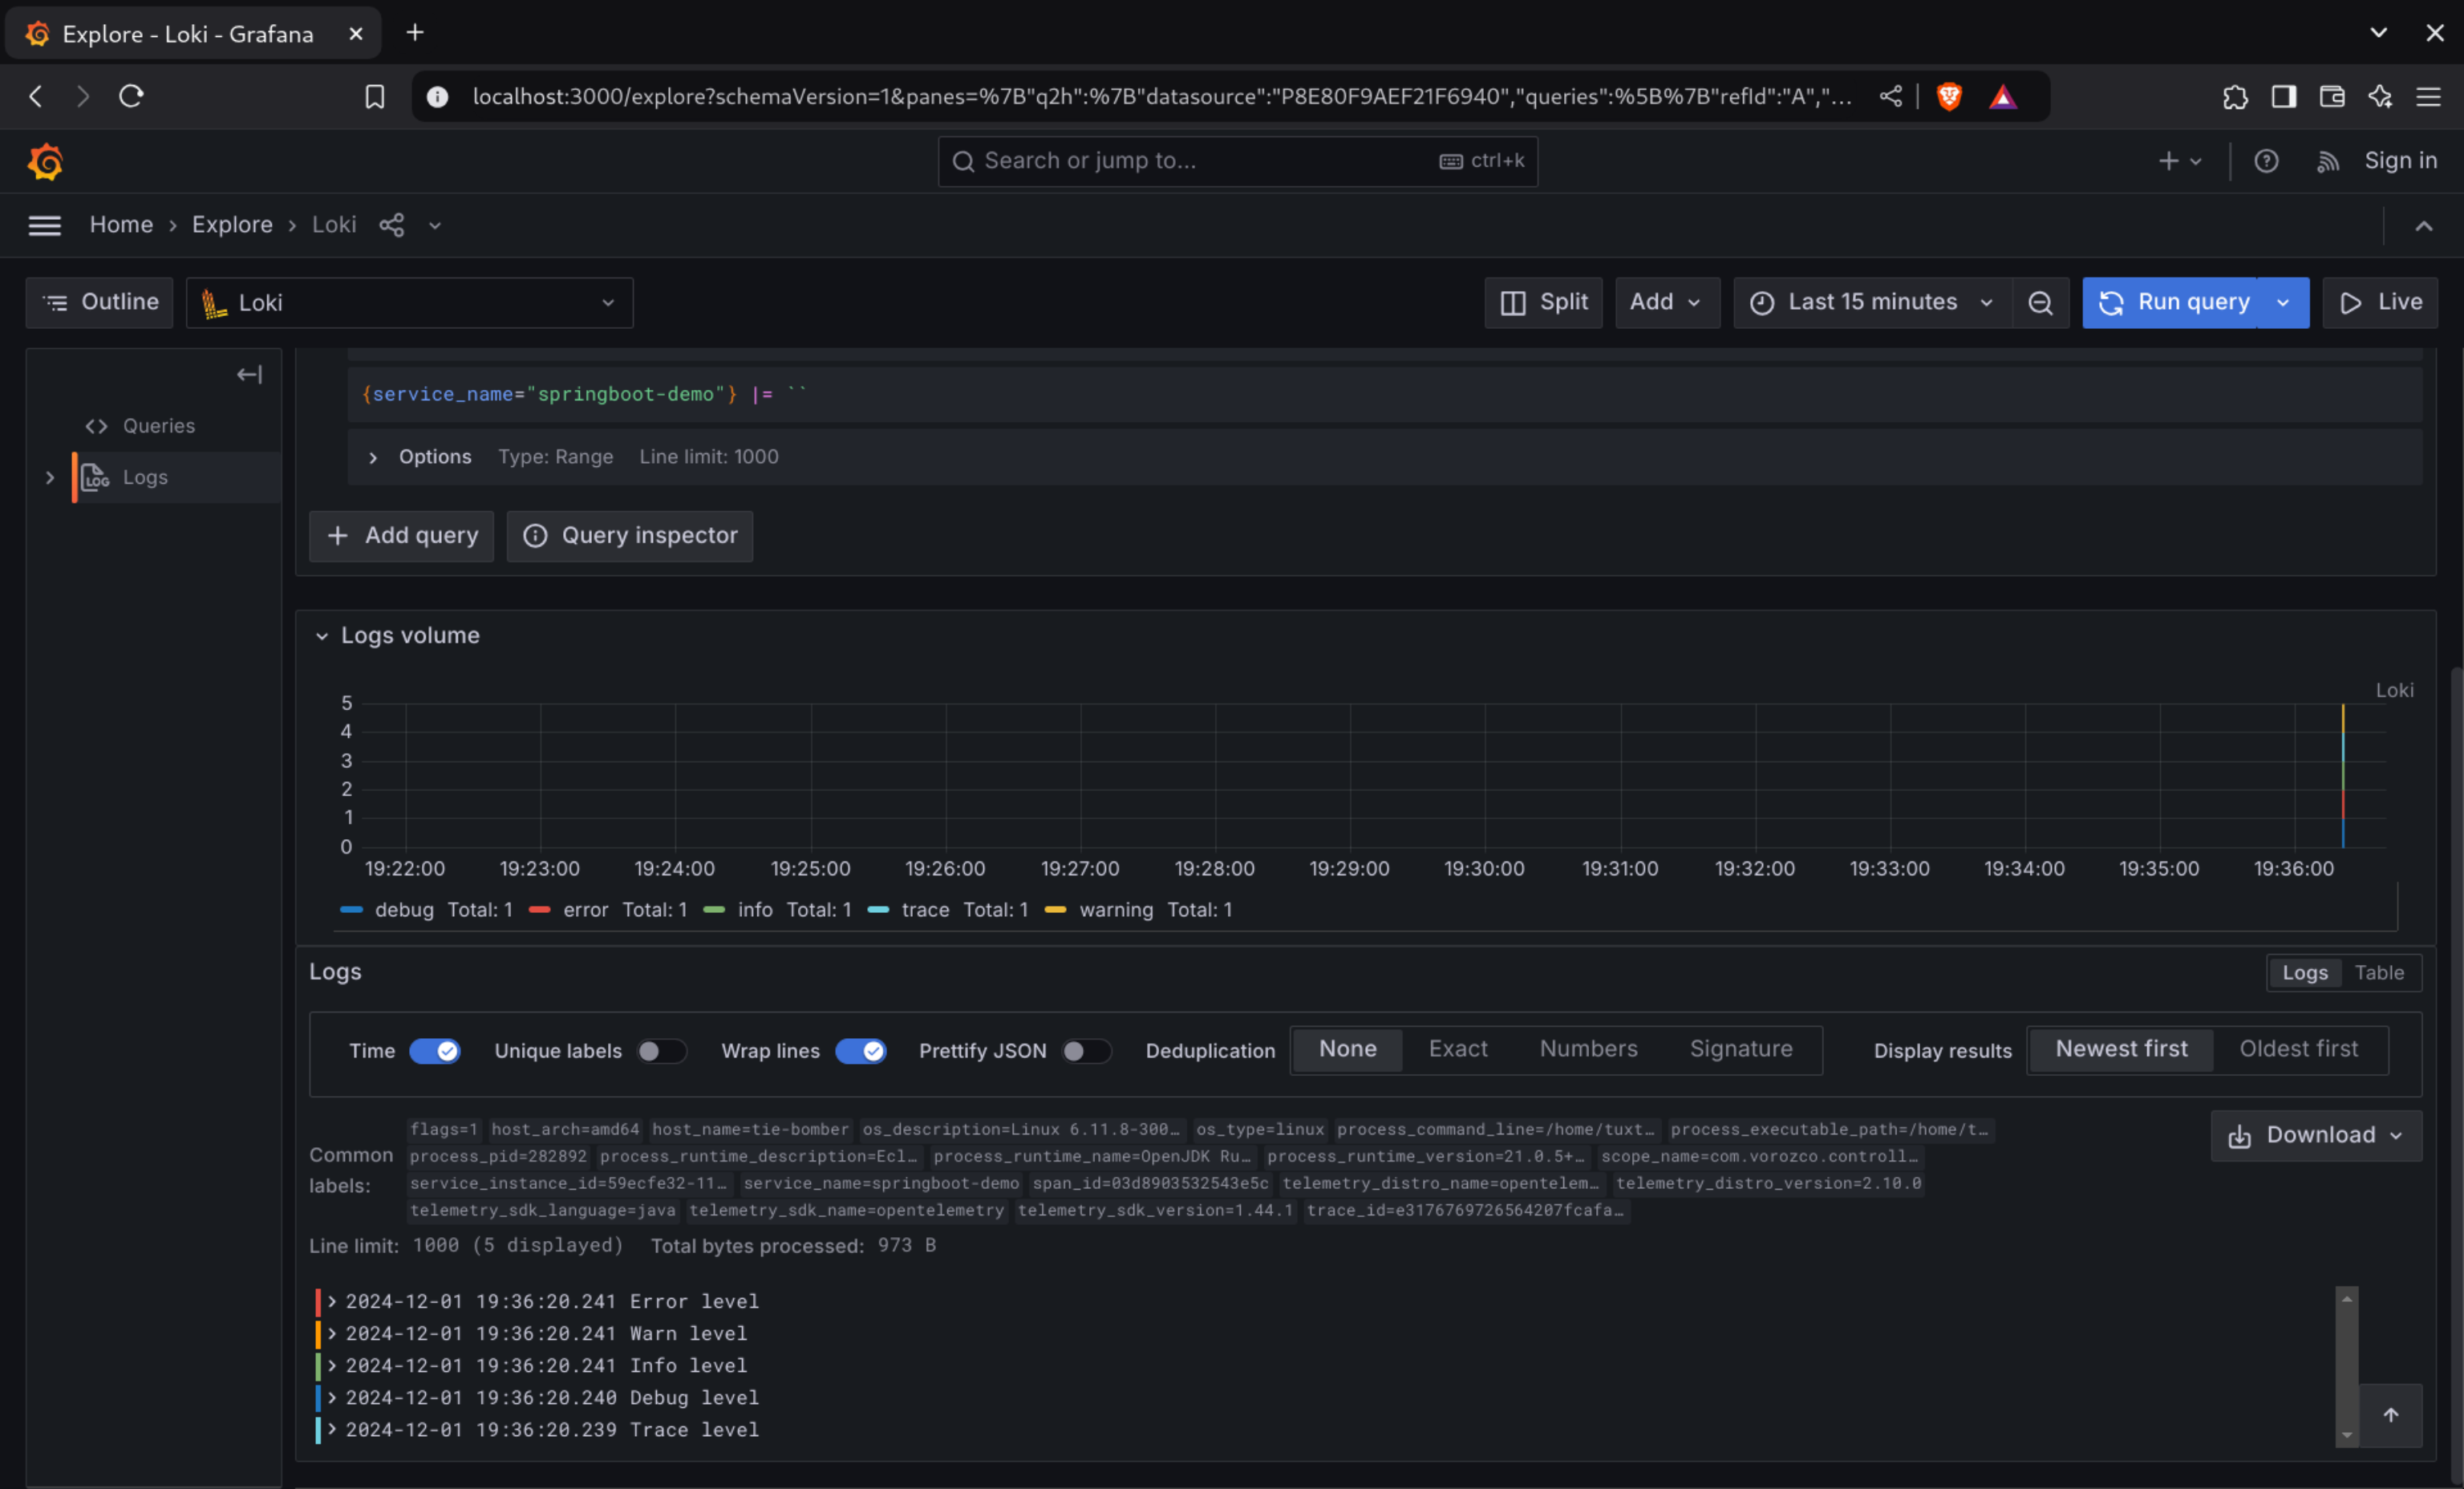
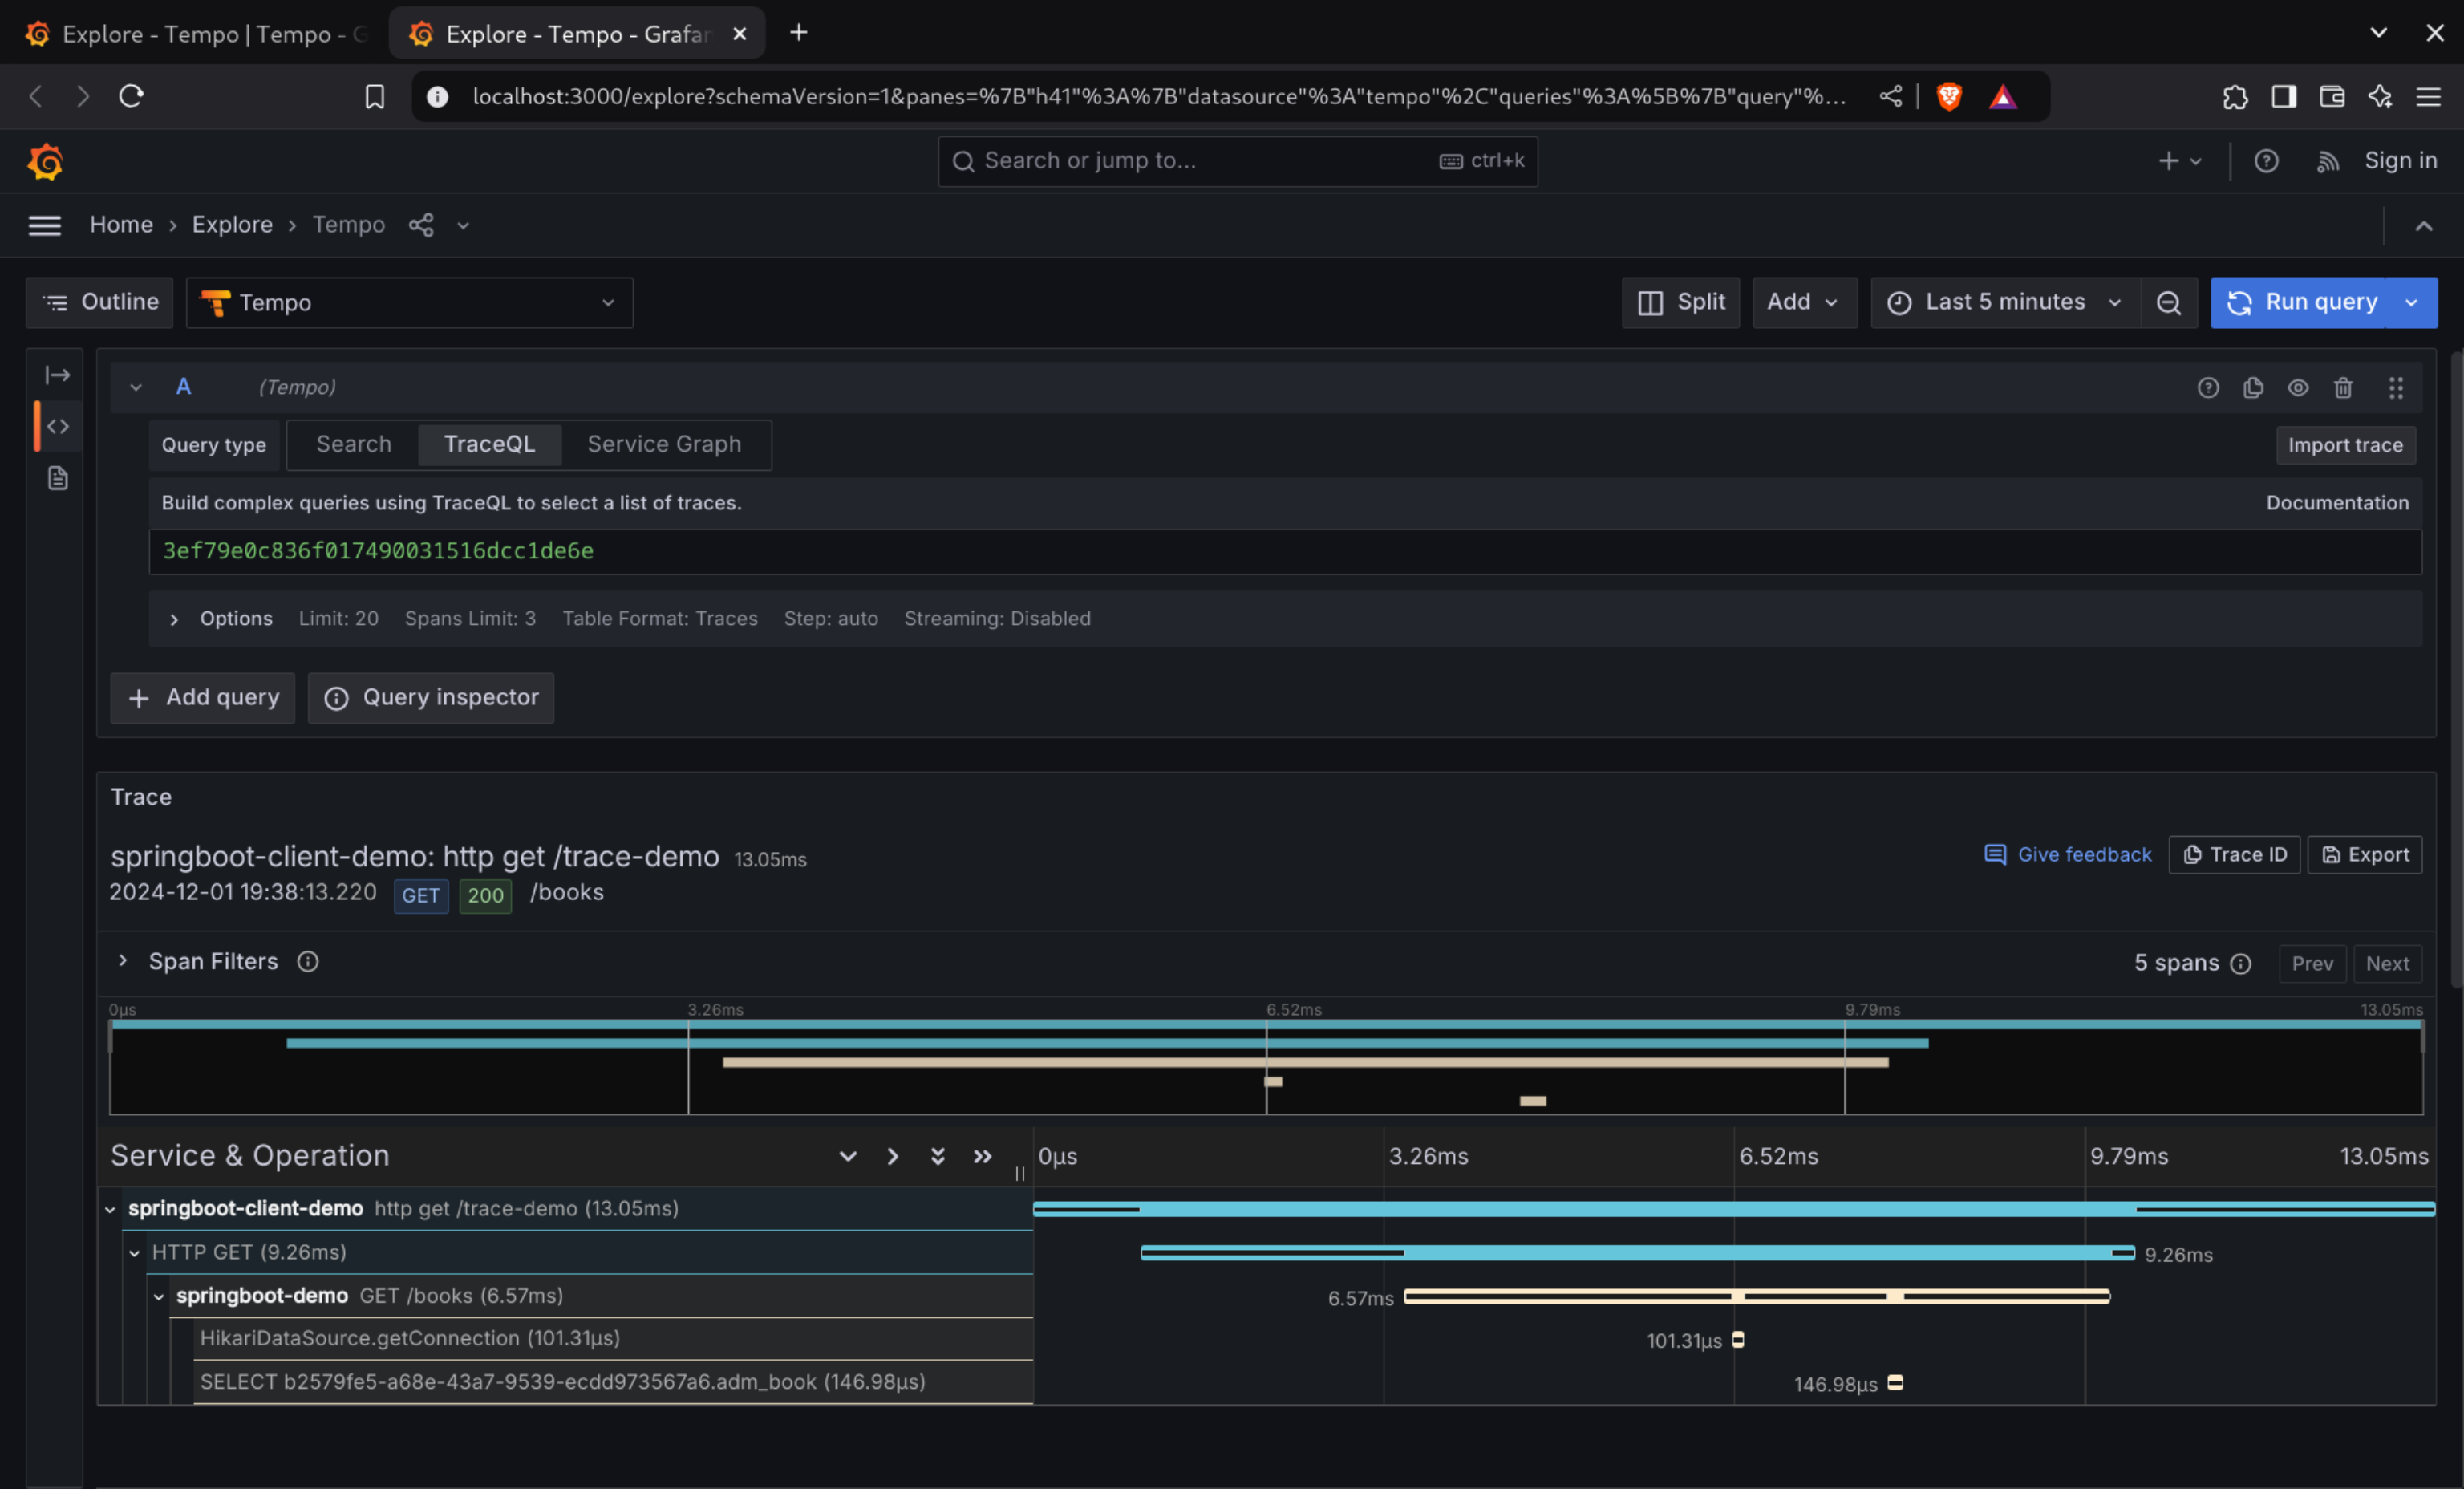
Finally, we could check the whole trace, including both services and interaction with H2 RDBMS:
Book Review: Practical Cloud-Native Java Development with MicroProfile
24 September 2021

General information
- Pages: 403
- Published by: Packt
- Release date: Aug 2021
Disclaimer: I received this book as a collaboration with Packt and one of the authors (Thanks Emily!)
A book about Microservices for the Java Enterprise-shops
Year after year many enterprise companies are struggling to embrace Cloud Native practices that we tend to denominate as Microservices, however Microservices is a metapattern that needs to follow a well defined approach, like:
- (We aim for) reactive systems
- (Hence we need a methodology like) 12 Cloud Native factors
- (Implementing) well-known design patterns
- (Dividing the system by using) Domain Driven Design
- (Implementing microservices via) Microservices chassis and/or service mesh
- (Achieving deployments by) Containers orchestration
Many of these concepts require a considerable amount of context, but some books, tutorials, conferences and YouTube videos tend to focus on specific niche information, making difficult to have a "cold start" in the microservices space if you have been developing regular/monolithic software. For me, that's the best thing about this book, it provides a holistic view to understand microservices with Java and MicroProfile for "cold starter developers".
About the book
Using a software architect perspective, MicroProfile could be defined as a set of specifications (APIs) that many microservices chassis implement in order to solve common microservices problems through patterns, lessons learned from well known Java libraries, and proposals for collaboration between Java Enterprise vendors.
Subsequently if you think that it sounds a lot like Java EE, that's right, it's the same spirit but on the microservices space with participation for many vendors, including vendors from the Java EE space -e.g. Red Hat, IBM, Apache, Payara-.
The main value of this book is the willingness to go beyond the APIs, providing four structured sections that have different writing styles, for instance:
- Section 1: Cloud Native Applications - Written as a didactical resource to learn fundamentals of distributed systems with Cloud Native approach
- Section 2: MicroProfile Deep Dive - Written as a reference book with code snippets to understand the motivation, functionality and specific details in MicroProfile APIs and the relation between these APIs and common Microservices patterns -e.g. Remote procedure invocation, Health Check APIs, Externalized configuration-
- Section 3: End-to-End Project Using MicroProfile - Written as a narrative workshop with source code already available, to understand the development and deployment process of Cloud Native applications with MicroProfile
- Section 4: The standalone specifications - Written as a reference book with code snippets, it describes the development of newer specs that could be included in the future under MicroProfile's umbrella
First section
This was by far my favorite section. This section presents a well-balanced overview about Cloud Native practices like:
- Cloud Native definition
- The role of microservices and the differences with monoliths and FaaS
- Data consistency with event sourcing
- Best practices
- The role of MicroProfile
I enjoyed this section because my current role is to coach or act as a software architect at different companies, hence this is good material to explain the whole panorama to my coworkers and/or use this book as a quick reference.
My only concern with this section is about the final chapter, this chapter presents an application called IBM Stock Trader that (as you probably guess) IBM uses to demonstrate these concepts using MicroProfile with OpenLiberty. The chapter by itself presents an application that combines data sources, front/ends, Kubernetes; however the application would be useful only on Section 3 (at least that was my perception). Hence you will be going back to this section once you're executing the workshop.
Second section
This section divides the MicroProfile APIs in three levels, the division actually makes a lot of sense but was evident to me only during this review:
- The base APIs to create microservices (JAX-RS, CDI, JSON-P, JSON-B, Rest Client)
- Enhancing microservices (Config, Fault Tolerance, OpenAPI, JWT)
- Observing microservices (Health, Metrics, Tracing)
Additionally, section also describes the need for Docker and Kubernetes and how other common approaches -e.g. Service mesh- overlap with Microservice Chassis functionality.
Currently I'm a MicroProfile user, hence I knew most of the APIs, however I liked the actual description of the pattern/need that motivated the inclusion of the APIs, and the description could be useful for newcomers, along with the code snippets also available on GitHub.
If you're a Java/Jakarta EE developer you will find the CDI section a little bit superficial, indeed CDI by itself deserves a whole book/fascicle but this chapter gives the basics to start the development process.
Third section
This section switches the writing style to a workshop style. The first chapter is entirely focused on how to compile the sample microservices, how to fulfill the technical requirements and which MicroProfile APIs are used on every microservice.
You must notice that this is not a Java programming workshop, it's a Cloud Native workshop with ready to deploy microservices, hence the step by step guide is about compilation with Maven, Docker containers, scaling with Kubernetes, operators in Openshift, etc.
You could explore and change the source code if you wish, but the section is written in a "descriptive" way assuming the samples existence.
Fourth section
This section is pretty similar to the second section in the reference book style, hence it also describes the pattern/need that motivated the discussion of the API and code snippets. The main focus of this section is GraphQL, Reactive Approaches and distributed transactions with LRA.
This section will probably change in future editions of the book because at the time of publishing the Cloud Native Container Foundation revealed that some initiatives about observability will be integrated in the OpenTelemetry project and MicroProfile it's discussing their future approach.
Things that could be improved
As any review this is the most difficult section to write, but I think that a second edition should:
- Extend the CDI section due its foundational status
- Switch the order of the Stock Tracer presentation
- Extend the data consistency discussión -e.g. CQRS, Event Sourcing-, hopefully with advances from LRA
The last item is mostly a wish since I'm always in the need for better ways to integrate this common practices with buses like Kafka or Camel using MicroProfile. I know that some implementations -e.g. Helidon, Quarkus- already have extensions for Kafka or Camel, but the data consistency is an entire discussion about patterns, tools and best practices.
Who should read this book?
- Java developers with strong SE foundations and familiarity with the enterprise space (Spring/Java EE)
General considerations on updating Enterprise Java projects from Java 8 to Java 11
23 September 2020
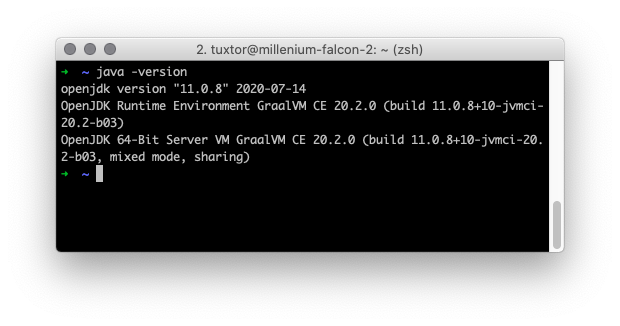
The purpose of this article is to consolidate all difficulties and solutions that I've encountered while updating Java EE projects from Java 8 to Java 11 (and beyond). It's a known fact that Java 11 has a lot of new characteristics that are revolutionizing how Java is used to create applications, despite being problematic under certain conditions.
This article is focused on Java/Jakarta EE but it could be used as basis for other enterprise Java frameworks and libraries migrations.
Is it possible to update Java EE/MicroProfile projects from Java 8 to Java 11?
Yes, absolutely. My team has been able to bump at least two mature enterprise applications with more than three years in development, being:
A Management Information System (MIS)
- Time for migration: 1 week
- Modules: 9 EJB, 1 WAR, 1 EAR
- Classes: 671 and counting
- Code lines: 39480
- Project's beginning: 2014
- Original platform: Java 7, Wildfly 8, Java EE 7
- Current platform: Java 11, Wildfly 17, Jakarta EE 8, MicroProfile 3.0
- Web client: Angular
Mobile POS and Geo-fence
- Time for migration: 3 week
- Modules: 5 WAR/MicroServices
- Classes: 348 and counting
- Code lines: 17160
- Project's beginning: 2017
- Original platform: Java 8, Glassfish 4, Java EE 7
- Current platform: Java 11, Payara (Micro) 5, Jakarta EE 8, MicroProfile 3.2
- Web client: Angular
Why should I ever consider migrating to Java 11?
As everything in IT the answer is "It depends . . .". However there are a couple of good reasons to do it:
- Reduce attack surface by updating project dependencies proactively
- Reduce technical debt and most importantly, prepare your project for the new and dynamic Java world
- Take advantage of performance improvements on new JVM versions
- Take advantage from improvements of Java as programming language
- Sleep better by having a more secure, efficient and quality product
Why Java updates from Java 8 to Java 11 are considered difficult?
From my experience with many teams, because of this:
Changes in Java release cadence
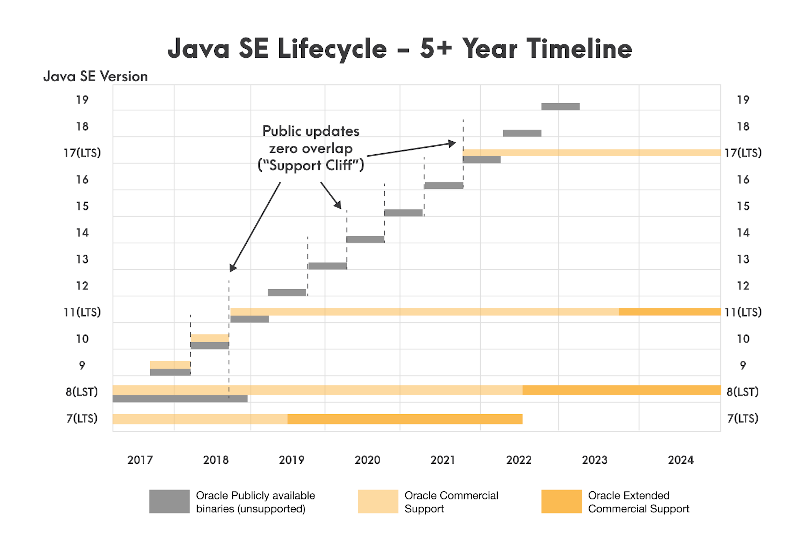
Currently, there are two big branches in JVMs release model:
- Java LTS: With a fixed lifetime (3 years) for long term support, being Java 11 the latest one
- Java current: A fast-paced Java version that is available every 6 months over a predictable calendar, being Java 15 the latest (at least at the time of publishing for this article)
The rationale behind this decision is that Java needed dynamism in providing new characteristics to the language, API and JVM, which I really agree.
Nevertheless, it is a know fact that most enterprise frameworks seek and use Java for stability. Consequently, most of these frameworks target Java 11 as "certified" Java Virtual Machine for deployments.
Usage of internal APIs

Errata: I fixed and simplified this section following an interesting discussion on reddit :)
Java 9 introduced changes in internal classes that weren't meant for usage outside JVM, preventing/breaking the functionality of popular libraries that made use of these internals -e.g. Hibernate, ASM, Hazelcast- to gain performance.
Hence to avoid it, internal APIs in JDK 9 are inaccessible at compile time (but accesible with --add-exports), remaining accessible if they were in JDK 8 but in a future release they will become inaccessible, in the long run this change will reduce the costs borne by the maintainers of the JDK itself and by the maintainers of libraries and applications that, knowingly or not, make use of these internal APIs.
Finally, during the introduction of JEP-260 internal APIs were classified as critical and non-critical, consequently critical internal APIs for which replacements are introduced in JDK 9 are deprecated in JDK 9 and will be either encapsulated or removed in a future release.
However, you are inside the danger zone if:
- Your project compiles against dependencies pre-Java 9 depending on critical internals
- You bundle dependencies pre-Java 9 depending on critical internals
- You run your applications over a runtime -e.g. Application Servers- that include pre Java 9 transitive dependencies
Any of these situations means that your application has a probability of not being compatible with JVMs above Java 8. At least not without updating your dependencies, which also could uncover breaking changes in library APIs creating mandatory refactors.
Removal of CORBA and Java EE modules from OpenJDK
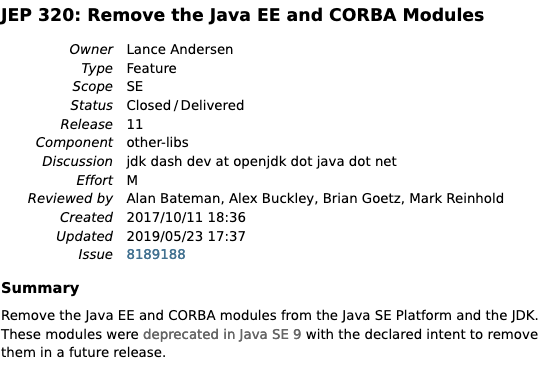
Also during Java 9 release, many Java EE and CORBA modules were marked as deprecated, being effectively removed at Java 11, specifically:
- java.xml.ws (JAX-WS, plus the related technologies SAAJ and Web Services Metadata)
- java.xml.bind (JAXB)
- java.activation (JAF)
- java.xml.ws.annotation (Common Annotations)
- java.corba (CORBA)
- java.transaction (JTA)
- java.se.ee (Aggregator module for the six modules above)
- jdk.xml.ws (Tools for JAX-WS)
- jdk.xml.bind (Tools for JAXB)
As JEP-320 states, many of these modules were included in Java 6 as a convenience to generate/support SOAP Web Services. But these modules eventually took off as independent projects already available at Maven Central. Therefore it is necessary to include these as dependencies if our project implements services with JAX-WS and/or depends on any library/utility that was included previously.
IDEs and application servers
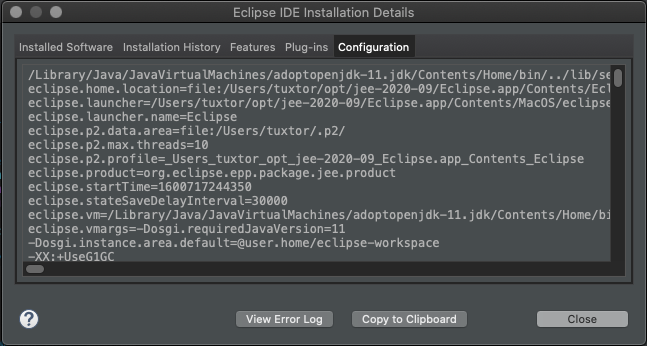
In the same way as libraries, Java IDEs had to catch-up with the introduction of Java 9 at least in three levels:
- IDEs as Java programs should be compatible with Java Modules
- IDEs should support new Java versions as programming language -i.e. Incremental compilation, linting, text analysis, modules-
- IDEs are also basis for an ecosystem of plugins that are developed independently. Hence if plugins have any transitive dependency with issues over JPMS, these also have to be updated
Overall, none of the Java IDEs guaranteed that plugins will work in JVMs above Java 8. Therefore you could possibly run your IDE over Java 11 but a legacy/deprecated plugin could prevent you to run your application.
How do I update?
You must notice that Java 9 launched three years ago, hence the situations previously described are mostly covered. However you should do the following verifications and actions to prevent failures in the process:
- Verify server compatibility
- Verify if you need a specific JVM due support contracts and conditions
- Configure your development environment to support multiple JVMs during the migration process
- Verify your IDE compatibility and update
- Update Maven and Maven projects
- Update dependencies
- Include Java/Jakarta EE dependencies
- Execute multiple JVMs in production
Verify server compatibility

Mike Luikides from O'Reilly affirms that there are two types of programmers. In one hand we have the low level programmers that create tools as libraries or frameworks, and on the other hand we have developers that use these tools to create experience, products and services.
Java Enterprise is mostly on the second hand, the "productive world" resting in giant's shoulders. That's why you should check first if your runtime or framework already has a version compatible with Java 11, and also if you have the time/decision power to proceed with an update. If not, any other action from this point is useless.
The good news is that most of the popular servers in enterprise Java world are already compatible, like:
- Apache Tomcat
- Apache Maven
- Spring
- Oracle WebLogic
- Payara
- Apache TomEE
... among others
If you happen to depend on non compatible runtimes, this is where the road ends unless you support the maintainer to update it.
Verify if you need an specific JVM
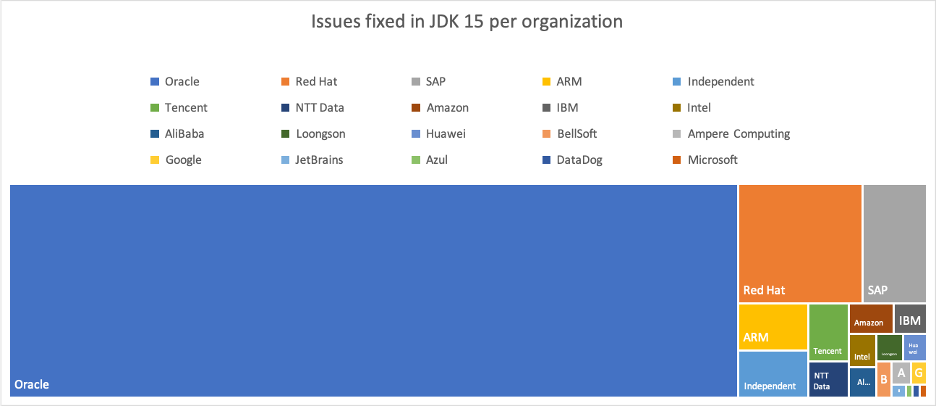
On a non-technical side, under support contract conditions you could be obligated to use an specific JVM version.
OpenJDK by itself is an open source project receiving contributions from many companies (being Oracle the most active contributor), but nothing prevents any other company to compile, pack and TCK other JVM distribution as demonstrated by Amazon Correto, Azul Zulu, Liberica JDK, etc.
In short, there is software that technically could run over any JVM distribution and version, but the support contract will ask you for a particular version. For instance:
- WebLogic is only certified for Oracle HotSpot and GraalVM
- SAP Netweaver includes by itself SAP JVM
Configure your development environment to support multiple JDKs
Since the jump from Java 8 to Java 11 is mostly an experimentation process, it is a good idea to install multiple JVMs on the development computer, being SDKMan and jEnv the common options:
SDKMan

SDKMan is available for Unix-Like environments (Linux, Mac OS, Cygwin, BSD) and as the name suggests, acts as a Java tools package manager.
It helps to install and manage JVM ecosystem tools -e.g. Maven, Gradle, Leiningen- and also multiple JDK installations from different providers.
jEnv
Also available for Unix-Like environments (Linux, Mac OS, Cygwin, BSD), jEnv is basically a script to manage and switch multiple JVM installations per system, user and shell.
If you happen to install JDKs from different sources -e.g Homebrew, Linux Repo, Oracle Technology Network- it is a good choice.
Finally, if you use Windows the common alternative is to automate the switch using .bat files however I would appreciate any other suggestion since I don't use Windows so often.
Verify your IDE compatibility and update
Please remember that any IDE ecosystem is composed by three levels:
- The IDE acting as platform
- Programming language support
- Plugins to support tools and libraries
After updating your IDE, you should also verify if all of the plugins that make part of your development cycle work fine under Java 11.
Update Maven and Maven projects

Probably the most common choice in Enterprise Java is Maven, and many IDEs use it under the hood or explicitly. Hence, you should update it.
Besides installation, please remember that Maven has a modular architecture and Maven modules version could be forced on any project definition. So, as rule of thumb you should also update these modules in your projects to the latest stable version.
To verify this quickly, you could use versions-maven-plugin:
<plugin>
      <groupId>org.codehaus.mojo</groupId>
      <artifactId>versions-maven-plugin</artifactId>
      <version>2.8.1</version>
</plugin>
Which includes a specific goal to verify Maven plugins versions:
mvn versions:display-plugin-updates
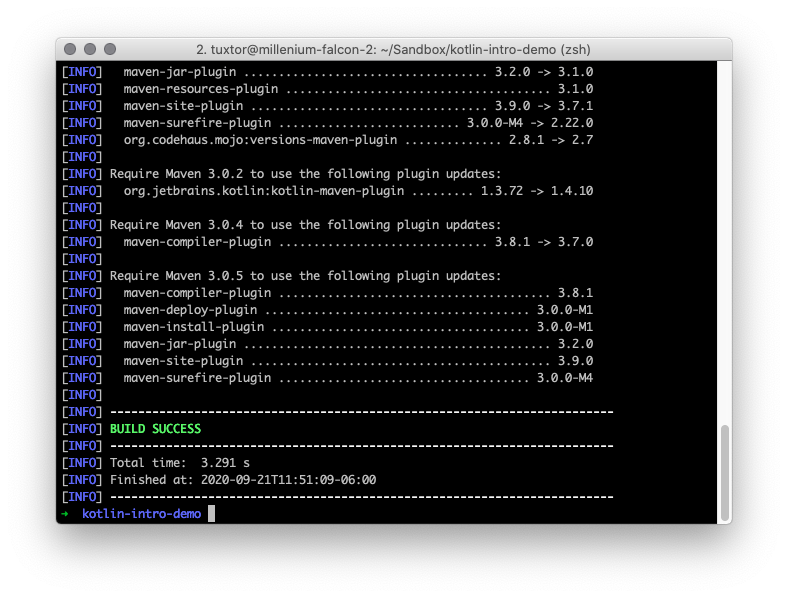
After that, you also need to configure Java source and target compatibility, generally this is achieved in two points.
As properties:
<properties>
        ...
    <maven.compiler.source>11</maven.compiler.source>
    <maven.compiler.target>11</maven.compiler.target>
</properties>
As configuration on Maven plugins, specially in maven-compiler-plugin:
<plugin>
    <groupId>org.apache.maven.plugins</groupId>
    <artifactId>maven-compiler-plugin</artifactId>
    <version>3.8.0</version>
    <configuration>
        <release>11</release>
    </configuration>
</plugin>
Finally, some plugins need to "break" the barriers imposed by Java Modules and Java Platform Teams knows about it. Hence JVM has an argument called illegal-access to allow this, at least during Java 11.
This could be a good idea in plugins like surefire and failsafe which also invoke runtimes that depend on this flag (like Arquillian tests):
<plugin>
    <groupId>org.apache.maven.plugins</groupId>
    <artifactId>maven-surefire-plugin</artifactId>
    <version>2.22.0</version>
    <configuration>
        <argLine>
            --illegal-access=permit
        </argLine>
    </configuration>
</plugin>
<plugin>
    <groupId>org.apache.maven.plugins</groupId>
    <artifactId>maven-failsafe-plugin</artifactId>
    <version>2.22.0</version>
    <configuration>
        <argLine>
            --illegal-access=permit
        </argLine>
    </configuration>
</plugin>
Update project dependencies
As mentioned before, you need to check for compatible versions on your Java dependencies. Sometimes these libraries could introduce breaking changes on each major version -e.g. Flyway- and you should consider a time to refactor this changes.
Again, if you use Maven versions-maven-plugin has a goal to verify dependencies version. The plugin will inform you about available updates.:
mvn versions:display-dependency-updates
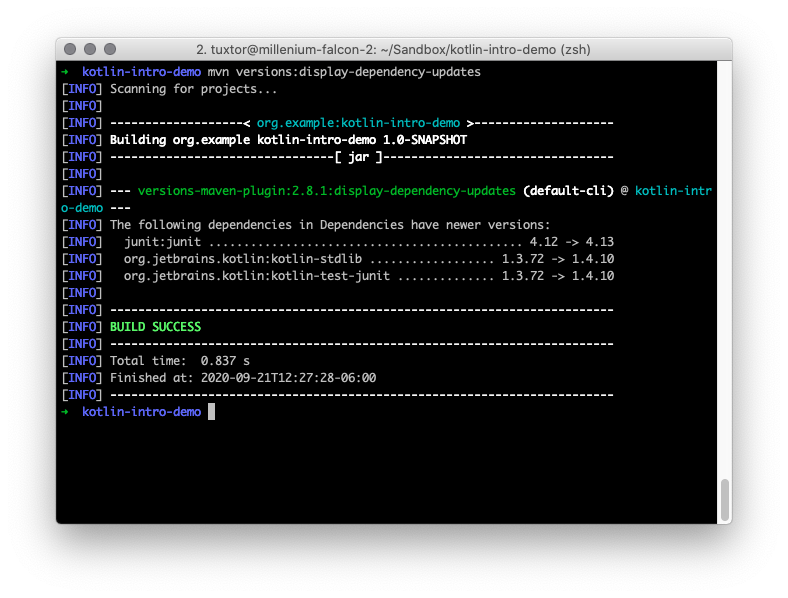
In the particular case of Java EE, you already have an advantage. If you depend only on APIs -e.g. Java EE, MicroProfile- and not particular implementations, many of these issues are already solved for you.
Include Java/Jakarta EE dependencies
Probably modern REST based services won't need this, however in projects with heavy usage of SOAP and XML marshalling is mandatory to include the Java EE modules removed on Java 11. Otherwise your project won't compile and run.
You must include as dependency:
- API definition
- Reference Implementation (if needed)
At this point is also a good idea to evaluate if you could move to Jakarta EE, the evolution of Java EE under Eclipse Foundation.
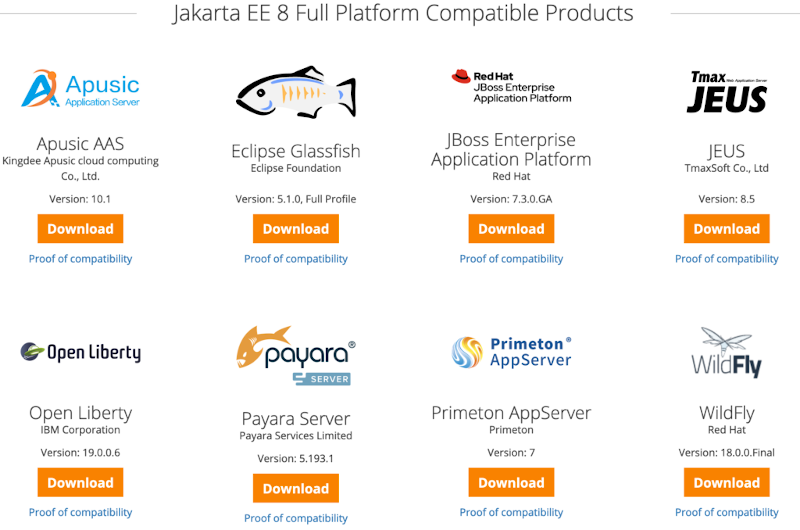
Jakarta EE 8 is practically Java EE 8 with another name, but it retains package and features compatibility, most of application servers are in the process or already have Jakarta EE certified implementations:
We could swap the Java EE API:
<dependency>
    <groupId>javax</groupId>
    <artifactId>javaee-api</artifactId>
    <version>8.0.1</version>
    <scope>provided</scope>
</dependency>
For Jakarta EE API:
<dependency>
    <groupId>jakarta.platform</groupId>
    <artifactId>jakarta.jakartaee-api</artifactId>
    <version>8.0.0</version>
    <scope>provided</scope>
</dependency>
After that, please include any of these dependencies (if needed):
Java Beans Activation
Java EE
<dependency>
    <groupId>javax.activation</groupId>
    <artifactId>javax.activation-api</artifactId>
    <version>1.2.0</version>
</dependency>
Jakarta EE
<dependency>
    <groupId>jakarta.activation</groupId>
    <artifactId>jakarta.activation-api</artifactId>
    <version>1.2.2</version>
</dependency>
JAXB (Java XML Binding)
Java EE
<dependency>
    <groupId>javax.xml.bind</groupId>
    <artifactId>jaxb-api</artifactId>
    <version>2.3.1</version>
</dependency>
Jakarta EE
<dependency>
    <groupId>jakarta.xml.bind</groupId>
    <artifactId>jakarta.xml.bind-api</artifactId>
    <version>2.3.3</version>
</dependency>
Implementation
<dependency>
    <groupId>org.glassfish.jaxb</groupId>
    <artifactId>jaxb-runtime</artifactId>
    <version>2.3.3</version>
</dependency>
JAX-WS
Java EE
<dependency>
    <groupId>javax.xml.ws</groupId>
    <artifactId>jaxws-api</artifactId>
    <version>2.3.1</version>
</dependency>
Jakarta EE
<dependency>
    <groupId>jakarta.xml.ws</groupId>
    <artifactId>jakarta.xml.ws-api</artifactId>
    <version>2.3.3</version>
</dependency>
Implementation (runtime)
<dependency>
    <groupId>com.sun.xml.ws</groupId>
    <artifactId>jaxws-rt</artifactId>
    <version>2.3.3</version>
</dependency>
Implementation (standalone)
<dependency>
    <groupId>com.sun.xml.ws</groupId>
    <artifactId>jaxws-ri</artifactId>
    <version>2.3.2-1</version>
    <type>pom</type>
</dependency>
Java Annotation
Java EE
<dependency>
    <groupId>javax.annotation</groupId>
    <artifactId>javax.annotation-api</artifactId>
    <version>1.3.2</version>
</dependency>
Jakarta EE
<dependency>
    <groupId>jakarta.annotation</groupId>
    <artifactId>jakarta.annotation-api</artifactId>
    <version>1.3.5</version>
</dependency>
Java Transaction
Java EE
<dependency>
    <groupId>javax.transaction</groupId>
    <artifactId>javax.transaction-api</artifactId>
    <version>1.3</version>
</dependency>
Jakarta EE
<dependency>
    <groupId>jakarta.transaction</groupId>
    <artifactId>jakarta.transaction-api</artifactId>
    <version>1.3.3</version>
</dependency>
CORBA
In the particular case of CORBA, I'm aware of its adoption. There is an independent project in eclipse to support CORBA, based on Glassfish CORBA, but this should be investigated further.
Multiple JVMs in production
If everything compiles, tests and executes. You did a successful migration.
Some deployments/environments run multiple application servers over the same Linux installation. If this is your case it is a good idea to install multiple JVMs to allow stepped migrations instead of big bang.
For instance, RHEL based distributions like CentOS, Oracle Linux or Fedora include various JVM versions:
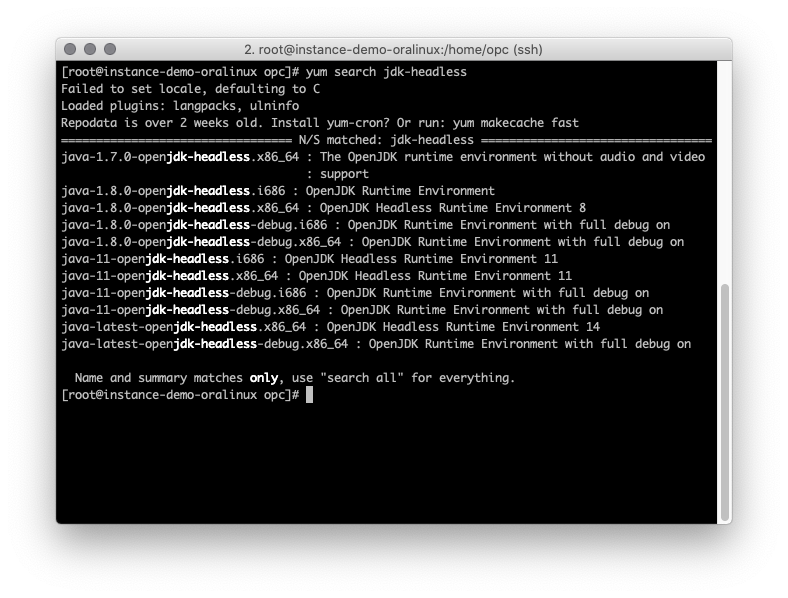
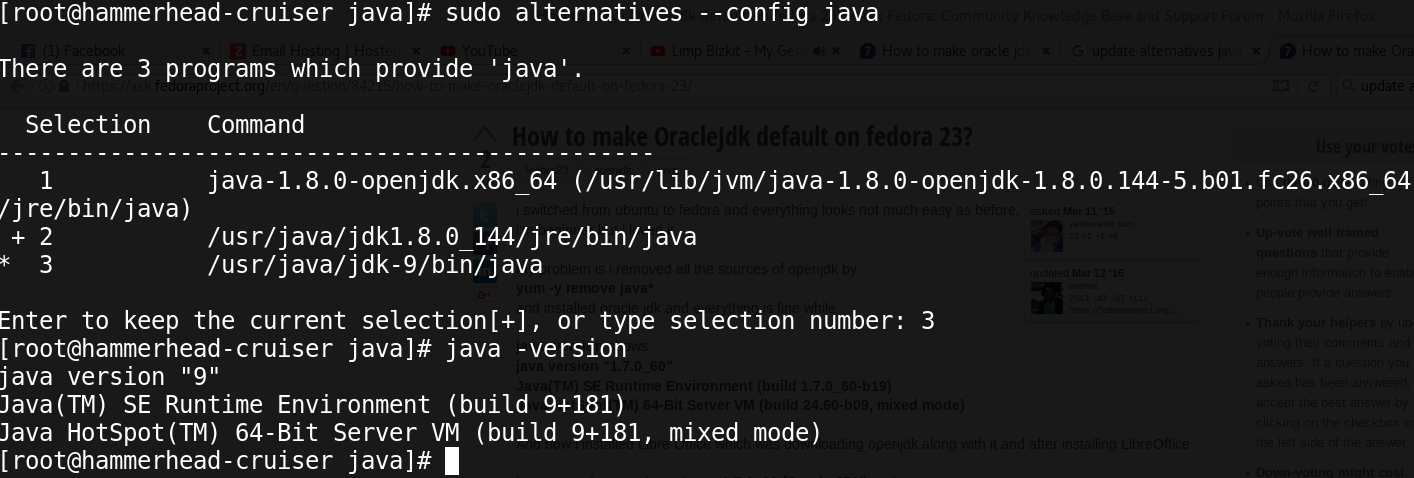
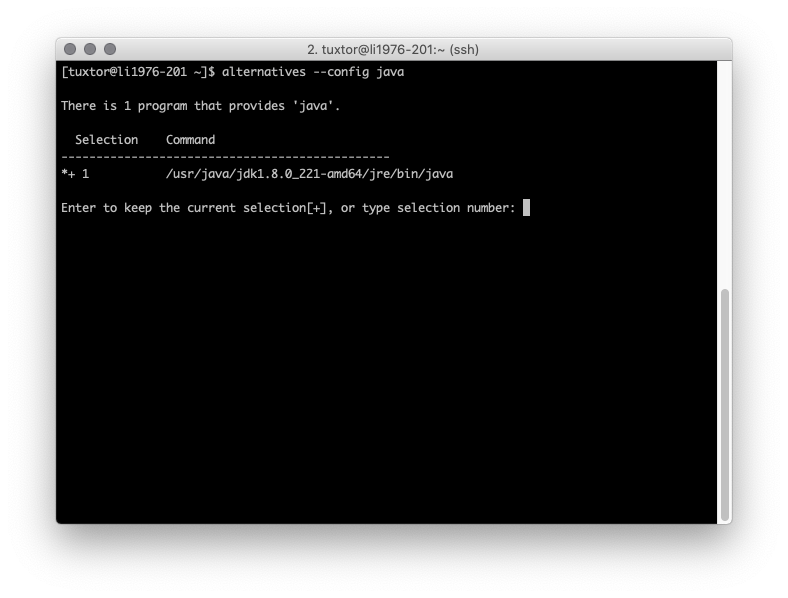
Most importantly, If you install JVMs outside directly from RPMs(like Oracle HotSpot), Java alternatives will give you support:
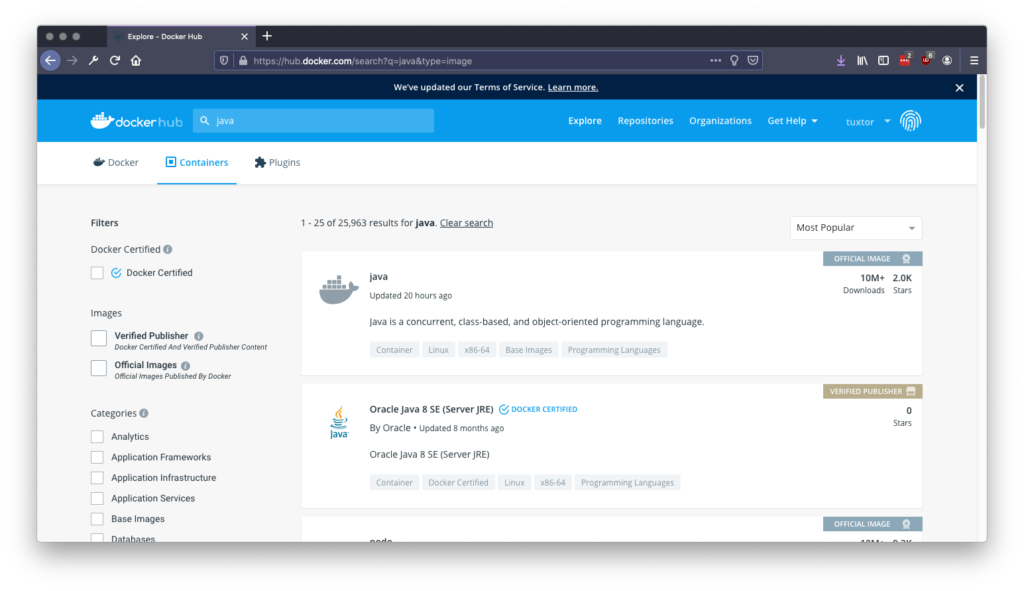
However on modern deployments probably would be better to use Docker, specially on Windows which also needs .bat script to automate this task. Most of the JVM distributions are also available on Docker Hub:
A simple MicroProfile JWT token provider with Payara realms and JAX-RS
02 October 2019

In this tutorial I will demonstrate how to create a "simple" (yet practical) token provider using Payara realms as users/groups store, with a couple of tweaks it's applicable to any MicroProfile implementation (since all implementations support JAX-RS).
In short this guide will:
- Create a public/private key in RSASSA-PKCS-v1_5 format to sign tokens
- Create user, password and fixed groups on Payara file realm (groups will be web and mobile)
- Create a vanilla JakartaEE + MicroProfile project
- Generate tokens that are compatible with MicroProfile JWT specification using Nimbus JOSE
Create a public/private pair
MicroProfile JWT establishes that tokens should be signed by using RSASSA-PKCS-v1_5 signature with SHA-256 hash algorithm.
The general idea behind this is to generate a private key that will be used on token provider, subsequently the clients only need the public key to verify the signature. One of the "simple" ways to do this is by generating an SSH keypair using OpenSSL.
First it is necessary to generate a base key to be signed:
openssl genrsa -out baseKey.pem
From the base key generate the PKCS#8 private key:
openssl pkcs8 -topk8 -inform PEM -in baseKey.pem -out privateKey.pem -nocrypt
Using the private key you could generate a public (and distributable) key
openssl rsa -in baseKey.pem -pubout -outform PEM -out publicKey.pem
Finally some crypto libraries like bouncy castle only accept traditional RSA keys, hence it is safe to convert it using also openssl:
openssl rsa -in privateKey.pem -out myprivateKey.pem
At the end myprivateKey.pem could be used to sign the tokens and publicKey.pem could be distributed to any potential consumer.
Create user, password and groups on Payara realm
According to Glassfish documentation, the general idea of realms is to provide a security policy for domains, being able to contain users and groups and consequently assign users to groups, these realms could be created using:
- File containers
- Certificates databases
- LDAP directories
- Plain old JDBC
- Solaris
- Custom realms
For tutorial purposes a file realm will be used but any properly configured Realm should work.
On vanilla Glassfish installations domain 1 uses server-config configuration, thus to create the realm you need to go to server-config -> Security -> Realms and add a new realm, in this tutorial burgerland will be created with the following configuration:
- Name: burgerland
- Class name: com.sun.enterprise.security.auth.realm.file.FileRealm
- JAAS Context: fileRealm
- Key file: ${com.sun.aas.instanceRoot}/config/burgerlandkeyfile
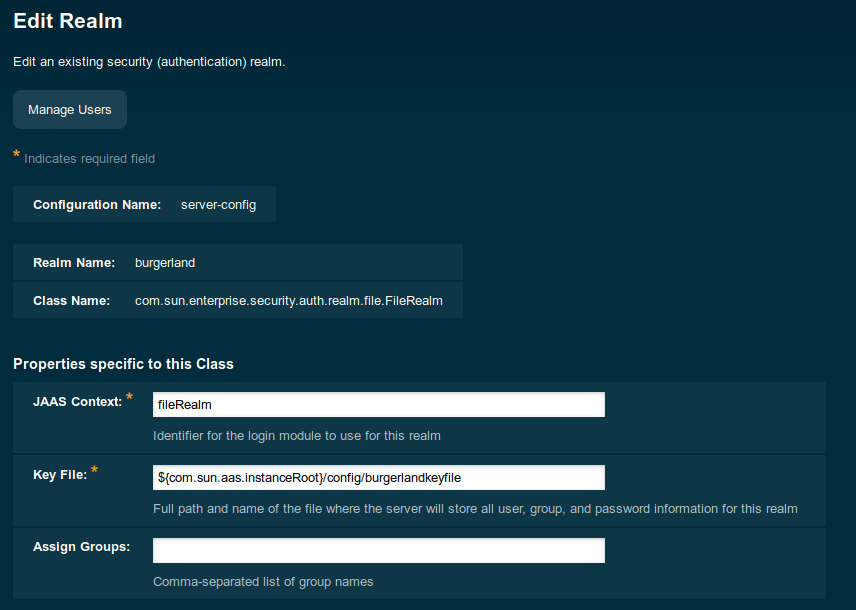
Once the realm is ready we can add two users/password with different roles (web, mobile), being ronald and king, final result should look like this:

Create a vanilla JakartaEE project
In order to generate the Tokens, we need to create a greenfield application, this could be achieved by using javaee8-essentials-archetype with the following command:
mvn archetype:generate -Dfilter=com.airhacks:javaee8-essentials-archetype -Dversion=0.0.4
As usual archetype assistant will ask for project details, project will be named microjwt-provider:
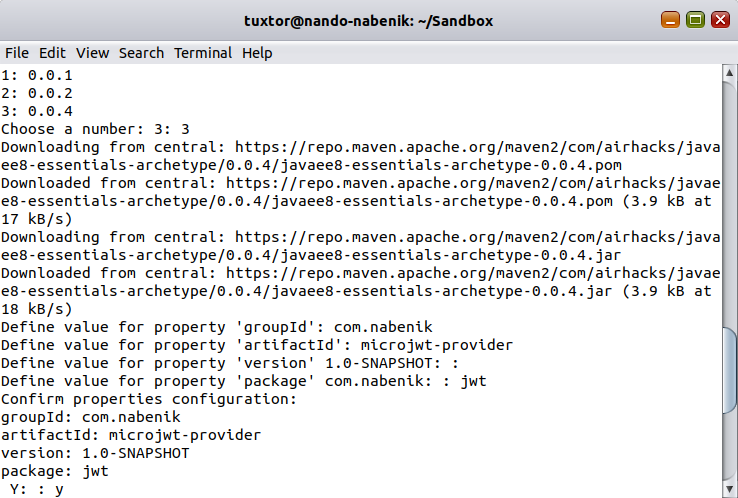
Now, it is necessary to copy the myprivateKey.pem file generated at section 1 to project's classpath using Maven structure, specifically to src/main/resources, to avoid any confussion I also renamed this file to privateKey.pem, the final structure will look like this:
microjwt-provider$ tree
.
├── buildAndRun.sh
├── Dockerfile
├── pom.xml
├── README.md
└── src
    └── main
        ├── java
        │   └── com
        │       └── airhacks
        │           ├── JAXRSConfiguration.java
        │           └── ping
        │               └── boundary
        │                   └── PingResource.java
        ├── resources
        │   ├── META-INF
        │   │   └── microprofile-config.properties
        │   └── privateKey.pem
        └── webapp
            └── WEB-INF
                └── beans.xml
You could get rid of source code since application will be bootstrapped using a different package structure :-).
Generating MP compliant tokens from Payara realm
In order to create a provider, we will create a project with a central JAX-RS resource named TokenProviderResource with the following characteristics:
- Receives a POST+Form params petition over
/auth - Resource creates and signs a token using privateKey.pem certificate
- Returns token in response body
- Roles will be established using
web.xmlfile - Roles will be mapped to Payara realm using
glassfish-web.xmlfile - User, password and roles will be checked using Servlet 3+ API
Nimbus JOSE and Bouncy Castle should be added as dependencies in order to read and sign tokens, these should be added at pom.xml file.
<dependency>
    <groupId>com.nimbusds</groupId>
    <artifactId>nimbus-jose-jwt</artifactId>
    <version>5.7</version>
</dependency>
<dependency>
    <groupId>org.bouncycastle</groupId>
    <artifactId>bcpkix-jdk15on</artifactId>
    <version>1.53</version>
</dependency>
Later, a enum will be used to describe the fixed roles in a type safe way:
public enum RolesEnum {
	WEB("web"),
	MOBILE("mobile");

	private String role;

	public String getRole() {
		return this.role;
	}

	RolesEnum(String role) {
		this.role = role;
	}
}
Once dependencies and roles are into project, we will implement a plain old Java bean in chage of token creation. First to be compliant with MicroProfile token structure a MPJWTToken bean is created, this will also contain a fast objet to JSON string converter but you could use any other marshaller implementation.
public class MPJWTToken {
	private String iss;
    private String aud;
    private String jti;
    private Long exp;
    private Long iat;
    private String sub;
    private String upn;
    private String preferredUsername;
    private List<String> groups = new ArrayList<>();
    private List<String> roles;
    private Map<String, String> additionalClaims;

    //Gets and sets go here

    public String toJSONString() {

        JSONObject jsonObject = new JSONObject();
        jsonObject.appendField("iss", iss);
        jsonObject.appendField("aud", aud);
        jsonObject.appendField("jti", jti);
        jsonObject.appendField("exp", exp / 1000);
        jsonObject.appendField("iat", iat / 1000);
        jsonObject.appendField("sub", sub);
        jsonObject.appendField("upn", upn);
        jsonObject.appendField("preferred_username", preferredUsername);

        if (additionalClaims != null) {
            for (Map.Entry<String, String> entry : additionalClaims.entrySet()) {
                jsonObject.appendField(entry.getKey(), entry.getValue());
            }
        }

        JSONArray groupsArr = new JSONArray();
        for (String group : groups) {
            groupsArr.appendElement(group);
        }
        jsonObject.appendField("groups", groupsArr);

        return jsonObject.toJSONString();
    }
Once JWT structure is complete, a CypherService is implemented to create and sign the token. This service will implement the JWT generator and also a key "loader" that reads privateKey file from classpath using Bouncy Castle.
public class CypherService {

	public static String generateJWT(PrivateKey key, String subject, List<String> groups) {
        JWSHeader header = new JWSHeader.Builder(JWSAlgorithm.RS256)
                .type(JOSEObjectType.JWT)
                .keyID("burguerkey")
                .build();

        MPJWTToken token = new MPJWTToken();
        token.setAud("burgerGt");
        token.setIss("https://burger.nabenik.com");
        token.setJti(UUID.randomUUID().toString());

        token.setSub(subject);
        token.setUpn(subject);

        token.setIat(System.currentTimeMillis());
        token.setExp(System.currentTimeMillis() + 7*24*60*60*1000); // 1 week expiration!

        token.setGroups(groups);

        JWSObject jwsObject = new JWSObject(header, new Payload(token.toJSONString()));

        // Apply the Signing protection
        JWSSigner signer = new RSASSASigner(key);

        try {
            jwsObject.sign(signer);
        } catch (JOSEException e) {
            e.printStackTrace();
        }

        return jwsObject.serialize();
    }

    public PrivateKey readPrivateKey() throws IOException {

        InputStream inputStream = CypherService.class.getResourceAsStream("/privateKey.pem");

        PEMParser pemParser = new PEMParser(new InputStreamReader(inputStream));
        JcaPEMKeyConverter converter = new JcaPEMKeyConverter().setProvider(new BouncyCastleProvider());
        Object object = pemParser.readObject();
        KeyPair kp = converter.getKeyPair((PEMKeyPair) object);
        return kp.getPrivate();
    }
}
CypherService will be used from TokenProviderResource as injectable CDI bean. One of my motivations to separate key reading from signing process is that key reading should be implemented respecting resource lifecycle, hence the key will be loaded at CDI @PostConstruct callback.
Here, full resource code:
@Singleton
@Path("/auth")
public class TokenProviderResource {

    @Inject
    CypherService cypherService;

    private PrivateKey key;

    @PostConstruct
    public void init() {
        try {
            key = cypherService.readPrivateKey();
        } catch (IOException e) {
            e.printStackTrace();
        }
    }

    @POST
    @Produces(MediaType.APPLICATION_JSON)
    @Consumes(MediaType.APPLICATION_FORM_URLENCODED)
    public Response doTokenLogin(@FormParam("username") String username, @FormParam("password")String password,
                               @Context HttpServletRequest request){

        List<String> target = new ArrayList<>();
        try {
            request.login(username, password);

            if(request.isUserInRole(RolesEnum.MOBILE.getRole()))
                target.add(RolesEnum.MOBILE.getRole());

            if(request.isUserInRole(RolesEnum.WEB.getRole()))
                target.add(RolesEnum.WEB.getRole());

        }catch (ServletException ex){
            ex.printStackTrace();
            return Response.status(Response.Status.UNAUTHORIZED)
                    .build();
        }

        String token = cypherService.generateJWT(key, username, target);

            return Response.status(Response.Status.OK)
                    .header(AUTHORIZATION, "Bearer ".concat(token))
                    .entity(token)
                    .build();

    }

}
JAX-RS endpoints in the end are abstractions over Servlet API, consequently you could inject the HttpServletRequest or HttpServletResponse object on any method (doTokenLogin). In this case it is usefull since I'm triggering a manual login using Servlet 3+ login method.
As noticed by many users, Servlet API does not allow to read user roles in a portable way, hence I'm just checking if a given user is included in fixed roles using the previously defined enum and adding these roles to the target ArrayList.
In this code the parameters were declared as @FormParam consuming x-www-form-urlencoded data making it usefull for plain HTML forms, but this configuration is completely optional.
Mapping project to Payara realm
The main motivation to use Servlet's login method is basically because it is already integrated with Java EE security schemes, hence using the realm will be a simple two-step configuration:
- Add the realm/roles configuration at
web.xmlfile in the project - Map Payara groups to application roles using
glassfish-web.xmlfile
If you wanna know the full description of this mapping I found a useful post here.
First, I need to map the application to burgerland realm and declare the two roles. Since I'm not selecting an auth method, project will fallback to BASIC method, however I'm not protecting any resource so, credentials won't be explicitly required on any HTTP request:
<?xml version="1.0" encoding="UTF-8"?>
<web-app xmlns="http://xmlns.jcp.org/xml/ns/javaee"
         xmlns:xsi="http://www.w3.org/2001/XMLSchema-instance"
         xsi:schemaLocation="http://xmlns.jcp.org/xml/ns/javaee http://xmlns.jcp.org/xml/ns/javaee/web-app_3_1.xsd"
         version="3.1">

    <login-config>
        <realm-name>burgerland</realm-name>
    </login-config>
    <security-role>
        <role-name>web</role-name>
    </security-role>
    <security-role>
        <role-name>mobile</role-name>
    </security-role>
</web-app>
Payara groups and Java web application roles are not the same concepts, but these could actually be mapped using glassfish descriptor glassfish-web.xml:
<?xml version="1.0" encoding="UTF-8"?>
<!DOCTYPE glassfish-web-app PUBLIC "-//GlassFish.org//DTD GlassFish Application Server 3.1 Servlet 3.0//EN" "http://glassfish.org/dtds/glassfish-web-app_3_0-1.dtd">
<glassfish-web-app error-url="">
    <security-role-mapping>
        <role-name>mobile</role-name>
        <group-name>mobile</group-name>
    </security-role-mapping>
    <security-role-mapping>
        <role-name>web</role-name>
        <group-name>web</group-name>
    </security-role-mapping>
</glassfish-web-app>
Finally the new application is deployed and a simple test demonstrates the functionality of token provider:

The token could be explored using any JWT tool, like the popular jwt.io, here the token is a compatible JWT implementation:
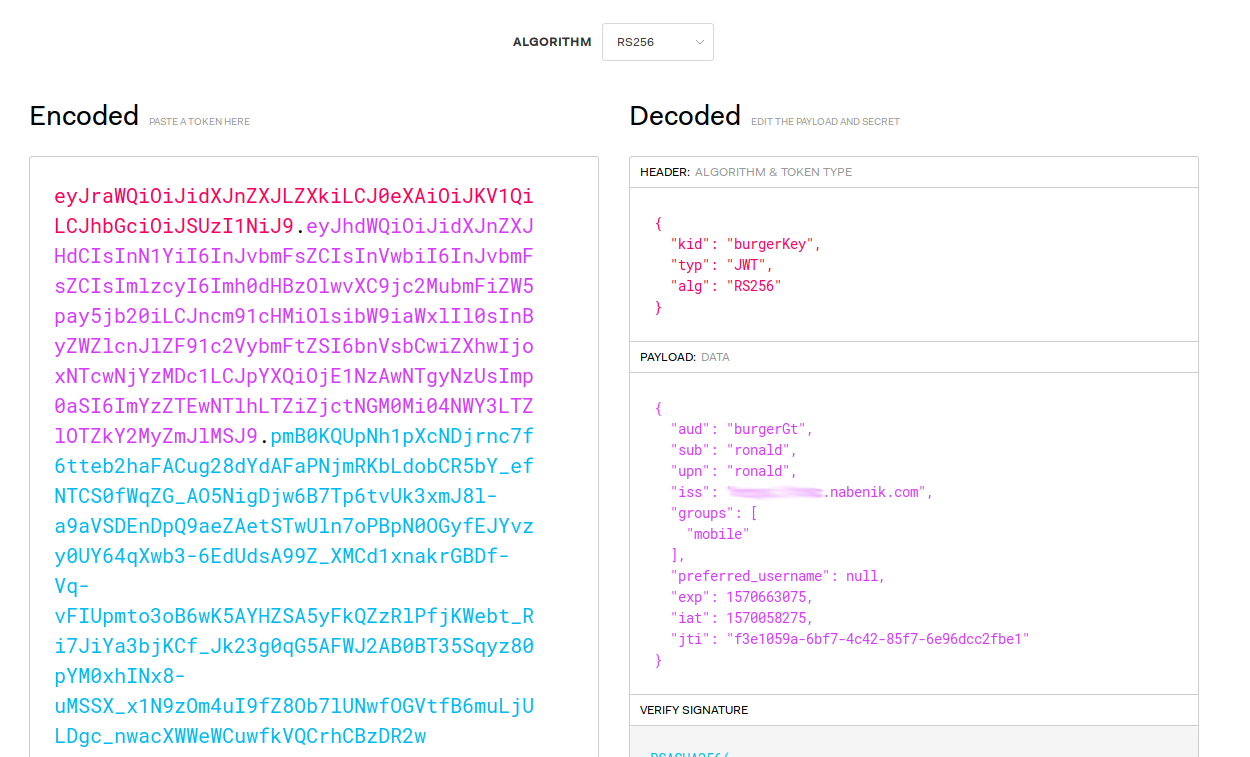
And as stated previously the signature could be checked using only the PUBLIC key:
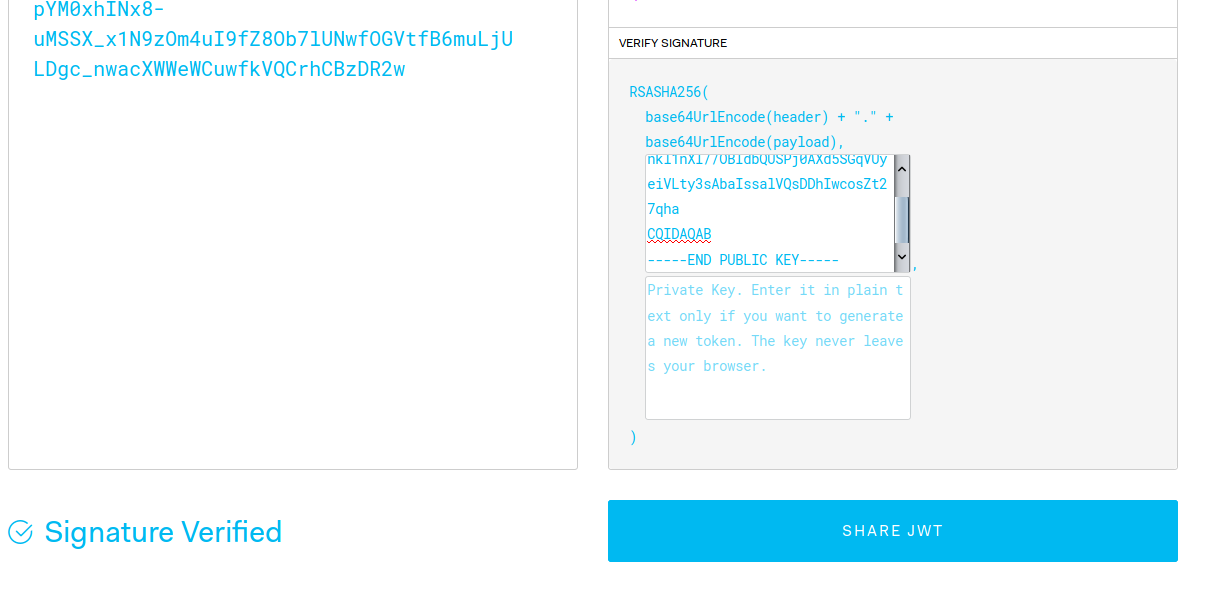
As always, full implementation is available at GitHub.
How to pack Angular 8 applications on regular war files
11 September 2019

From time to time it is necessary to distribute SPA applications using war files as containers, in my experience this is necessary when:
- You don't have control over deployment infrastructure
- You're dealing with rigid deployment standards
- IT people is reluctant to publish a plain old web server
Anyway, and as described in Oracle's documentation one of the benefits of using war files is the possibility to include static (HTML/JS/CSS) files in the deployment, hence is safe to assume that you could distribute any SPA application using a war file as wrapper (with special considerations).
Creating a POC with Angular 8 and Java War
To demonstrate this I will create a project that:
- Is compatible with the big three Java IDEs (NetBeans, IntelliJ, Eclipse) and VSCode
- Allows you to use the IDEs as JavaScript development IDEs
- Allows you to create a SPA modern application (With all npm, ng, cli stuff)
- Allows you to combine Java(Maven) and JavaScript(Webpack) build systems
- Allows you to distribute a minified and ready for production project
Bootstrapping a simple Java web project
To bootstrap the Java project, you could use the plain old maven-archetype-webapp as basis:
mvn archetype:generate -DarchetypeGroupId=org.apache.maven.archetypes -DarchetypeArtifactId=maven-archetype-webapp -DarchetypeVersion=1.4
The interactive shell will ask you for you project characteristics including groupId, artifactId (project name) and base package.
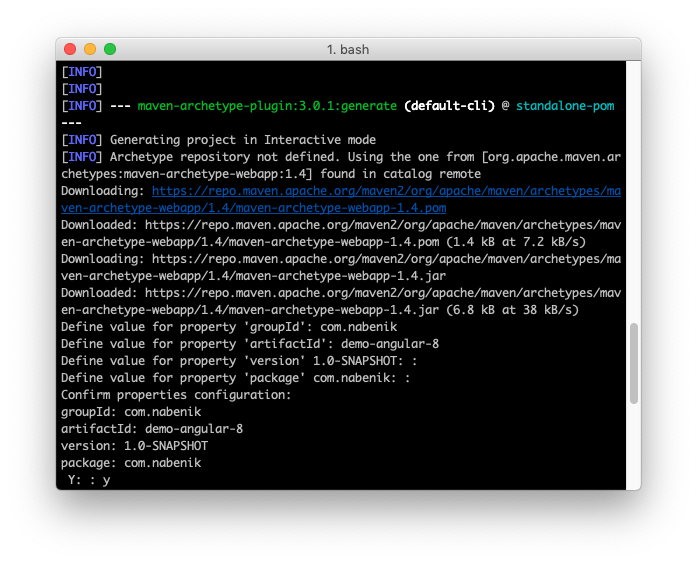
In the end you should have the following structure as result:
demo-angular-8$ tree
.
├── pom.xml
└── src
    └── main
        └── webapp
            ├── WEB-INF
            │   └── web.xml
            └── index.jsp

4 directories, 3 files
Now you should be able to open your project in any IDE. By default the 'pom.xml' will include locked down versions for maven plugins, you could safely get rid of those since we won't personalize the entire Maven lifecycle, just a couple of hooks.
<?xml version="1.0" encoding="UTF-8"?>

<project xmlns="http://maven.apache.org/POM/4.0.0" xmlns:xsi="http://www.w3.org/2001/XMLSchema-instance"
  xsi:schemaLocation="http://maven.apache.org/POM/4.0.0 http://maven.apache.org/xsd/maven-4.0.0.xsd">
  <modelVersion>4.0.0</modelVersion>

  <groupId>com.nabenik</groupId>
  <artifactId>demo-angular-8</artifactId>
  <version>1.0-SNAPSHOT</version>
  <packaging>war</packaging>

  <name>demo-angular-8 Maven Webapp</name>

  <properties>
    <project.build.sourceEncoding>UTF-8</project.build.sourceEncoding>
    <maven.compiler.source>1.7</maven.compiler.source>
    <maven.compiler.target>1.7</maven.compiler.target>
  </properties>
</project>
Besides that index.jsp is not necessary, just delete it.
Bootstrapping a simple Angular JS project
As an opinionated approach I suggest to isolate the Angular project at its own directory (src/main/frontend), on the past and with simple frameworks (AngularJS, Knockout, Ember) it was possible to bootstrap the entire project with a couple of includes in the index.html file, however nowadays most of the modern front end projects use some kind of bundler/linter in order to enable modern (>=ES6) features like modules, and in the case of Angular, it uses Webpack under the hood for this.
For this guide I assume that you already have installed all Angular CLI tools, hence we could go inside our source code structure and bootstrap the Angular project.
demo-angular-8$ cd src/main/
demo-angular-8/src/main$ ng new frontend
This will bootstrap a vanilla Angular project, and in fact you could consider the src/main/frontend folder as a separate root (and also you could open this directly from VSCode), the final structure will be like this:

As a first POC I started the application directly from CLI using IntelliJ IDEA and ng serve --open, all worked as expected.

Invoking Webpack from Maven
One of the useful plugins for this task is frontend-maven-plugin which allows you to:
- Download common JS package managers (npm, cnpm, bower, yarn)
- Invoke JS build systems and tests (grunt, gulp, webpack or npm itself, karma)
By default Angular project come with hooks from npm to ng but we need to add a hook in package.json to create a production quality build (buildProduction), please double check the base-href parameter since I'm using the default root from Java conventions (same as project name)
...
"scripts": {
    "ng": "ng",
    "start": "ng serve",
    "build": "ng build",
    "buildProduction": "ng build --prod --base-href /demo-angular-8/",
    "test": "ng test",
    "lint": "ng lint",
    "e2e": "ng e2e"
  }
...
To test this build we could execute npm run buildProduction at webproject's root (src/main/frontend), the output should be like this:
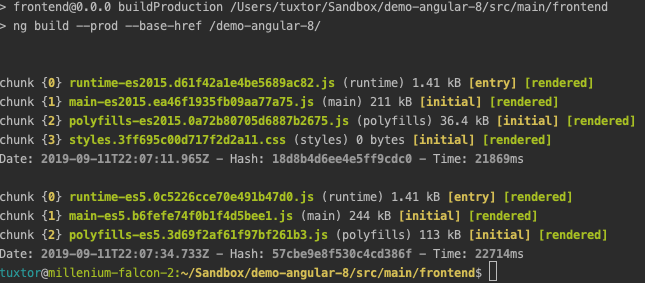
Finally It is necessary to invoke or new target with maven, hence our configuration should:
- Install NodeJS (and NPM)
- Install JS dependencies
- Invoke our new hook
- Copy the result to our final distributable war
To achieve this, the following configuration should be enough:
<build>
<finalName>demo-angular-8</finalName>
    <plugins>
    <plugin>
            <groupId>com.github.eirslett</groupId>
            <artifactId>frontend-maven-plugin</artifactId>
            <version>1.6</version>

            <configuration>
                <workingDirectory>src/main/frontend</workingDirectory>
            </configuration>

            <executions>

                <execution>
                    <id>install-node-and-npm</id>
                    <goals>
                        <goal>install-node-and-npm</goal>
                    </goals>
                    <configuration>
                        <nodeVersion>v10.16.1</nodeVersion>
                    </configuration>
                </execution>

                <execution>
                    <id>npm install</id>
                    <goals>
                        <goal>npm</goal>
                    </goals>
                    <configuration>
                        <arguments>install</arguments>
                    </configuration>
                </execution>
                <execution>
                    <id>npm build</id>
                    <goals>
                        <goal>npm</goal>
                    </goals>
                    <configuration>
                        <arguments>run buildProduction</arguments>
                    </configuration>
                    <phase>generate-resources</phase>
                </execution>
            </executions>
    </plugin>
    <plugin>
        <artifactId>maven-war-plugin</artifactId>
        <version>3.2.2</version>
        <configuration>
            <failOnMissingWebXml>false</failOnMissingWebXml>

            <!-- Add frontend folder to war package -->
            <webResources>
                <resource>
                    <directory>src/main/frontend/dist/frontend</directory>
                </resource>
            </webResources>

        </configuration>
    </plugin>
    </plugins>
</build>
And that's it!. Once you execute mvn clean package you will obtain as result a portable war file that will run over any Servlet container runtime. For Instance I tested it with Payara Full 5, working as expected.
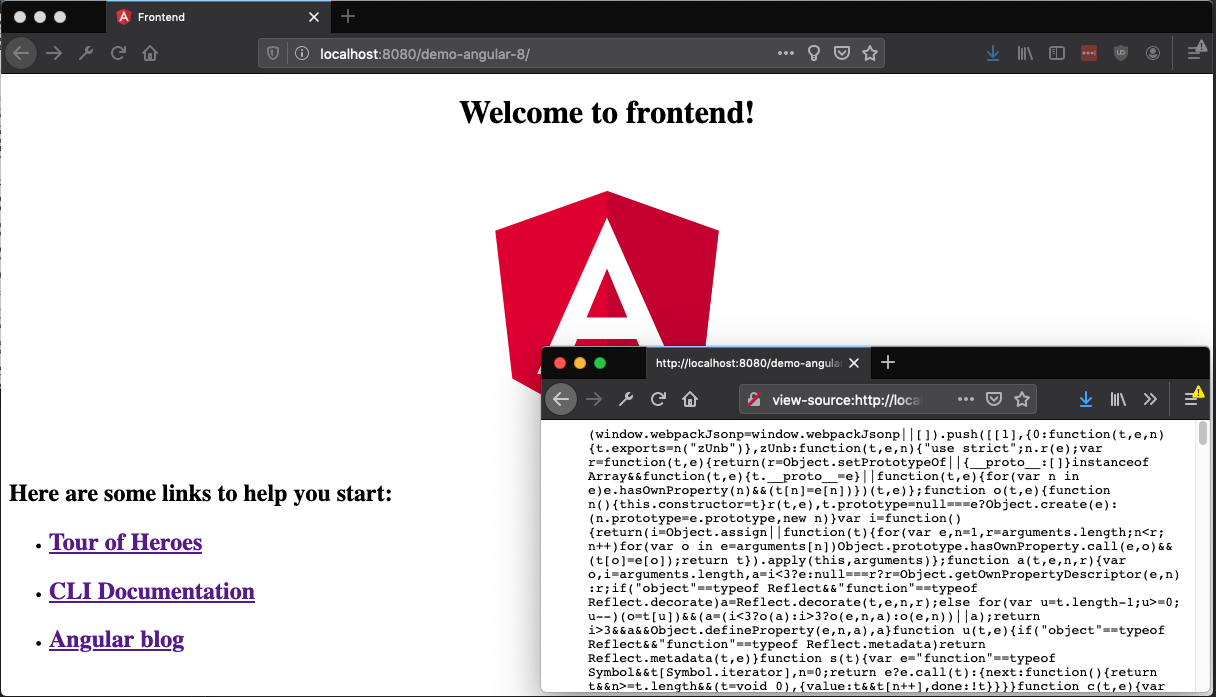
How to install Payara 5 with NGINX and Let's Encrypt over Oracle Linux 7.x
02 May 2019
From field experiences I must affirm that one of the greatest and stable combinations is Java Application Servers + Reverse Proxies, although some of the functionality is a clear overlap, I tend to put reverse proxies in front of application servers for the following reasons (please see NGINX page for more details):
- Load balancing: The reverse proxy acts as traffic cop and could be used as API gateway for clustered instances/backing services
- Web acceleration: Most of our applications nowadays use SPA frameworks, hence it is worth to cache all the js/css/html files and free the application server from this responsibility
- Security: Most of the HTTP requests could be intercepted by the reverse proxy before any attempt against the application server, increasing the opportunity to define rules
- SSL Management: It is easier to install/manage/deploy OpenSSL certificates in Apache/NGINX if compared to Java KeyStores. Besides this, Let's Encrypt officially support NGINX with plugins.
Requirements
To demonstrate this functionality, this tutorial combines the following stack in a classic (non-docker) way, however most of the concepts could be useful for Docker deployments:
- Payara 5 as application server
- NGINX as reverse proxy
- Let's encrypt SSL certificates
It is assumed that a clean Oracle Linux 7.x (7.6) box will be used during this tutorial and tests will be executed over Oracle Cloud with root user.
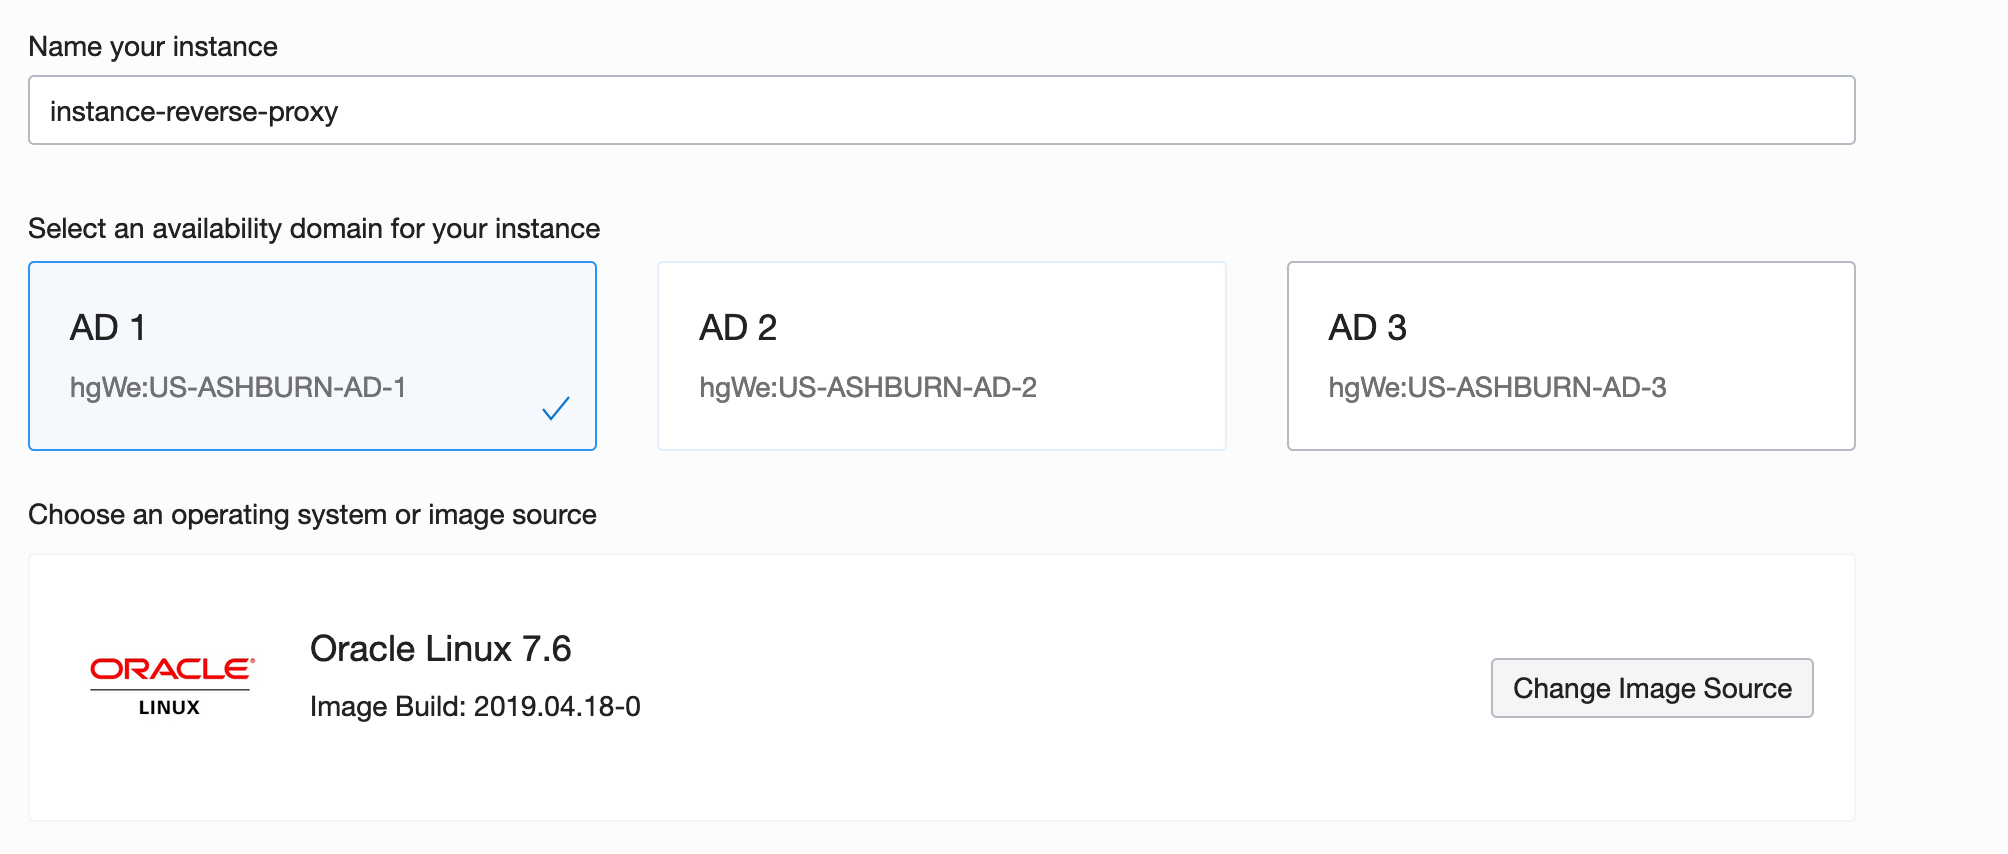
Preparing the OS
Since Oracle Linux is binary compatible with RHEL, EPEL repository will be added to get access to Let's Encrypt. It is also useful to update the OS as a previous step:
yum -y update
yum -y install https://dl.fedoraproject.org/pub/epel/epel-release-latest-7.noarch.rpm
Setting up Payara 5
In order to install Payara application server a couple of dependencies will be needed, specially a Java Developer Kit. For instance OpenJDK is included at Oracle Linux repositories.
yum -y install java-1.8.0-openjdk-headless
yum -y install wget
yum -y install unzip
Once all dependencies are installed, it is time to download, unzip and install Payara. It will be located at /opt following standard Linux conventions for external packages:
cd /opt
wget -O payara-5.191.zip https://search.maven.org/remotecontent?filepath=fish/payara/distributions/payara/5.191/payara-5.191.zip
unzip payara-5.191.zip
rm payara-5.191.zip
It is also useful to create a payara user for administrative purposes, to administrate the domain(s) or to run Payara as Linux service with systemd:
adduser payara
chown -R payara:payara payara5
echo 'export PATH=$PATH:/opt/payara5/glassfish/bin' >> /home/payara/.bashrc
chown payara:payara /home/payara/.bashrc
A systemd unit is also needed:
echo '[Unit]
Description = Payara Server v5
After = syslog.target network.target

[Service]
User=payara
ExecStart = /usr/bin/java -jar /opt/payara5/glassfish/lib/client/appserver-cli.jar start-domain
ExecStop = /usr/bin/java -jar /opt/payara5/glassfish/lib/client/appserver-cli.jar stop-domain
ExecReload = /usr/bin/java -jar /opt/payara5/glassfish/lib/client/appserver-cli.jar restart-domain
Type = forking

[Install]
WantedBy = multi-user.target' > /etc/systemd/system/payara.service
systemctl enable payara
Additionally if remote administration is needed, secure admin should be enabled:
sudo -u payara /opt/payara5/bin/asadmin --host localhost --port 4848 change-admin-password
systemctl start payara
sudo -u payara /opt/payara5/bin/asadmin --host localhost --port 4848 enable-secure-admin
systemctl restart payara
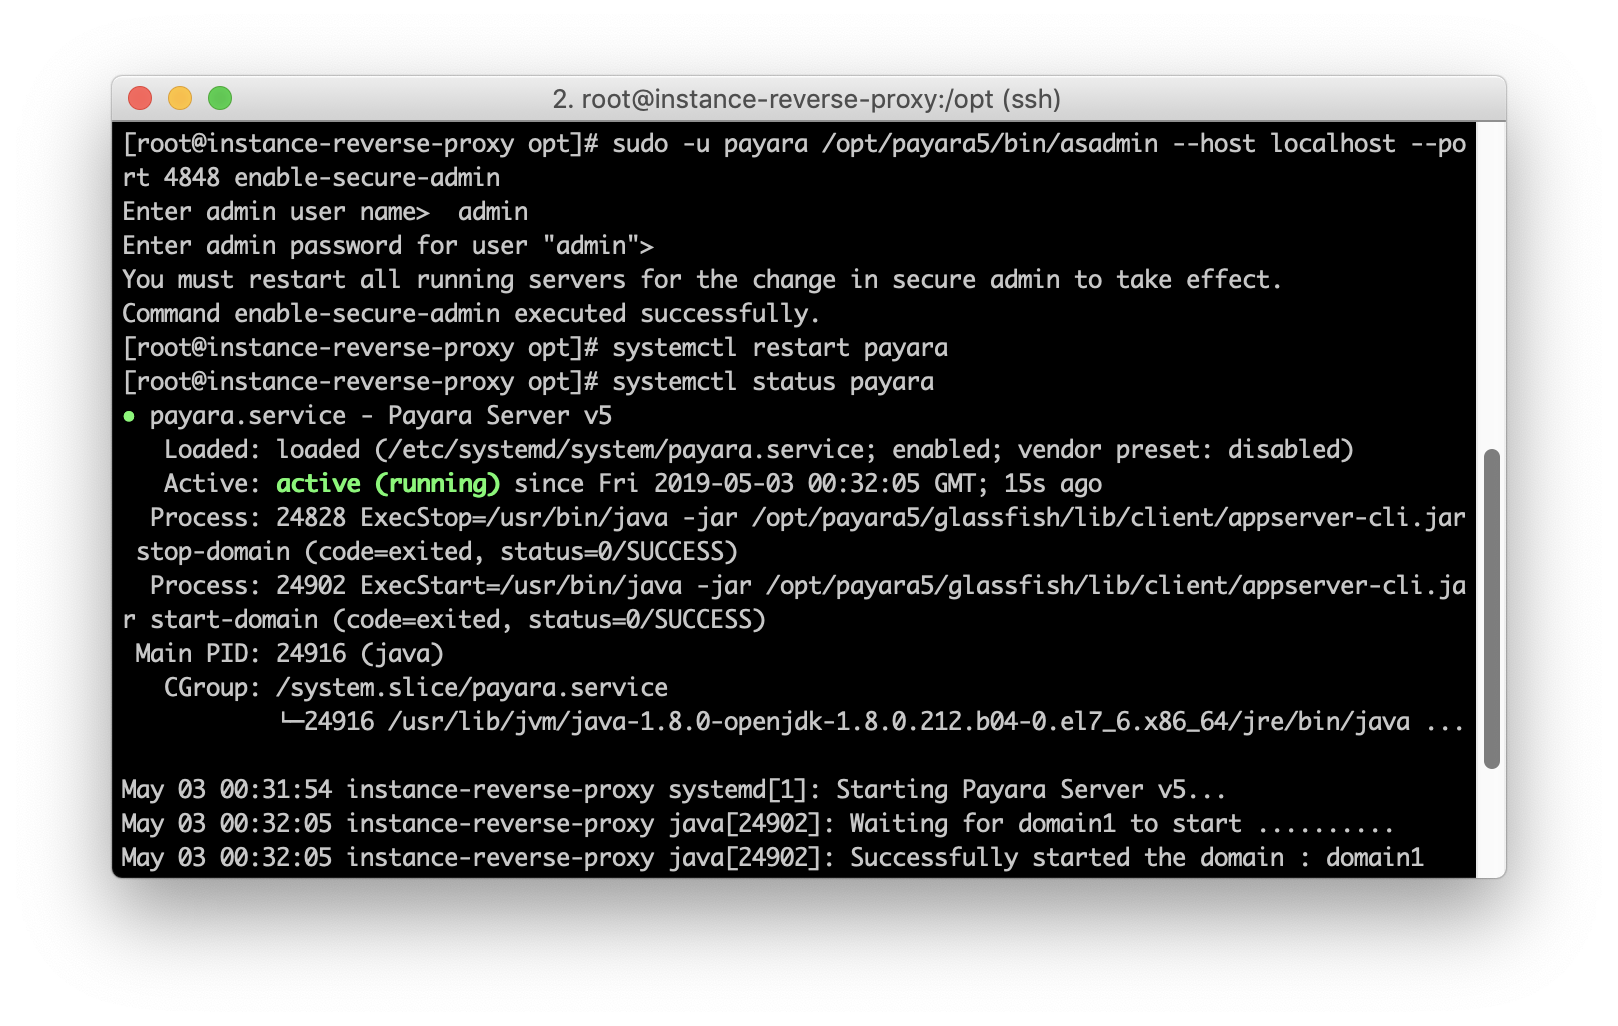
Oracle Cloud default configuration will create a VNIC attached to your instance, hence you should check the rules in order to allow access to ports.
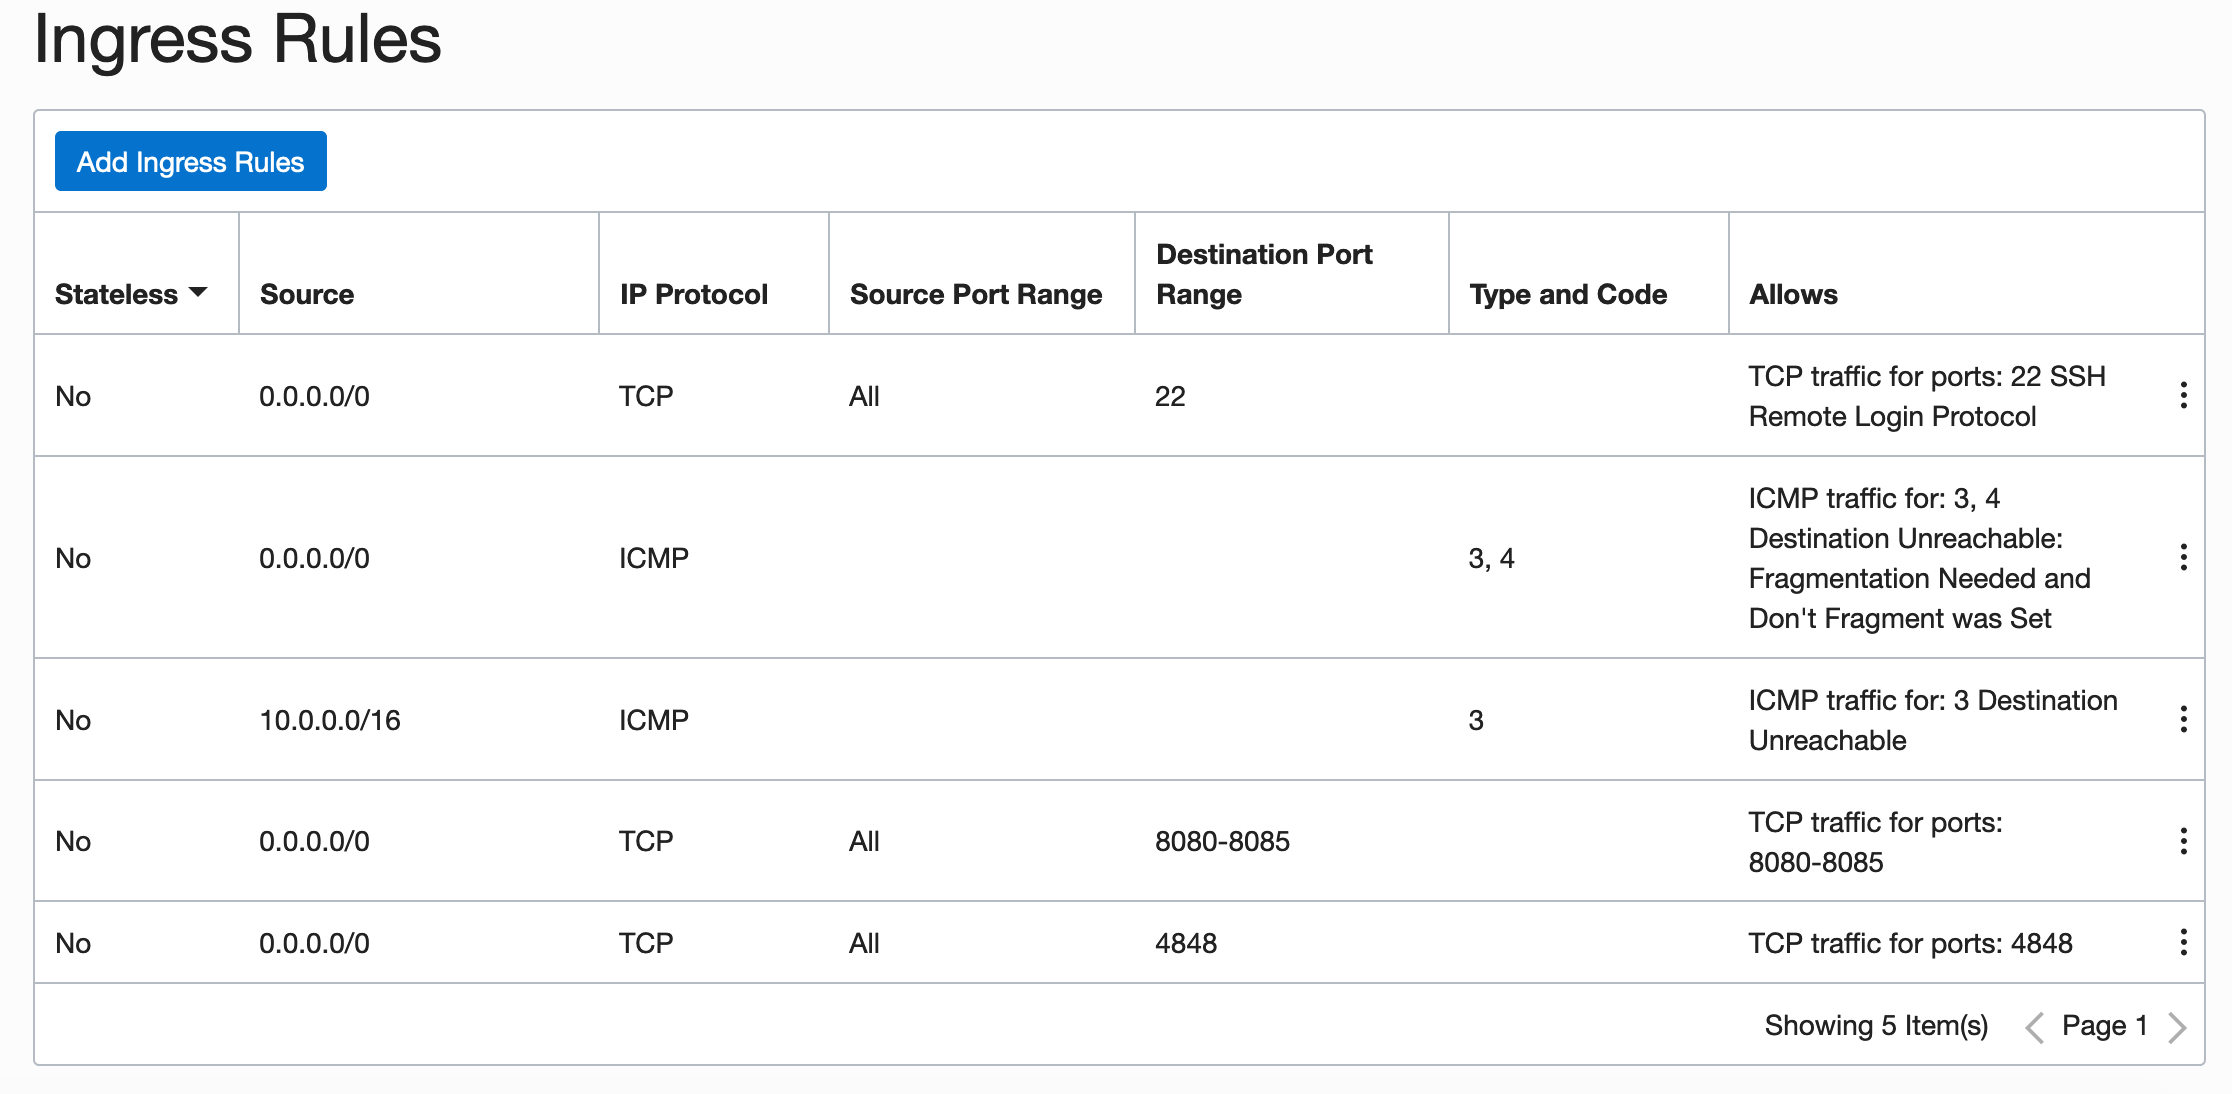
By default, Oracle Linux instances have a restricted set of rules in iptables and SELinux, hence ports should be opened with firewalld and SELinux should be configured to allow reverse proxy traffic:
firewall-cmd --zone=public --permanent --add-service=http
firewall-cmd --zone=public --permanent --add-service=https
firewall-cmd --zone=public --permanent --add-port=4848/tcp
setsebool -P httpd_can_network_connect 1
With this, the access is guaranteed to http+https+payara admin port.
Setting up NGINX reverse proxy
NGINX is available at EPEL:
yum -y install nginx
systemctl enable nginx
At this time your will need a FQDN pointing to your server, otherwhise Let's encrypt validation won't work. For this tutorial the ocl.nabenik.com domain will be used. If your domain propagated properly you should see a page like this:
Don't worry the Fedora logo is due EPEL usage, but you're running Oracle Linux :).
Now it's time to setup NGINX as reverse proxy, an opinionated deployment option is to create a /etc/nginx/sites-available and /etc/nginx/sites-enabled structure inside NGINX configuration, to isolate/manage multiple domains with the same instance (aka virtual hosts).
mkdir -p /etc/nginx/sites-available
mkdir -p /etc/nginx/sites-enabled
mkdir -p /var/www/ocl.nabenik.com/
chown -R nginx:nginx /var/www/ocl.nabenik.com

echo 'server {
    server_name ocl.nabenik.com;

    gzip on;
    gzip_types      text/css text/javascript text/plain application/xml;
    gzip_min_length 1000;

    location ^~ /.well-known/acme-challenge/ {
        allow all;
        root /var/www/ocl.nabenik.com/;
        default_type "text/plain";
        try_files $uri =404;
    }

    location / {
        proxy_pass             http://localhost:8080;
        proxy_connect_timeout       300;
        proxy_send_timeout          300;
        proxy_read_timeout          300;
        send_timeout                300;
    }

    error_page  500 502 503 504  /50x.html;
    location = /50x.html {
        root  /usr/share/nginx/html;
    }

    listen 80;
}' > /etc/nginx/sites-available/ocl.nabenik.com.conf
To enable the new host, a symlink is created on sites-enabled:
ln -s /etc/nginx/sites-available/ocl.nabenik.com.conf /etc/nginx/sites-enabled/ocl.nabenik.com.conf
After that you should include the following line inside /etc/nginx/nginx.conf, just before config file ending.
include /etc/nginx/sites-enabled/*.conf;
It is also useful to check your configuration with nginx -t, if all works property you should reach payara after NGINX reload.
Setting up Let's Encrypt
Once the reverse proxy is working, certbot should be enough to add an SSL certificate, the plugin itself will create a challenge at ^~ /.well-known/acme-challenge/, hence the proxy exclusion is mandatory (as reflected in the previous configuration step).
yum install -y certbot-nginx
certbot --nginx -d ocl.nabenik.com
One of the caveats of using certbot is the dependency of python version. Another alternative if you find any issues is to install it with pip
yum install -y python-pip
pip install certbot-nginx
certbot --nginx -d ocl.nabenik.com
If everything works as expected, you should see the Payara page under SSL.

Finally and most importantly, Let's Encrypt certificates are valid just for 90 days, hence you could add certification renewal (crontab -e) as a cron task
15 3 * * * /usr/bin/certbot renew --quiet
Getting started with Java EE 8, Java 11, Eclipse for Java Enterprise and Wildfly 16
30 April 2019

In this mini-tutorial we will demonstrate the configuration of a pristine development environment with Eclipse, JBoss Tools and Wildfly Application Server on MacOS.
From JBoss with love
If you have been in the Java EE space for a couple of years, Eclipse IDE for Java Enterprise Developers is probably one of the best IDE experiences, making an easy task the creation of applications with important EE components like CDI, EJB, JPA mappings, configuration files and good interaction with some of the important application servers (TomEE, WebLogic, Payara, Wildfly, JBoss).
In this line, Red Hat develops the Eclipse variant "CodeReady Studio" giving you and IDE with support for Java Enterprise Frameworks, Maven, HTML 5, Red Hat Fuse and OpenShift deployments.
To give support to its IDE, Red Hat also publishes CodeReady plugins as an independent project called JBoss Tools, enabling custom Enterprise Java development environments with Eclipse IDE for Java Enterprise developers as basis, which we demonstrate in this tutorial.
Why? For fun. Or as in my case, I don't use the entire toolset from Red Hat.
Requirements
In order to complete this tutorial you will need to download/install the following elements:
1- Java 11 JDK from Oracle or any OpenJDK distro
2- Eclipse IDE for Enterprise Java Developers
3- Wildfly 16
Installing OpenJDK
Since this is an OS/distribution dependent step, you could follow tutorials for Red Hat's OpenJDK, AdoptOpenJDK, Ubuntu, etc. At this time, Wildfly has Java 11 as target due new Java-LTS version scheme.
For MacOS one convenient way is AdoptOpenJDK tap.
First you should install Homebrew
/usr/bin/ruby -e "$(curl -fsSL https://raw.githubusercontent.com/Homebrew/install/master/install)"
After that and if you want an specific Java version, you should add AdoptOpenJDK tap and install from there. For instance if we like a OpenJDK 11 instance we should type:
brew tap AdoptOpenJDK/openjdk
brew cask install adoptopenjdk11
If all works as expected, you should have a new Java 11 environment running:
Eclipse IDE for Enterprise Java Developers
Eclipse offers collections of plugins denominated Packages, each package is a collection of common plugins aimed for a particular development need. Hence to simplify the process you could download directly Eclipse IDE for Enterprise Java Developers.
On Mac you will download a convenient .dmg file that you should drag and drop on the Applications folder.
The result is a brand new Eclipse Installation with Enterprise Java (Jakarta EE) support.
JBoss Tools
To install the "Enterprise Java" Features to your Eclipse installation, go to JBoss Tools main website at https://tools.jboss.org/ you should double check the compatibility with your Eclipse version before installing. Since Eclipse is lauching new versions each quarter the preferred way to install the plugins is by adding the update URL .
First, go to:
Help > Install New Software… > Work with:
And add the JBoss Tools URL http://download.jboss.org/jbosstools/photon/development/updates/
After that you should select the individual features, a minimal set of features for developers aiming Jakarta EE is:
- JBoss Web and Java EE Development: Support for libraries and tools like DeltaSpike, Java EE Batch, Hibernate, JavaScript, JBoss Forge
- JBoss Application Server Adapters: Support for JBoss, Wildfly and OpenShift 3
- JBoss Cloud and Container Development Tools: Support for Vagrant, Docker and Red Hat Containers development kit
- JBoss Maven support: Integrations between Maven and many EE/JBoss APIs
Finally you should accept licenses and restart your Eclipse installation.
Wildfly 16
Wildfly distributes the application server in zip or tgz files. After getting the link you could do the install process from the CLI. For example if you wanna create your Wildfly directory at ~/opt/ you should execute the following commands
mkdir ~/opt/
cd ~/opt/
wget https://download.jboss.org/wildfly/16.0.0.Final/wildfly-16.0.0.Final.zip
unzip wildfly-16.0.0.Final.zip
It is also convenient to add an administrative user that allows the creation of DataSources, Java Mail destinations, etc. For instance and using again ~/opt/ as basis:
cd ~/opt/wildfly-16.0.0.Final/bin/
./add-user.sh
The script will ask basic details like user name, password and consideration on cluster environments, in the end you should have a configured Wildfly instance ready for development, to start the instance just type:
~/opt/wildfly-16.0.0.Final/bin/standalone.sh
To check your administrative user, go to http://localhost:9990/console/index.html.
Eclipse and Wildfly
Once you have all set, it is easy to add Wildfly to your Eclipse installation. Go to servers window and add a new server instance, the wizard is pretty straight forward so screenshot are added just for reference:
If you wanna go deep on server's configuration, Eclipse allows you to open the standalone.xml configuration file directly from the IDE, just check if the application server is stopped, otherwhise your configuration changes will be deleted.
Testing the environment
To test this application I've created a nano-application using an Archetype for Java EE 8. The application server and the IDE support Java 11 and the deployment works as expected directly from the ide.
The state of Kotlin for Jakarta EE/MicroProfile traditional applications
22 April 2019

This easter I had the opportunity to catch up with some R&D tasks in my main Job, in short I had to evaluate the feasibility of using Kotlin in regular Jakarta EE/MicroProfile projects including:
- Language benefits
- Jakarta EE/MicroProfile API support, specifically CDI, JPA, JAX-RS
- Maven support
- Compatibility with my regular libraries (Flyway, SL4J, Arquillian)
- Regular application server support -e.g Payara-
- Tooling support (deployment, debugging, project import)
- Cloud deployment by Docker
TL;DR version
Kotlin works as language and plays well with Maven, I'm able to use many of the EE API for "services", however the roadblock is not the language or libraries, is the tooling support.
The experience is superb on IntelliJ IDEA and all works as expected, however the IDE is a barrier if you're not an IntelliJ user, Kotlin doesn't play well with WTP on Eclipse (hence it doesn't deploy to app servers) and Kotlin support for Netbeans is mostly dead.
About language
If you have a couple of years in the JVM space you probably remember that Scala, Ceylon and Kotlin have been considered as better Javas. I do a lot of development in different languages including Java for backends, Kotlin for mobile, JavaScript on front-ends, Bash for almost every automation task so I knew the streghts of Kotlin from the mobile space where is specially important, basically most of the Java development on Android is currently a Java 7+Lambdas experience.
My top five features that could help you in your EE tasks are
* One line functions
* Public by default
* Multiline Strings
* Companion objects
* Type inference
I'll try to exemplify these in a regular application
The Jakarta EE/MicroProfile application
The demo application follows a simple structure, it includes MicroProfile Config, CDI, EJB, JPA, and JAX-RS, focused on a simple phrase collector/retrieval service. Interesting Kotlin features are highlighted.
Source code is available at GitHub repo https://github.com/tuxtor/integrum-ee.
Project configuration
To enable Kotlin support I basically followed Kotlin's Maven guide, is not so explanatory but if you have a litle bit of experience in maven this won't be a problem.
Besides adding Kotlin dependencies to a regular EE pom.xmla special configuration is needed for the all-open plugin, Jakarta EE works with proxy entities that inherit from your original code. To make it simple all CDI, EJB and JAX-RS important annotations were included as "open activators".
<plugin>
    <groupId>org.jetbrains.kotlin</groupId>
    <artifactId>kotlin-maven-plugin</artifactId>
    <version>${kotlin.version}</version>
    <executions>
        <execution>
            <id>compile</id>
            <goals> <goal>compile</goal> </goals>
            <configuration>
                <sourceDirs>
                    <sourceDir>${project.basedir}/src/main/kotlin</sourceDir>
                    <sourceDir>${project.basedir}/src/main/java</sourceDir>
                </sourceDirs>
            </configuration>
        </execution>
        <execution>
            <id>test-compile</id>
            <goals> <goal>test-compile</goal> </goals>
            <configuration>
                <sourceDirs>
                    <sourceDir>${project.basedir}/src/test/kotlin</sourceDir>
                    <sourceDir>${project.basedir}/src/test/java</sourceDir>
                </sourceDirs>
            </configuration>
        </execution>
    </executions>
    <configuration>
        <compilerPlugins>
            <plugin>all-open</plugin>
        </compilerPlugins>

        <pluginOptions>
            <option>all-open:annotation=javax.ws.rs.Path</option>
            <option>all-open:annotation=javax.enterprise.context.RequestScoped</option>
            <option>all-open:annotation=javax.enterprise.context.SessionScoped</option>
            <option>all-open:annotation=javax.enterprise.context.ApplicationScoped</option>
            <option>all-open:annotation=javax.enterprise.context.Dependent</option>
            <option>all-open:annotation=javax.ejb.Singleton</option>
            <option>all-open:annotation=javax.ejb.Stateful</option>
            <option>all-open:annotation=javax.ejb.Stateless</option>
        </pluginOptions>
    </configuration>

    <dependencies>
        <dependency>
            <groupId>org.jetbrains.kotlin</groupId>
            <artifactId>kotlin-maven-allopen</artifactId>
            <version>${kotlin.version}</version>
        </dependency>
    </dependencies>
</plugin>
Model
Table models are easily created by using Kotlin's Data Classes, note the default values on parameters and nullable types for autogenerated values, using an incrementable value on a table.
@Entity
@Table(name = "adm_phrase")
@TableGenerator(name = "admPhraseIdGenerator", table = "adm_sequence_generator", pkColumnName = "id_sequence", valueColumnName = "sequence_value", pkColumnValue = "adm_phrase", allocationSize = 1)
data class AdmPhrase(
        @Id
        @GeneratedValue(strategy = GenerationType.TABLE, generator = "admPhraseIdGenerator")
        @Column(name = "phrase_id")
        var phraseId:Long? = null,
        var author:String = "",
        var phrase:String = ""
)
After that, I need to provide also a repository, the repository is a classic CRUD component injectable with CDI, one line methods are created to make the repository concise. The interesting part however is that Kotlin's nullability system plays well with CDI by using lateinit.
The most pleasant part is to create JPQL querys with multiline declarations, In general I dislike the + signs polluting my query in Java :).
@RequestScoped
class AdmPhraseRepository @Inject constructor() {

    @Inject
    private lateinit var em:EntityManager

    @PostConstruct
    fun init() {
        println ("Booting repository")
    }

    fun create(admPhrase:AdmPhrase) = em.persist(admPhrase)

    fun update(admPhrase:AdmPhrase) = em.merge(admPhrase)

    fun findById(phraseId: Long) = em.find(AdmPhrase::class.java, phraseId)

    fun delete(admPhrase: AdmPhrase) = em.remove(admPhrase)

    fun listAll(author: String, phrase: String): List<AdmPhrase> {

        val query = """SELECT p FROM AdmPhrase p
            where p.author LIKE :author
            and p.phrase LIKE :phrase
        """

        return em.createQuery(query, AdmPhrase::class.java)
                .setParameter("author", "%$author%")
                .setParameter("phrase", "%$phrase%")
                .resultList
    }

}
Controller
The model needs to be exposed by using a controller, hence a JAX-RS activator is needed
@ApplicationPath("/rest")
class RestApplication : Application()
That's all the code.
On the other side, implementing the controller looks a lot more like Java, specially if the right HTTP codes are needed. In this line to express the Java class to the builders the special Kotlin syntax this::class.java is mandatory.
Is also observed the elvis operator in action (in DELETE), if the entity is not found the alternative return is fired immediately, a nice idiomatic resource.
@Path("/phrases")
@Produces(MediaType.APPLICATION_JSON)
@Consumes(MediaType.APPLICATION_JSON)
class AdmPhraseController{

    @Inject
    private lateinit var admPhraseRepository: AdmPhraseRepository

    @Inject
    private lateinit var logger: Logger

    @GET
    fun findAll(@QueryParam("author") @DefaultValue("%") author: String,
                @QueryParam("phrase") @DefaultValue("%") phrase: String) =
                admPhraseRepository.listAll(author, phrase)

    @GET
    @Path("/{id:[0-9][0-9]*}")
    fun findById(@PathParam("id") id:Long) = admPhraseRepository.findById(id)

    @PUT
    fun create(phrase: AdmPhrase): Response {
        admPhraseRepository.create(phrase)
        return Response.created(UriBuilder.fromResource(this::class.java)
                .path(phrase.phraseId.toString()).build()).build()
    }

    @POST
    @Path("/{id:[0-9][0-9]*}")
    fun update(@PathParam("id") id: Long?, phrase: AdmPhrase): Response {
        if(id != phrase.phraseId) return Response.status(Response.Status.NOT_FOUND).build()

        val updatedEntity = admPhraseRepository.update(phrase)
        return Response.ok(updatedEntity).build()
    }

    @DELETE
    @Path("/{id:[0-9][0-9]*}")
    fun delete(@PathParam("id") id: Long): Response {
        val updatedEntity = admPhraseRepository.findById(id) ?:
            return Response.status(Response.Status.NOT_FOUND).build()
        admPhraseRepository.delete(updatedEntity)
        return Response.ok().build()
    }
}
To try MicroProfile a second controller is created that tries to read JAVA_HOME
@Path("/hello")
class HelloController{

    @Inject
    @ConfigProperty(name ="JAVA_HOME", defaultValue = "JAVA_HOME")
    lateinit var javaHome:String

    @GET
    fun doHello() = "There is no place like $javaHome"

}
Utilities
To create a real test, four "advanced components" were included, being an entity manager producer for CDI components, a Flyway bootstrapper with @Startup EJB, a Log producer for SL4J, and a "simple" test with Arquillian.
The producer itself is pretty similar to its Java equivalent, it only takes advantage of one line methods.
@ApplicationScoped
class EntityManagerProducer {

    @PersistenceUnit
    private lateinit var entityManagerFactory: EntityManagerFactory

    @Produces
    @Default
    @RequestScoped
    fun create(): EntityManager = this.entityManagerFactory.createEntityManager()

    fun dispose(@Disposes @Default entityManager: EntityManager) {
        if (entityManager.isOpen) {
            entityManager.close()
        }
    }
}
The Flyway migration is implemented with EJB to fire it every time that this application is deployed (and of course to test EJB). Since Kotlin doesn't have a try-with-resources structure the resource management is implemented with a let block, making it really readable. Besides this if there is a problem the data source it will be null and let block won't be executed.
@ApplicationScoped
@Singleton
@Startup
class FlywayBootstrapper{

    @Inject
    private lateinit var logger:Logger

    @Throws(EJBException::class)
    @PostConstruct
    fun init() {

        val ctx = InitialContext()
        val dataSource = ctx.lookup("java:app/jdbc/integrumdb") as? DataSource

        dataSource.let {
            val flywayConfig = Flyway.configure()
                    .dataSource(it)
                    .locations("db/postgresql")

            val flyway = flywayConfig.load()
            val migrationInfo = flyway.info().current()

            if (migrationInfo == null) {
                logger.info("No existing database at the actual datasource")
            }
            else {
                logger.info("Found a database with the version: ${migrationInfo.version} : ${migrationInfo.description}")
            }

            flyway.migrate()
            logger.info("Successfully migrated to database version: {}", flyway.info().current().version)
            it?.connection?.close()
        }
        ctx.close()
    }
}
To create a non empty-database a PostgreSQL migration was created at db/postgresql in project resources.
CREATE TABLE IF NOT EXISTS public.adm_sequence_generator (
    id_sequence VARCHAR(75) DEFAULT '' NOT NULL,
    sequence_value BIGINT DEFAULT 0 NOT NULL,
    CONSTRAINT adm_sequence_generator_pk PRIMARY KEY (id_sequence)
);
COMMENT ON COLUMN public.adm_sequence_generator.id_sequence IS 'normal_text - people name, items short name';
COMMENT ON COLUMN public.adm_sequence_generator.sequence_value IS 'integuer_qty - sequences, big integer qty';


CREATE TABLE IF NOT EXISTS public.adm_phrase
(
    phrase_id BIGINT DEFAULT 0 NOT NULL,
    author varchar(25) DEFAULT '' NOT NULL,
    phrase varchar(25) DEFAULT '' NOT NULL,
    CONSTRAINT adm_phrase_pk PRIMARY KEY (phrase_id)
);

insert into adm_phrase values (1, 'Twitter','Kotlin is cool');
insert into adm_phrase values (2, 'TIOBE','Java is the king');
Log producer also gets benefits from one line methods
open class LogProducer{

    @Produces
    fun produceLog(injectionPoint: InjectionPoint): Logger =
            LoggerFactory.getLogger(injectionPoint.member.declaringClass.name)
}
Finally a test class is also implemented, since Kotlin doesn't have static methods a companion object with @JvmStatic annotation is created on the class, otherwise test won't be executed. This is probably one of the examples where Kotlin's program get bigger if compared to Java equivalent.
@RunWith(Arquillian::class)
class AdmPhraseRepositoryIT {

    @Inject
    private lateinit var admPhraseRepository: AdmPhraseRepository


    companion object ArquillianTester{

        @JvmStatic
        @Deployment
        fun bootstrapTest(): WebArchive {
            val war = createBasePersistenceWar()
                    .addClass(AdmPhraseRepository::class.java)
                    .addAsWebInfResource("test-beans.xml", "beans.xml")
            println(war.toString(true))

            return war
        }
    }

    @Test
    fun testPersistance(){
        val phrase = AdmPhrase( author = "Torvalds", phrase = "Intelligence is the ability to avoid doing work, yet getting the work done")
        admPhraseRepository.create(phrase)
        assertNotNull(phrase.phraseId)
    }
}
Testing the application with IntelliJ IDEA and Payara 5
If the application is executed/debugged on IntelliJ IDEA all works as expected, sincerely I wasn't expecting an easy road but this worked really well. For instance a debugging session is initiated with Payara 5:
I could also retrieve the results from RDMBS
And my hello world with MicroProfile works too
 .
.
Testing the application on Oracle Cloud
As Oracle Groundbreaker Ambassador I have access to instances on Oracle Cloud, hence I created and deployed the same application just to check if there are any other caveats.
Packing applications in Payara Micro is very easy, basically you copy your application to a predefined location:
FROM payara/micro
COPY target/integrum-ee.war $DEPLOY_DIR
A scalable Docker Compose descriptor is needed to provide a simple load balancer and RDBMS, this step is also applicable with Kubernetes, Docker Swarm, Rancher, etc.
version: '3.1'
services:
  db:
    image: postgres:9.6.1
    restart: always
    environment:
      POSTGRES_PASSWORD: informatica
      POSTGRES_DB: integrum
    networks:
      - webnet
  web:
    image: "integrum-ee:latest"
    restart: always
    environment:
      JDBC_URL: 'jdbc:postgresql://db:5432/integrum'
      JAVA_TOOL_OPTIONS: '-Xmx64m'
      POSTGRES_PASSWORD: informatica
      POSTGRES_DB: integrum
    ports:
      - 8080
    networks:
      - webnet
  nginx:
    image: nginx:latest
    volumes:
      - ./nginx.conf:/etc/nginx/nginx.conf:ro
    depends_on:
      - web
    ports:
      - "4000:4000"
    networks:
      - webnet
networks:
  webnet:
A simple nginx.conf file is created just to balance the access to Payara (eventual and scalable) Workers:
user  nginx;

events {
    worker_connections   1000;
}
http {
        server {
              listen 4000;
              location / {
                proxy_pass http://web:8080;
              }
        }
}
The JTA resource is created via glassfish-resources.xml expressing RDBMS credentials with env variables:
<?xml version="1.0" encoding="UTF-8"?>
<!DOCTYPE resources PUBLIC "-//GlassFish.org//DTD GlassFish Application Server 3.1 Resource Definitions//EN" "http://glassfish.org/dtds/glassfish-resources_1_5.dtd">
<resources>
    <jdbc-connection-pool name="postgres_appPool" allow-non-component-callers="false" associate-with-thread="false" connection-creation-retry-attempts="0" connection-creation-retry-interval-in-seconds="10" connection-leak-reclaim="false" connection-leak-timeout-in-seconds="0" connection-validation-method="table" datasource-classname="org.postgresql.ds.PGSimpleDataSource" fail-all-connections="false" idle-timeout-in-seconds="300" is-connection-validation-required="false" is-isolation-level-guaranteed="true" lazy-connection-association="false" lazy-connection-enlistment="false" match-connections="false" max-connection-usage-count="0" max-pool-size="200" max-wait-time-in-millis="60000" non-transactional-connections="false" ping="false" pool-resize-quantity="2" pooling="true" res-type="javax.sql.DataSource" statement-cache-size="0" statement-leak-reclaim="false" statement-leak-timeout-in-seconds="0" statement-timeout-in-seconds="-1" steady-pool-size="8" validate-atmost-once-period-in-seconds="0" wrap-jdbc-objects="true">
        <property name="URL" value="${ENV=JDBC_URL}"/>
        <property name="User" value="postgres"/>
        <property name="Password" value="${ENV=POSTGRES_PASSWORD}"/>
        <property name="DatabaseName" value="${ENV=POSTGRES_DB}"/>
        <property name="driverClass" value="org.postgresql.Driver"/>
    </jdbc-connection-pool>
    <jdbc-resource enabled="true" jndi-name="java:app/jdbc/integrumdb" object-type="user" pool-name="postgres_appPool"/>
</resources>
After that, Invoking the compose file will bring the application+infrastructure to life. Now it's time to test it on a real cloud. First the image is published to Oracle's Container Registry
Once the container is available at Oracle Cloud the image become usable for any kind of orchestation, for simplicity I'm running directly the compose file over a bare CentOS VM image (the Wercker+Docker+Kubernetes is an entirely different tutorial).

To use it on Oracle's infrasctructure, the image ID should be switched to the full name image: iad.ocir.io/tuxtor/microprofile/integrum-ee:1, in the end the image is pulled, and the final result is our Kotlin EE application running over Oracle Cloud.
Testing the application with NetBeans
JetBrains dropped Kotlin support for NetBeans in 2017, I tried the plugin just for fun on NetBeans 11 but it hangs Netbeans startup while loading Kotlin support, so NetBeans tests were not possible.

Testing the application with Eclipse for Java EE
JetBeans currently develops a Kotlin complement for Eclipse and seems to work fine with pure Kotlin projects, however the history is very different for Jakarta EE.
After importing the Maven project (previously created in IntelliJ IDEA) many default facets are included in the project, being CDI the most problematic, it takes a lot of time to build the project in the CDI builder step.

Besides that, Jakarta EE complements/parsers work over the code and not the class files, hence the "advanced" menus don't show content, a very cosmetic detail anyway. If Kotlin sources are located under src/main/kotlin as suggested by JetBrains Maven guide, these are ignored by default. Hence, I took the easy road and moved all the code to src/main/java.
Kotlin syntax highlighting works fine, as expected from any language on Eclipse.
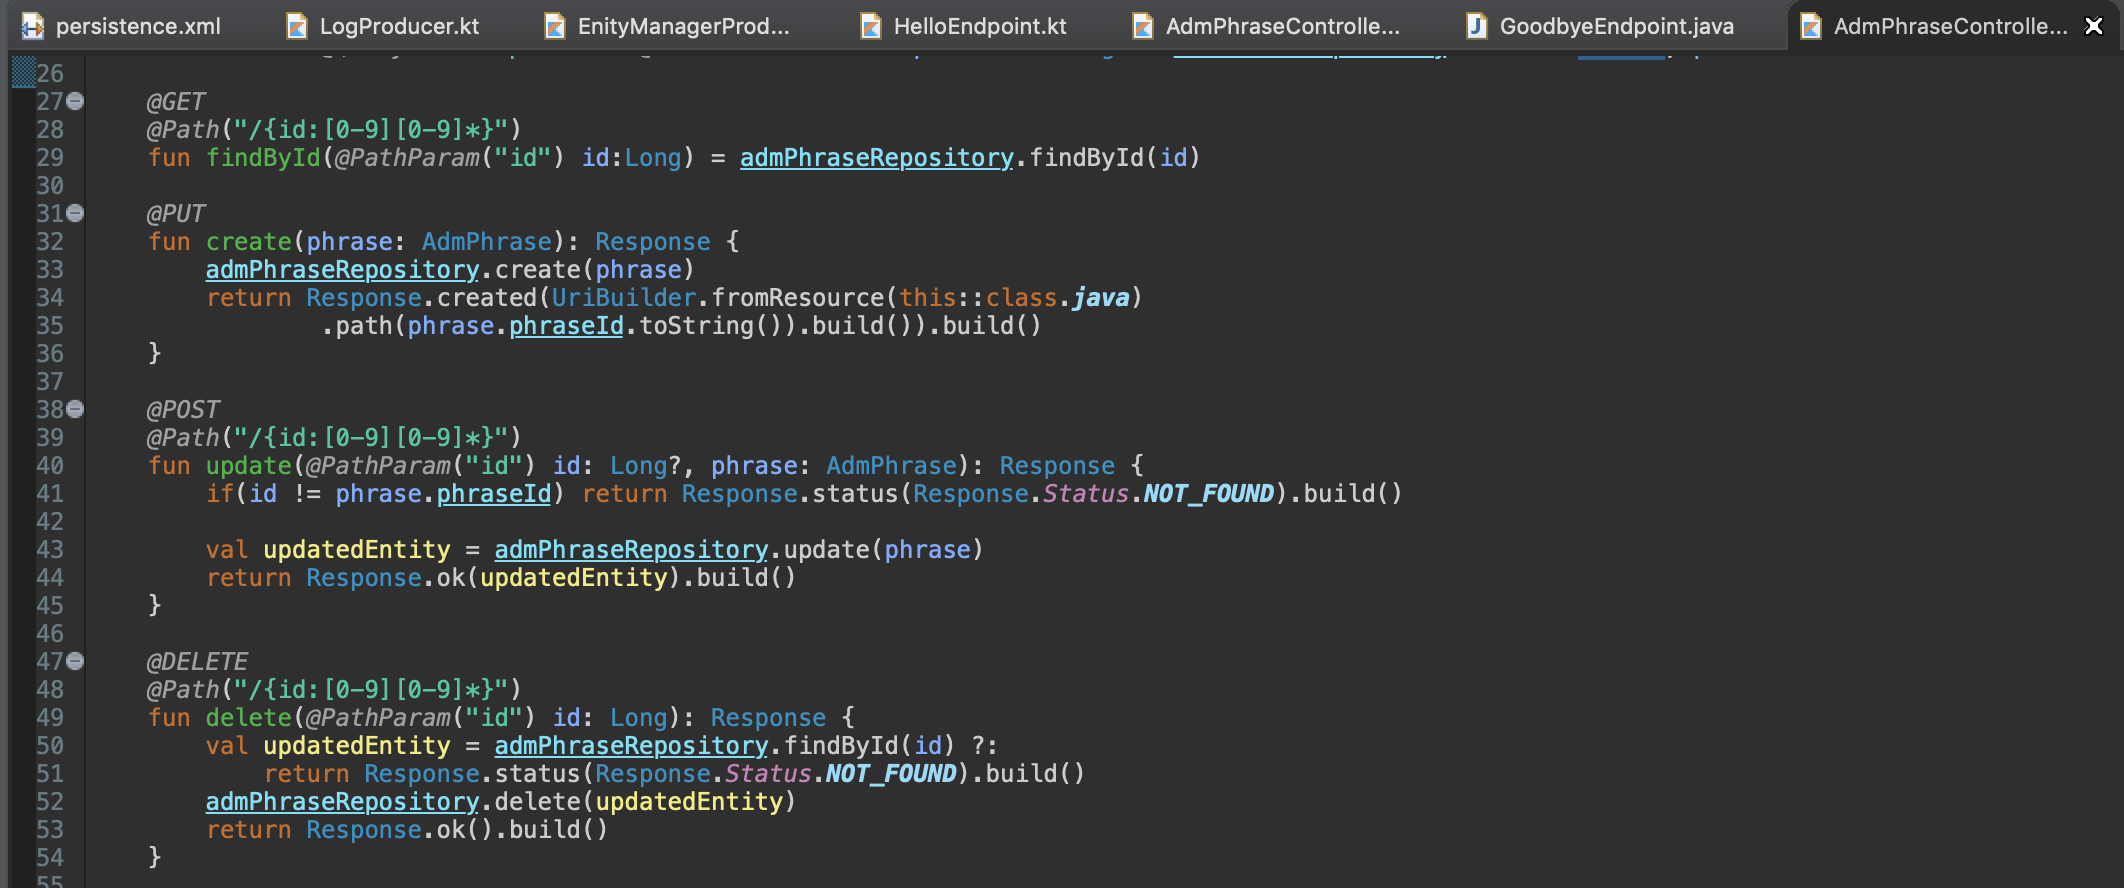
However if you try to deploy the application it simply doesn't work because Eclipse compiler does not produce the class file for Kotlin source files, a bug was raised in 2017 and many other users report issues with Tomcat and Wildfly. Basically Eclipse WTP is not compatible with Kotlin and deployment/debugging Kotlin code won't work over an application server.
Final considerations
At the end I was a little dissapointed, Kotlin has great potential for Jakarta EE but it works only if you use IntelliJ IDEA. I'm not sure about IntelliJ CE but as stated in JetBrains website, EE support is only included on Ultimate Edition, maybe this could be changed with more community involvemente but I'm not sure if this is the right direction considering project Amber.
Book Review: Enterprise Java Microservices by Ken Finnigan
19 December 2018

General information
- Pages: 245
- Published by: Manning
- Release date: nov 2018
Disclaimer: I received this book as a collaboration with Manning and the author.
Some context on learning Microservices
Let's clarify one thing, switching from Monoliths to Microservices is not like switching from traditional JavaEE to Spring (and viceversa), is more like learning to develop software again because you have to learn:
- New architectural patterns
- How to work with distributed transactions
- How to guarantee consistency in distributed data (or not)
- New plumbing/management tools like Docker, Kubernets, Pipelines
- New frameworks and/or old frameworks with new Cloud Native capabilities
Despite really good publications like the 12 factors for web native applications. From my perspective the real challenge on learning Microservices is the lack of a central documentation/tutorial/from 0 to wow guide.
In the old days, if you wanted to learn enterprise software development on Java, you simply took the Java EE tutorial from 0 to 100, maybe a second tutorial like Ticket Monster, a couple of reference books and that's it. However, learning Microservices is more like:
- Learning new cloud native capabilities of old frameworks in documentations that take for granted your knowledge of previous versions of the framework
- Or learning new frameworks with words like reactive, functional, non-blocking, bazinga
- Learning new design patterns without knowing the real motivation of each pattern
- Surfing in a lot of reddit and StackOverflow discussions on not-so clear explanations
- Learning Docker and Kubernets because every body is doing it
- Hitting end roads because you are accustomed to things like JNDI, JTA, Stateful sessions
About the book
Do you see the problem? The lack of a cohesive guide that explains who, how and why you need the zillion of new tools makes the path of learning Microservices an uphill battle, and that's where Enterprise Java Microservices shines.
Enterprise Java Microservices is one of the first attempts to create a cohesive guide with special focus on Java EE developers and MicroProfile. The book is divided in two main sections, the first one focused on Microservice basics (my favorite) and the second one focused on Microservices implementations with specific libraries (being a little bit biased for Red Hat Solutions).
First section
For those that already have some Enterprise Java knowledge but don't have too much idea about the new challenges in the Microservice world this will be the most useful section, with your actual knowledge you should be able to understand:
- The main differences between monoliths and microservices architectural styles and patterns, this is by far the most important section for me and gave me a couple of new ideas debunking some misconceptions that I had
- Just Enough and Micro application servers/frameworks
- New jargon on the cloud native world (yup you have to learn a lot of new acronyms)
- General knowledge on testing Microservices
- Why do you need new tools like service discovery, service registry, gateways, etc.
- Principles of reactive applications
This section also includes a brief introduction to API/Rest Web Services creation with Java EE and Spring, however I'm not sure about the feeling of this section for a newcomer.
Second section
Once you took the basis from the first section (or from bad implementations and end roads in the real life like me), this section will cover three of the most complex and important topics in Microservices, being:
- Service discovery and load balancing
- Fault tolerance (circuit breakers, bulkheads, etc.)
- Strategies for management and monitoring microservices
The chapters of the second section are structured in a way that makes easier to understand why do you need the "topic" that you are about to learn, however and despite being early focused on MicroProfile, it will use specific libraries like Hystrix, Ribbon and Feing (yes, like in Spring Boot) for the implementation of these patterns, adding also some specific integrations with Thorntail.
Later on, the book evolves over a sample application, covering topics like security, architectures with Docker/Kubernets and data streams processing, where as I said a particular bias is present, implementing the solutions by using Minishift, Keycloack and other Red Hat specifics.
To clarify, I don't think that this bias is bad, considering that there are (as I said) a zillion of alternatives for those factors not covered by Java, I think it was the right decision.
Things that could be better
As any review this is the most difficult section to write, but I think that a second edition should include:
- MicroProfile fault tolerance
- MicroProfile type safe clients
Since Ken is one of the guys behind MicroProfile implementation in Red Hat, I'm guessing that the main motivation for not including it is simple, MicroProfile is evolving so fast that these standards were presented after book printing.
People looking for data consistency patterns (CQRS, Event Sourcing, eventual consistency, etc.) could find the streaming processing section a little smaller than it should be.
Who should read this book?
- Java developers with strong foundations, or experience in Spring or Java EE
Yes, despite their coverage of basic APIs, I think that you need foundations like those covered in OCP certification, otherwise you will be confused in the implementation of annotations, callbacks, declarative and imperative code.
Eclipse MicroProfile Metrics, practical use cases
31 October 2018
Background
At the end of 2000 decade, one of the main motivations for DevOps creation was the (relatively speaking) neglected interaction between development, QA and operations teams.
In this line, the "DevOps promise" could be summarized as the union between culture, practices and tools to improve software quality and, at the same time, to speed up software development teams in terms of time to market. Winning in many successful implementations colateral effects like scalability, stability, security and development speed.
In line with diverse opinions, to implement a successful DevOps culture IT teams need to implement practices like:
- Continuos integration (CI)
- Continuos delivery (CD)
- MicroServices
- Infrastructure as code
- Communication and collaboration
- Monitoring and metrics
In this world of buzzwords it's indeed difficult to identify the DevOps maturity state without losing the final goal: To create applications that generate value for the customer in short periods of time.
In this post, we will discuss about monitoring and metrics in the Java Enterprise World, specially how the new DevOps practices impact the architectural decision at the technology selection phase.
Metrics in Java monoliths
If traditional architectures are considered, monolithic applications hold common characteristics like:
- Execution over servlet containers and application servers, with the JVM being a long running process.
- Ideally, these containers are never rebooted, or reboots are allowed on planned maintenance Windows.
- An application could compromise the integrity of the entire monolith under several conditions like bad code, bad deployments and server issues.
Without considering any Java framework, the deployment structure will be similar to the figure. In here we observe that applications are distributed by using .war or .jar files, being collected in .ear files for management purposes. In these architectures applications are created as modules, and separated considering its business objectives.
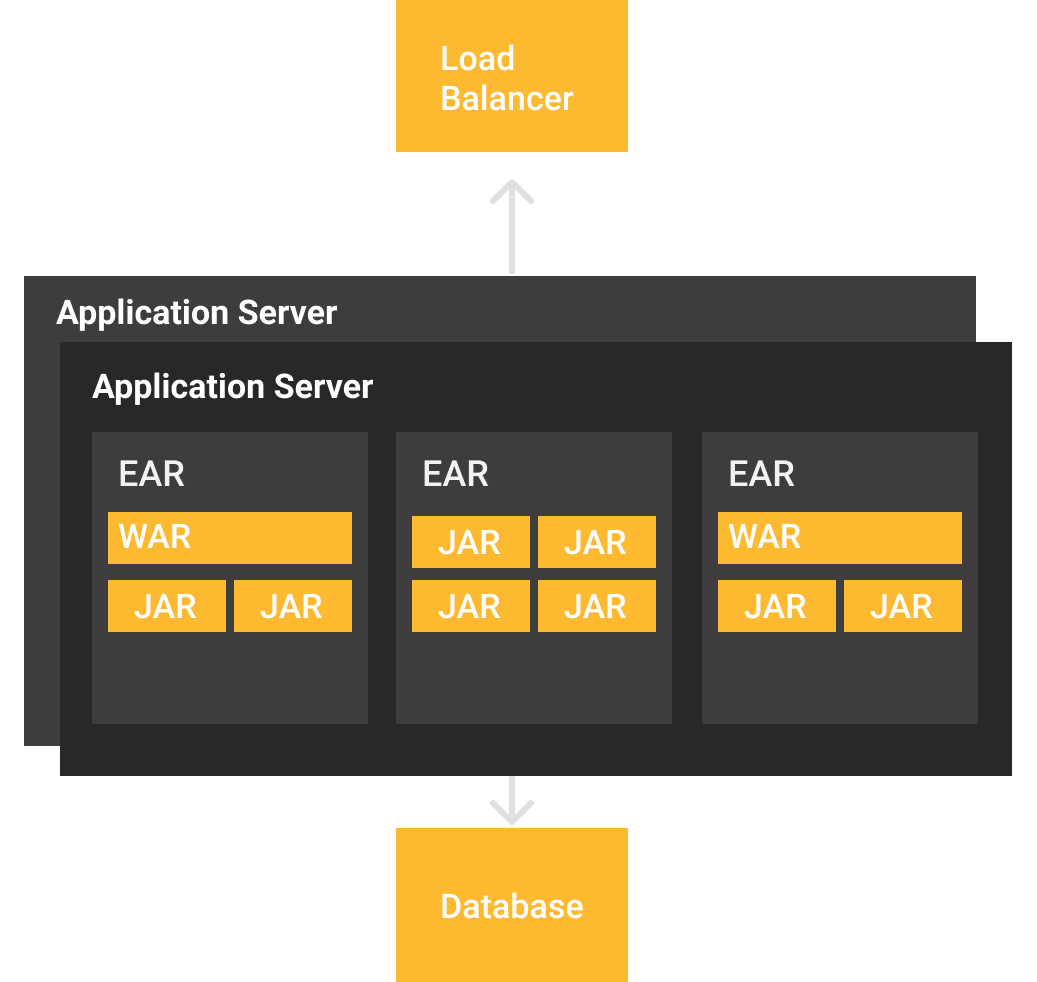
If a need to scale appears, there are basically two options, 1- to scale server resources (vertical) and 2- to add more servers with an application copy to distribute clients using a load balancer. It is worth to notice that new nodes tend to be also long running processes, since any application server reboot implies a considerable amount of time that is directly proportional to the quantity of applications that have been deployed.
Hence, the decision to provision (or not) a new application server often is a combined decision between development and operations teams, and with this you have the following options to monitor the state of your applications and application server:
- Vendor or vendor-neutral telemetric APIs -e.g Jookla, Glassfish REST Metrics-
- JMX monitoring through specific tools and ports -e.g. VisualVM, Mission Control-
- "Shell wrangling" with tail, sed, cat, top and htop
It should be noticed also, in this kind of deployments it's necessary to obtain metrics from application and server, creating a complex scenario for status monitoring.
The rule of thumb for this scenarios is often to choose telemetric/own APIs to monitor application state and JMX/Logs for a deeper analysis of runtime situation, again presenting more questions:
- Which telemetric API should I choose? Do I need a specific format?
- Server's telemetry would be sufficient? How metrics will be processed?
- How do I got access to JMX in my deployments if I'm a Containers/PaaS user?
Reactive applications
One of the (not so) recent approaches to improve users experience is to implement reactive systems with the defined principles of the Reactive Manifesto.
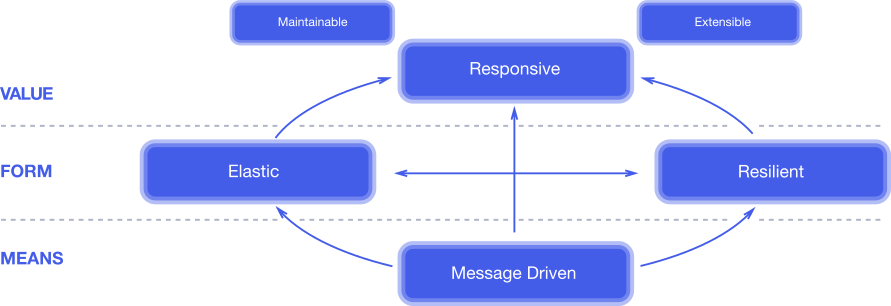
In short, a reactive system is a system capable of:
- Being directed/activated by messages often processed asynchronously
- Presents resilience by failing partially, without compromising all the system
- Is elastic to provision and halt modules and resources on demand, having a direct impact in resources billing
- The final result is a responsive system for the user
Despite not being discussed so often, reactive architectures have a direct impact on metrics. With dynamic provisioning you won't have long running processes to attach and save metrics, and additionally the services are switching ip addresses depending on clients demand.
Metrics in Java Microservices architectures
Without considering any particular framework or library, the reactive architectural style puts as strong suggestion the usage of containers and/or Microservice, specially for resilience and elasticity:
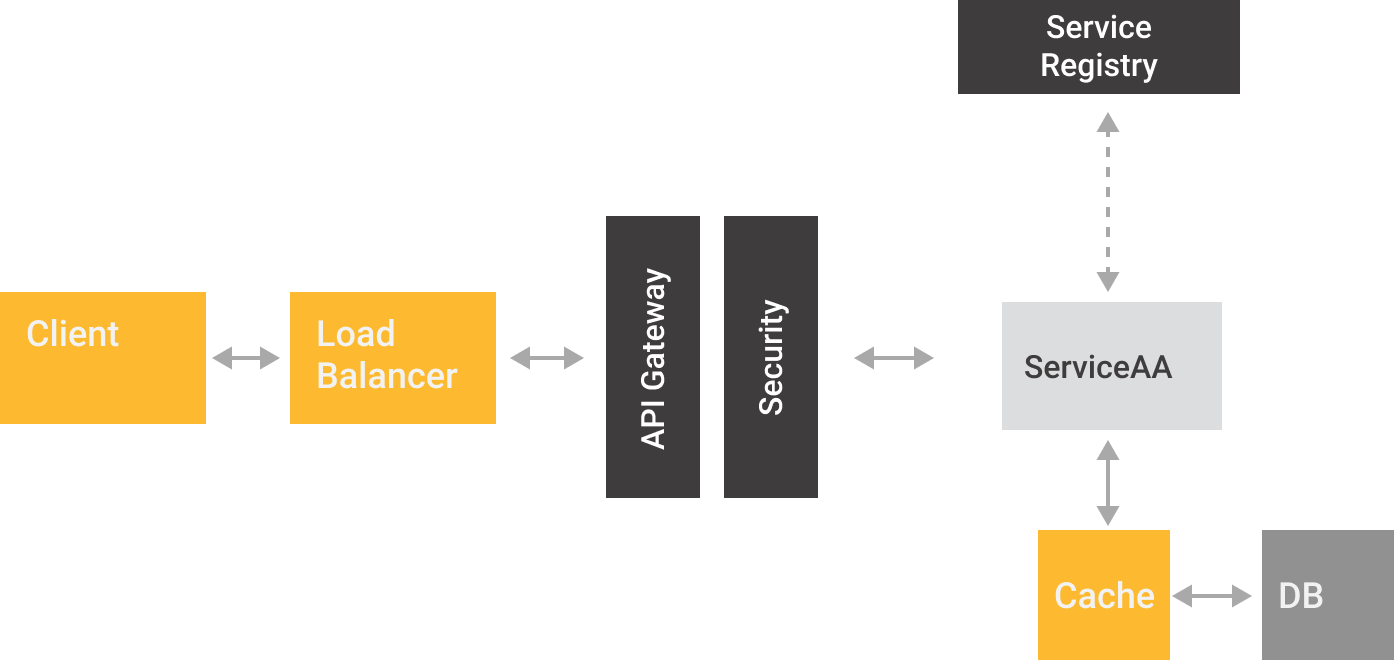
In a traditional Microservices architecture we observe that services are basically short-lived "workers", which could have clones reacting to changes on clients demand. These environments are often orchestrated with tools like Docker Swarm or Kubernetes, hence each service is responsable of register themself to a service registry acting as a directory. Being the registry, the ideal source for any metric tool to read services location, pulling and saving the correspondent metrics.
Metrics with Java EE and Eclipse MicroProfile
Despite the early efforts on the EE space like an administrative API with metrics, the need of a formal standard for metrics became mandatory due Microservices popularization. Being Dropwizard Metrics one of the pioneers to cover the need of a telemetric toolkit with specific CDI extensions.
In this line, the MicroProfile project has included among its recent versions(1.4 and 2.0) support for Healthcheck and state Metrics. Many of the current DropWizard users would notice that annotations are similar if not the same. In fact MicroProfile annotations are based directly on DropWizard's API 3.2.3.
To differentiate between concepts, Healtheck API is in charge of answering a simple question "Is the service running and how well is it doing it?" and are targeted for orchestrations. On the other side Metrics present instant or periodical metrics on how services are reacting over consumers requests.
Latest version of MicroProfile (2.0) includes support for Metrics 1.1, including:
- Counted
- Gauge
- Metered
- Timed
- Histogram
So, it is worth to give them a try with practical use cases.
Metrics with Payara and Eclipse MicroProfile
For the test we will use an application composed by two microservices, as described in the diagram:
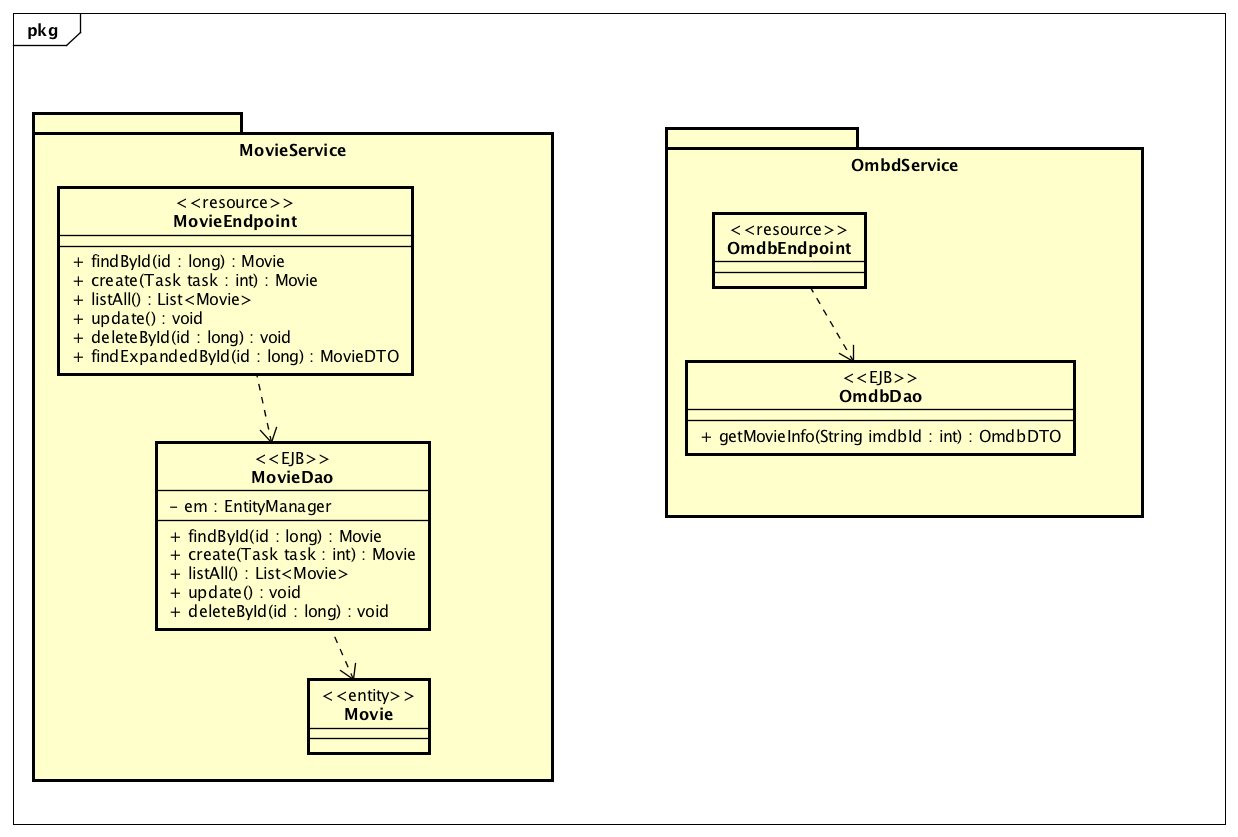
Our scenario includes two microservices, OmdbService focused on information retrieving from OMDB to obtain up to date movie information and MovieService aimed to obtain movie information from a relational database and mix it with OMDB plot. Projects code is available at GitHub.
To activate support for MicroProfile 2.0 two things are needed, 1- the right dependency on pom.xml and 2- to deploy/run our application over a MicroProfile compatible implementation, like Payara Micro.
<dependency>
	<groupId>org.eclipse.microprofile</groupId>
	<artifactId>microprofile</artifactId>
	<type>pom</type>
	<version>2.0.1</version>
	<scope>provided</scope>
</dependency>
MicroProfile uses a basic convention in regards of metrics, presenting three levels:
- Base: Mandatory Metrics for all MicroProfile implementations, located at
/metrics/base - Application: Custom metrics exposed by the developer, located at
/metrics/application - Vendor: Any MicroProfile implementation could implement its own variant, located at
/metrics/vendor
Depending on requests header, metrics will be available in JSON or OpenMetrics format. The last one popularized by Prometheus, a Cloud Native Computing Foundation project.
Practical use cases
So far, we've established that:
- You could monitor your Java application by using telemetric APIs and JMX
- Reactive applications present new challenges, specially due microservices dynamic and short running nature
- JMX is sometimes difficult to implement on container/PaaS based deployments
- MicroProfile Metrics is a new proposal for Java(Jakarta) EE environments, working indistinctly for monoliths and microservices architectures
In this post we present a couple of cases discussed also at Oracle Code One:
Case 0: Telemetry from JVM
To give a quick look on MicroProfile metrics, it is enough to boot a MicroProfile compliant app server/microservice framework with any deployment. Since Payara Micro is compatible with Microprofile, metrics will be available from the beginning at http://localhost:8080/metrics/base.
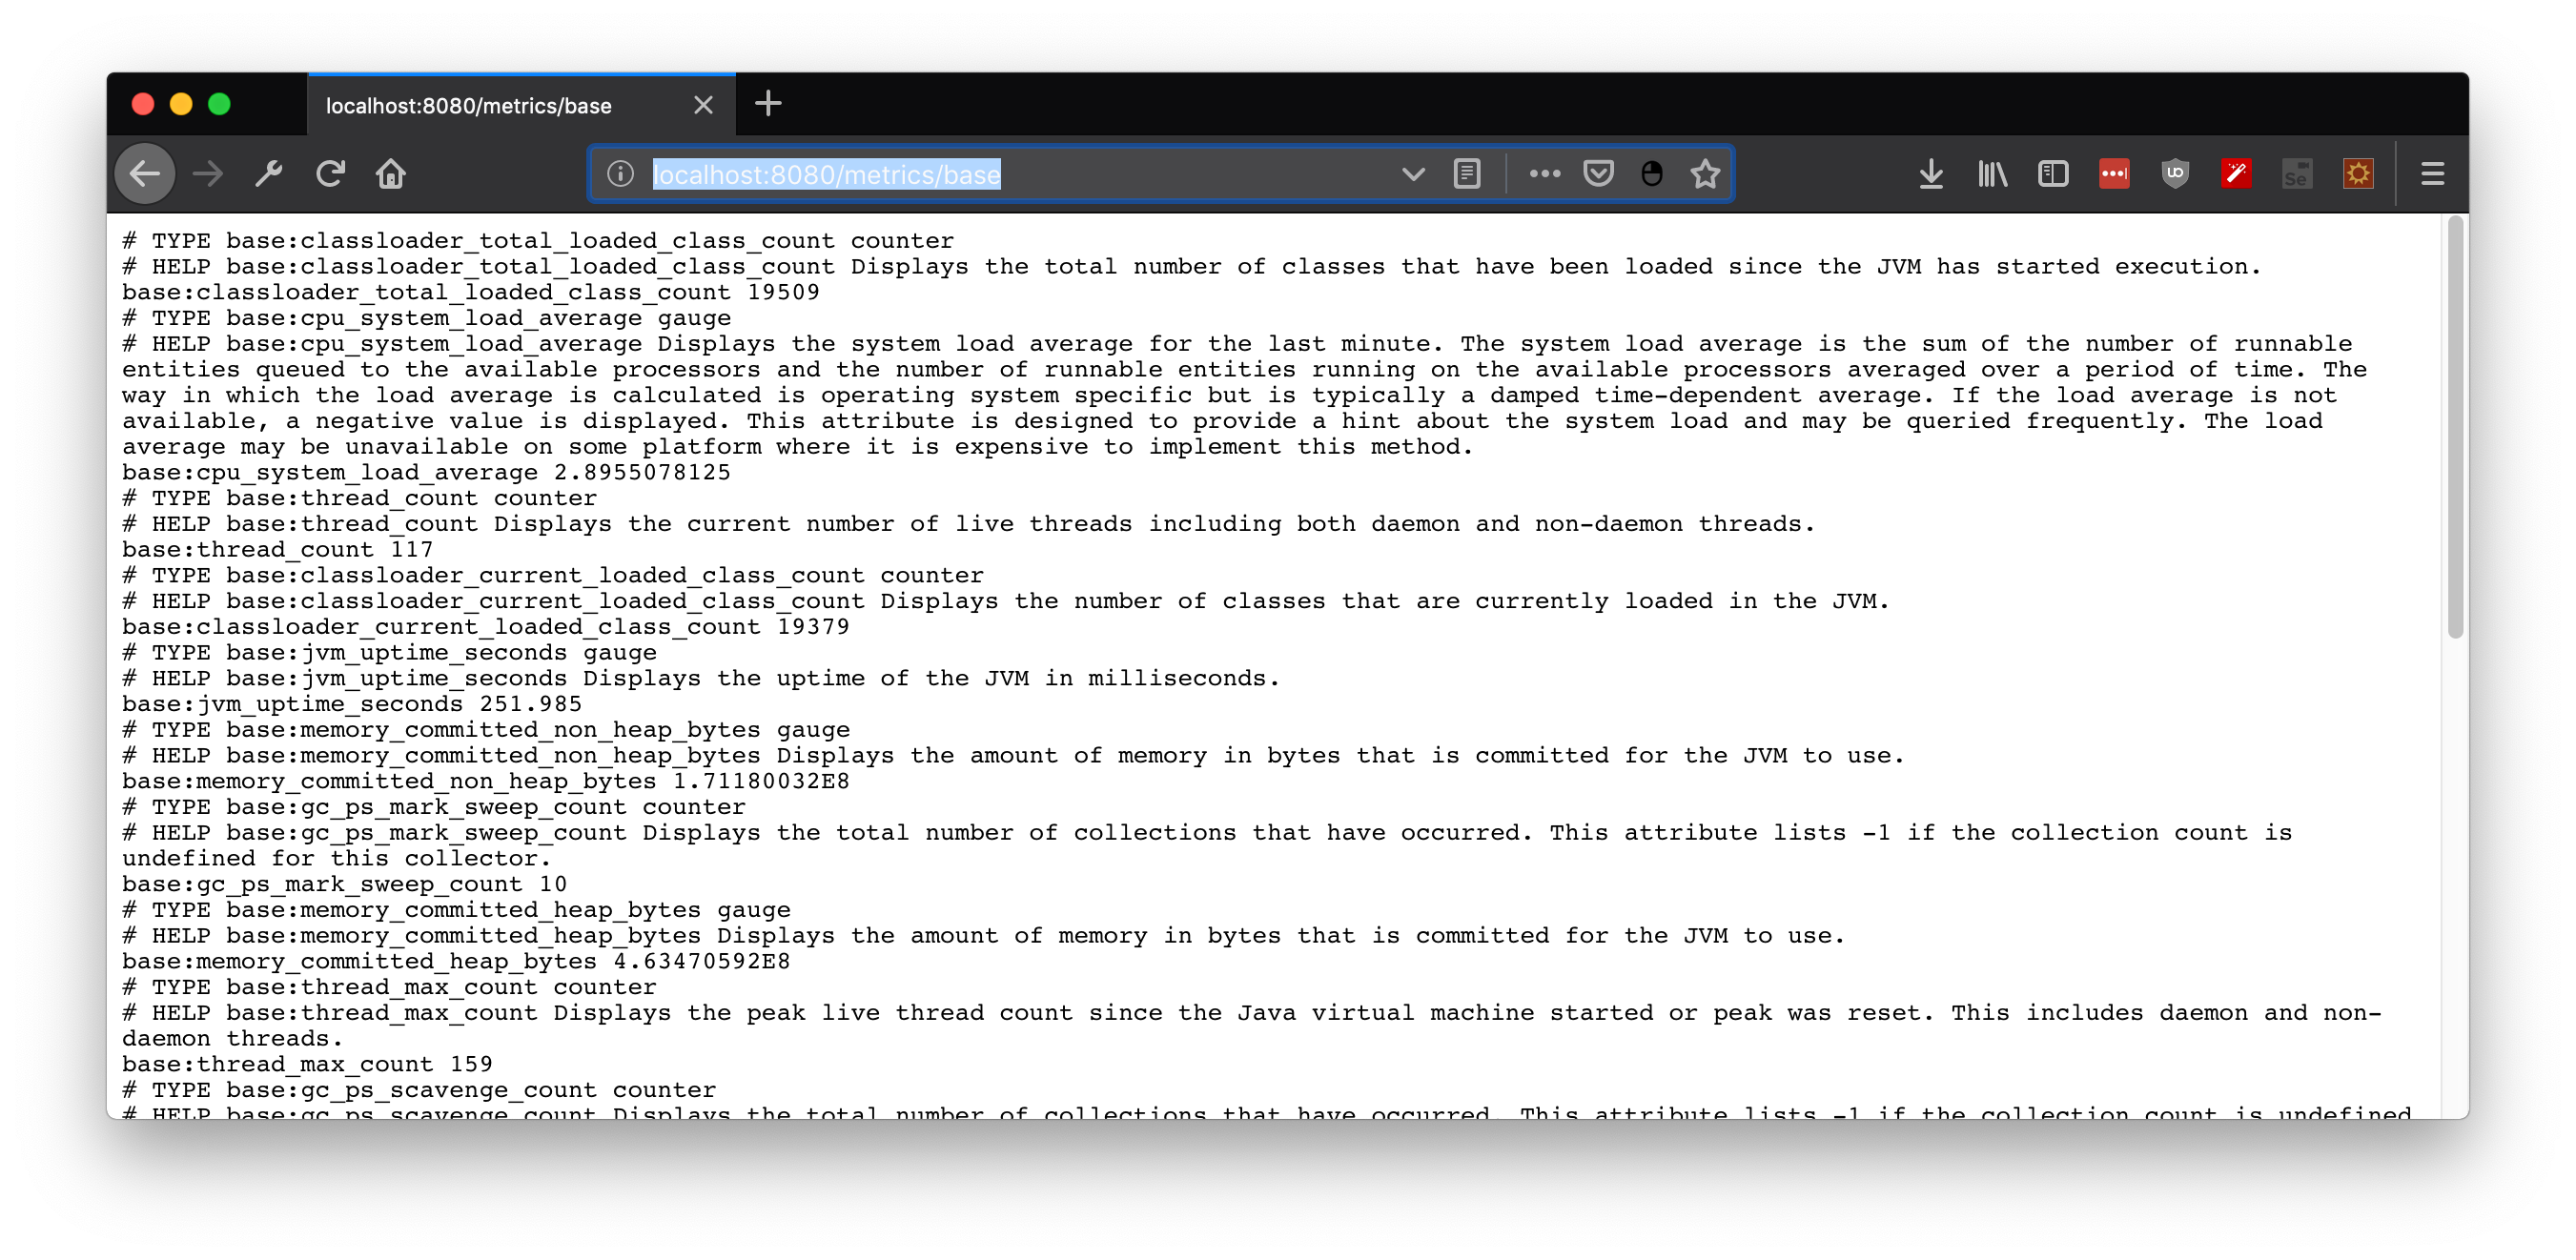
You could switch the Accept request header in order to obtain JSON format, in curl for instance:
curl -H "Accept: application/json" http://localhost:8080/metrics/base
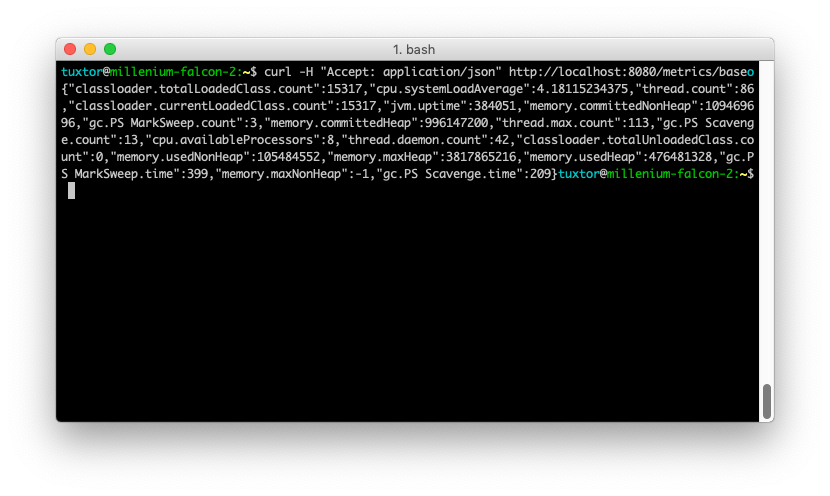
By itself metrics are just an up to date snapshot about platform state. If you wanna compare these snapshots over time, metrics should be retrieved on constant periods of time . . . or you could integrate prometheus which already does it for you. In here I demonstrate some useful querys for JVM state, including heap state, cpu utilization and GC executions:
base:memory_used_heap_bytes
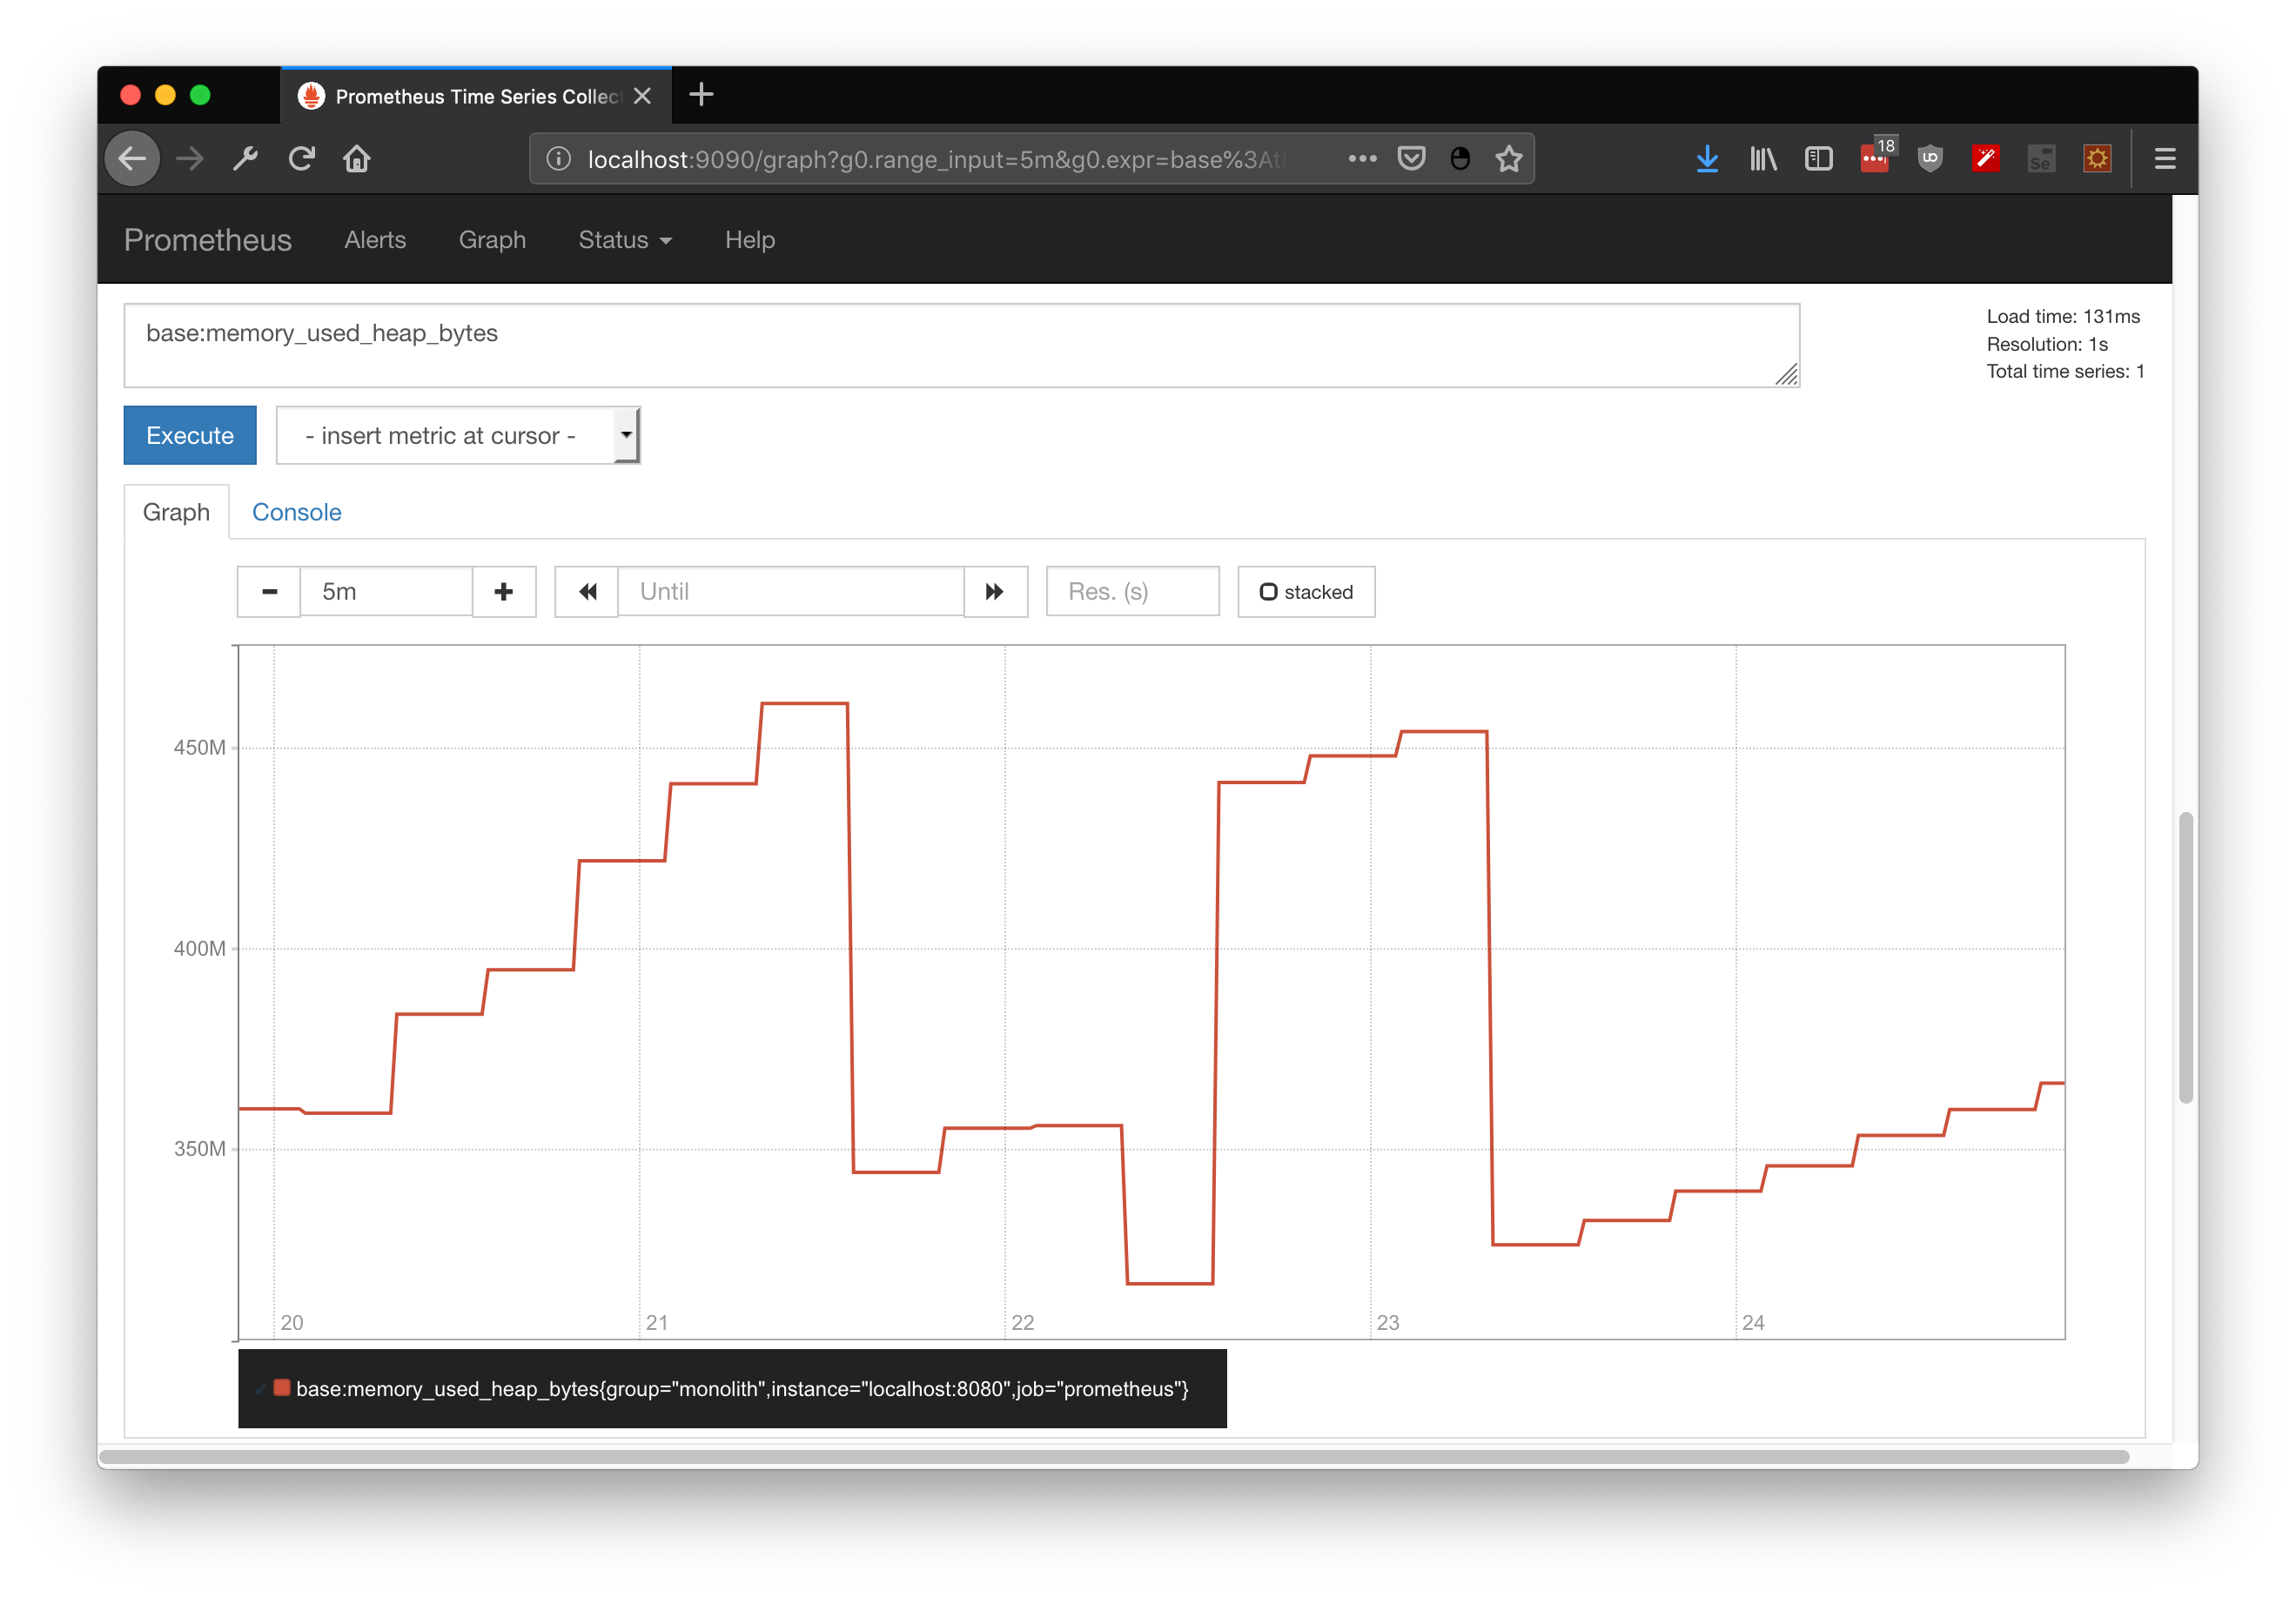
base:cpu_system_load_average
base:gc_ps_mark_sweep_count
Case 1: Metrics for Microservices
In a regular and "full tolerant" request from one microservice to another your communication flow will go through the following decisions:
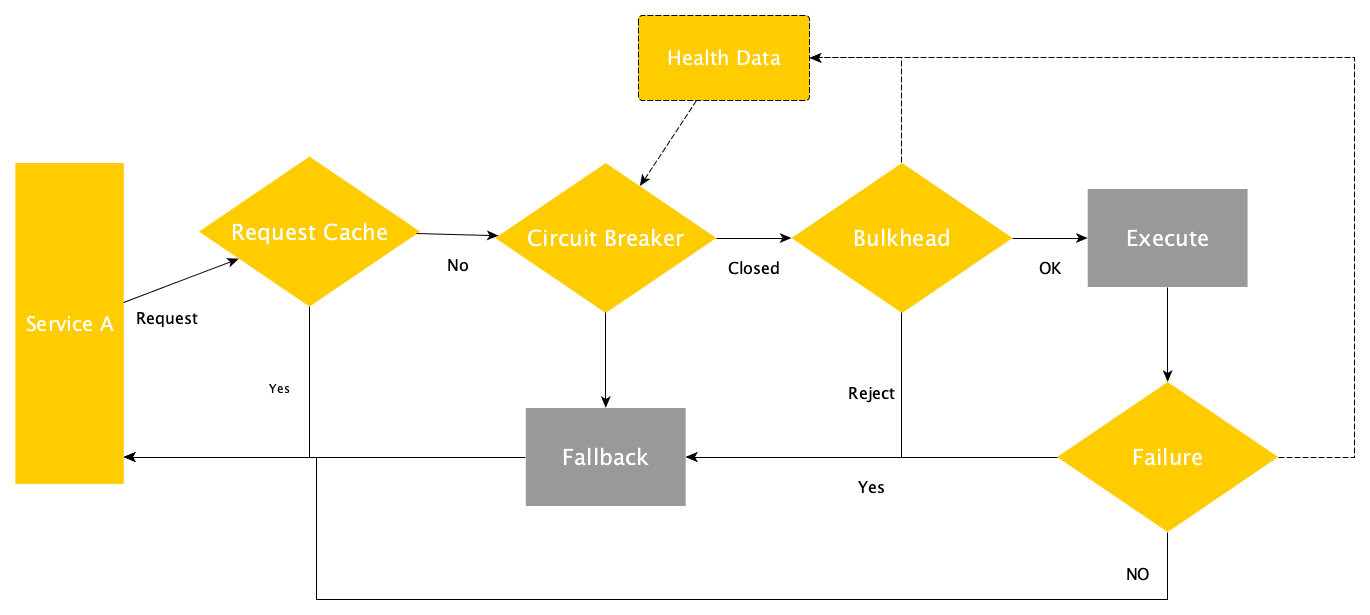
- To use or not a cache to attend the request
- To cut the communication (circuit breaker) and execute a fallback method if a metric threshold has been reached
- To reject the request if a bulkhead has been exhausted and execute a fallback method instead
- To execute a fallback method if the execution reached a failed state
Many of the caveats on developing Microservices come from the fact that you are dealing with distributed computation, hence you should include new patterns that already depend on metrics. If metrics are being generated, with exposure you will gain data for improvements, diagnosis and issue management.
Case 1.1: Counted to retrieve failed hits
The first metric to implement will be Counted, a pretty simple one actually. Its main objective is to increment/decrement its value over time. In this use case the metric is counting how many times the service reached the fallBack alternative by injecting it directly on a JAX-RS service:
@Inject
@Metric
Counter failedQueries;
...
@GET
@Path("/{id:[a-z]*[0-9][0-9]*}")
@Fallback(fallbackMethod = "findByIdFallBack")
@Timeout(TIMEOUT)
public Response findById(@PathParam("id")
final String imdbId) {
...
}

public Response findByIdFallBack(@PathParam("id")
final String imdbId) {
	...
	failedQueries.inc();
}
After simulating a couple of failed queries over OMDB database (no internet :) ) the metric application:com_nabenik_omdb_rest_omdb_endpoint_failed_queries shows how many times my service has invoked the fallback method:
Case 1.2: Gauge to create your own metric
Although you could depend on simple counters to describe the state of any given service. With gauge you could create your own metric . . . like a dummy metric to display 100 or 50 depending on odd/even random number:
@Gauge(unit = "ExternalDatabases", name = "movieDatabases", absolute = true)
public long getDatabases() {
	int number = (int)(Math.random() * 100);
	int criteria = number % 2;

	if(criteria == 0) {
		return 100;
	}else {
		return 50;
	}
}
Again, you could search for the metric at prometheus, specifically application:movie_databases_ExternalDatabases
Case 1.3: Metered to analyze request totals
Are you charging your API per request? Don't worry you could measure the usage rate with @Metered.
@Metered(name = "moviesRetrieved",
	unit = MetricUnits.MINUTES,
	description = "Metrics to monitor movies",
	absolute = true)
public Response findExpandedById(@PathParam("id") final Long id)
In this practical use case 500 +/- requests where simulated over a one minute period. As you could observe from the metric application:movies_retrieved_total the stress test from JMeter and Prometheus show the same information:
Case 1.4: Timed to analyze your response performance
If used properly, @Timed will give you information about requests performance over time units.
@Timed(name = "moviesDelay",
	description = "Metrics to monitor the time for movies retrieval",
	unit = MetricUnits.MINUTES,
	absolute = true)
public Response findExpandedById(@PathParam("id") final Long id)
By retrieving the metric application:movies_delay_rate_per_second its observable that requests take more time to complete at the end of the stress test (as expected with more traffic, less bandwidth and more time to answer):
Case 1.5: Histogram to accumulate useful information
As described in Wikipedia, an Histogram is an accurate representation of the distribution of numerical data. Hence we could create our own distribution by manipulating directly the metrics API with any given data, like global attendees:
@Inject
MetricRegistry registry;

@POST
@Path("/add/{attendees}")
public Response addAttendees(@PathParam("attendees") Long attendees) {
	Metadata metadata =
	new Metadata("matrix attendees",
	MetricType.HISTOGRAM);
	Histogram histogram =
	registry.histogram(metadata);
	histogram.update(attendees);
	return Response.ok().build();
}
And as any distribution, we could get the mins, max, average and values per quantile:
Book Review: Best Developer Job Ever! by Bruno Souza
22 August 2018

General information
- Pages: 95
- Published by: Amazon Digital Services LLC
- Release date: july 2018
About the author
I should start this review with a personal comment about the author, Bruno as many Java developers know is one of the most influential leaders in the Java community, being in my case one of the people that adviced me to create a Duke's Choice Award winner project. Hence when he announced the release of his developers advisory book, It went directly to my reading list.
About the book
Different from some motivational books that I've read, this book is focused in just one topic with a practical approach:
How do I improve my professional carreer as software developer?
For a regular book reader it will be a very short book, it took me 3 hours to complete the book from start to end.
The book is divided in five main sections:
- Get clarity on your strengths
- Define your objectives
- (How to) Expand your network
- Promote yourself (in the right way)
- Get quality interviews
From reading just the section titles, readers could be tempted to guess that this book is focused on boosting any professional carreer, however each section and advice is tailored to IT following an evolutive approach:
- Any advice starts with an argumentative step, presenting diverse paths to reach the same professional objective in IT and specially in software development
- After argumentation and based in author's real world experience, some advices are presented to choose the best path and take advantage of it in a productive way
- Finally, some tools, tips and techniques are presented and complemented with various success histories to validate the tips (whick I must say, I know them to be true)
Room for improvement
The main caveat for this book is that isn't available in other languages. I also noticed that despite presenting many usefull advices, it lacks of some diagrams to re-read the tips and act also as a developers carreer manual.
For the non-casual readers, the writting style could be interpreted as too informal or not so literary. As is, the book is written as an informal conversation between peers and it's a little bit repetitive while trying to emphasize some important points. It depends on readers background.
Who should read this book?
- Any IT professional, specialy software developers
- IT recruiters, it will give serious advices of how software development world works
To finish the review, I think that the following excerpt contains the spirit of the book
People can be givers or takers. The givers come in and bring things others can benefit from while the takers take more than they give and ultimately drag the network down by trying to benefit themselves. That’s why givers tend to grow more than takers or matchers.
Notes on Java EE support for NetBeans 9
30 July 2018
Today one of my favourite open source projects got a major release, now under Apache Foundation, welcome back NetBeans!.
The @TheASF @NetBeans community is proud to announce the 1st official release of @TheASF @NetBeans (incubating): https://t.co/GJLsExeWXO Especially for devs, users, and students of JDK 8, 9, and 10. 100% free and open source and we welcome pull requests: https://t.co/AT39k8NCnO pic.twitter.com/Ae70AyqiGp
— Apache NetBeans (incubating) (@netbeans) July 29, 2018
In this line, I think that the most frequent question since beta release is:
What about Java EE/C++/PHP/JavaME . . .? You name it
Quick response:
First source code donation to Apache includes only base NetBeans platform modules plus Java SE support
Long response:
Please see Apache Foundation official statement.
Does it mean that I won't be able to develop my Java EE application on NetBeans 9
Short answer: No
Long answer: Currently Oracle already did a second donation, where most of NetBeans modules considered as external are included, as Apache statement suggests we could expect these modules on future NetBeans releases.
Is it possible to enable Java EE support in NetBeans 9?
Considering that NetBeans has been modular since . . . ever, we could expect support for old modules in the new NetBeans version. As a matter of fact, this is the official approach to enable Java EE support on NetBeans 9, by using kits.
Hence I've prepared a small tutorial to achieve this. This tutorial is focused on MacOS but steps should be exactly the same for Linux and Windows. To show some caveats, I've tested two app server over Java 8 and Java 10.
Downloading NetBeans 9.0
First, you should download NetBeans package from official Apache Mirrors, at this time distributions are only available as .zip files.
After download, just uncompress the .zip file
unzip incubating-netbeans-java-9.0-bin.zip
You should find a netbeans executable at bin/ directory, for Unix:
cd netbeans
bin/netbeans
Whit this you would be able to run NetBeans 9. By default, NetBeans will run on the most up-to date JVM available at system.
Enabling Java EE support
To install Java EE support you should enable also NetBeans 8.2 update center repository.
First go to Tools > Plugins > Settings.
Second, add a new update repository:
http://updates.netbeans.org/netbeans/updates/8.2/uc/final/distribution/catalog.xml.gz
Third, search for new plugins with the keyword "Kit", as the name suggests, these are plugins collections for specific purposes
From experience I do recommend the following plugins:
- HTML5 Kit
- JSF
- SOAP Web Services
- EJB and EAR
- RESTful Web Services
- Java EE Base
Restart the IDE and you're ready to develop apps with Java EE :).
Test 1: Wildfly 13
To test NetBeans setup, I added a new application server and ran a recent Java EE 8 REST-CRUD application, from recent jEspañol presentation (in Spanish).
You have to select WildFly Application Server
As WildFly release notes suggests if you wanna Java EE 8 support, you should choose standalone-ee8.xml as domain configuration.
Domain configuration will be detected by NetBeans 9
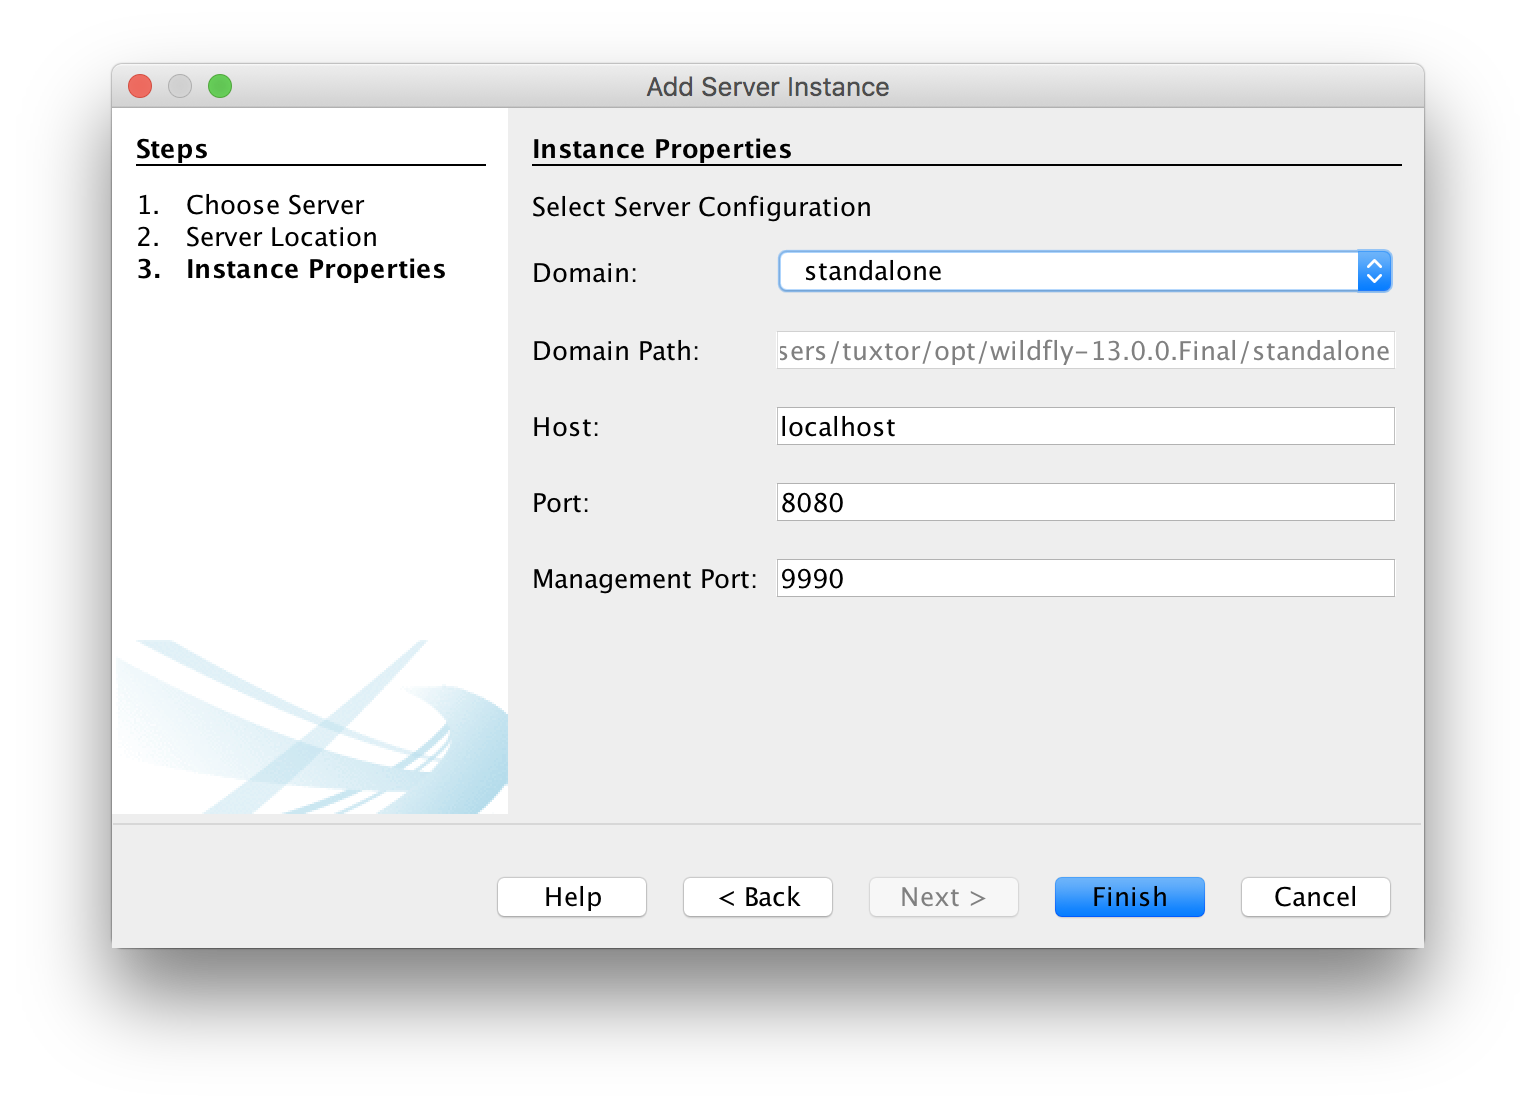
WildFly team has been working on Java 9 and 10 compatibility, hence application ran as expected delivering new records from in-memory database.
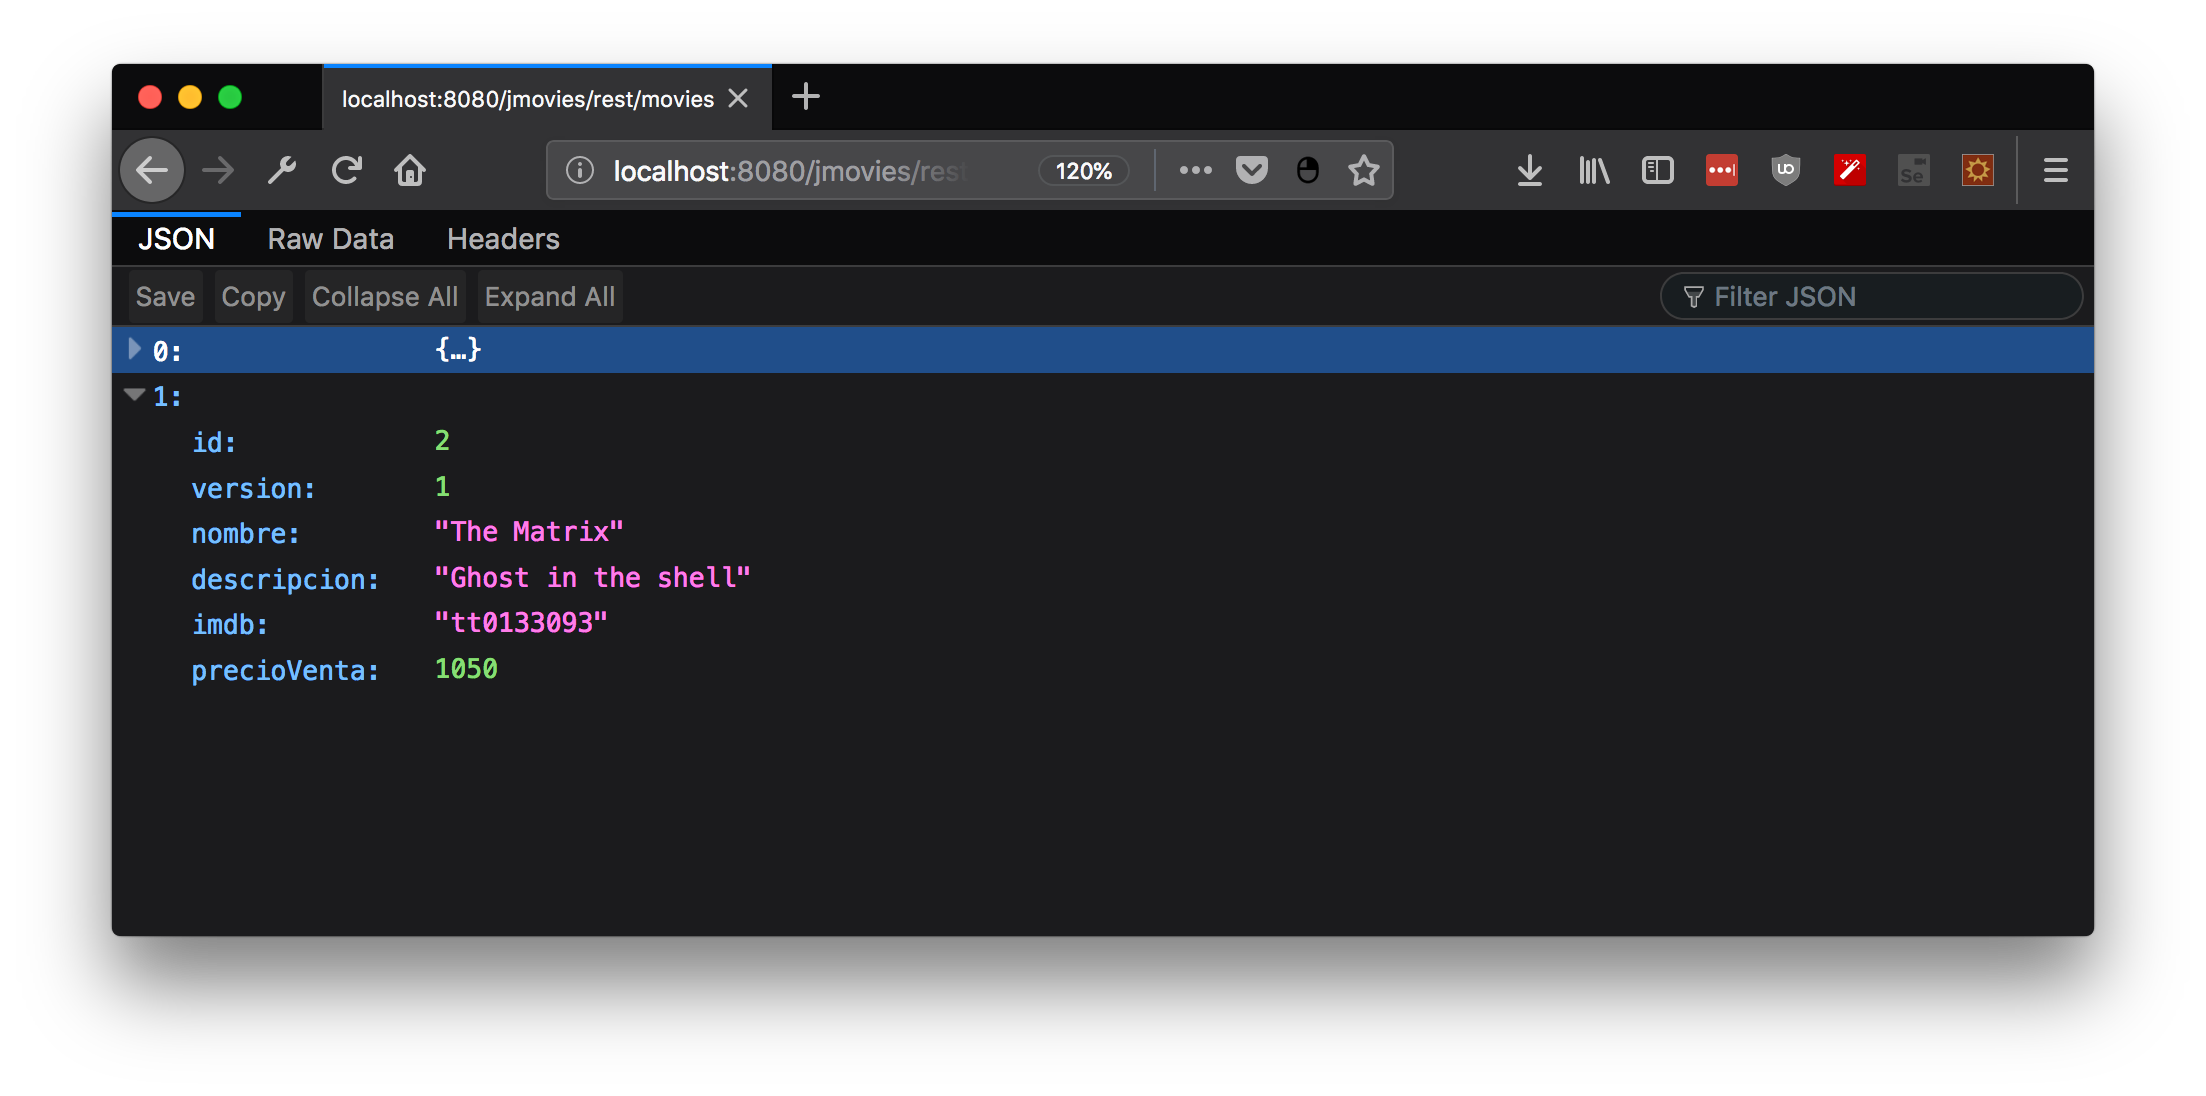
Test 2: Glassfish 5 and Payara 5 on Java 10 (NetBeans) and Java 8 (App server platform)
To test vanilla experience, I tried to connect Payara and Glassfish 5 app server, as in the case of WildFly, configuration is pretty straight forward:
You have to select Payara Application Server
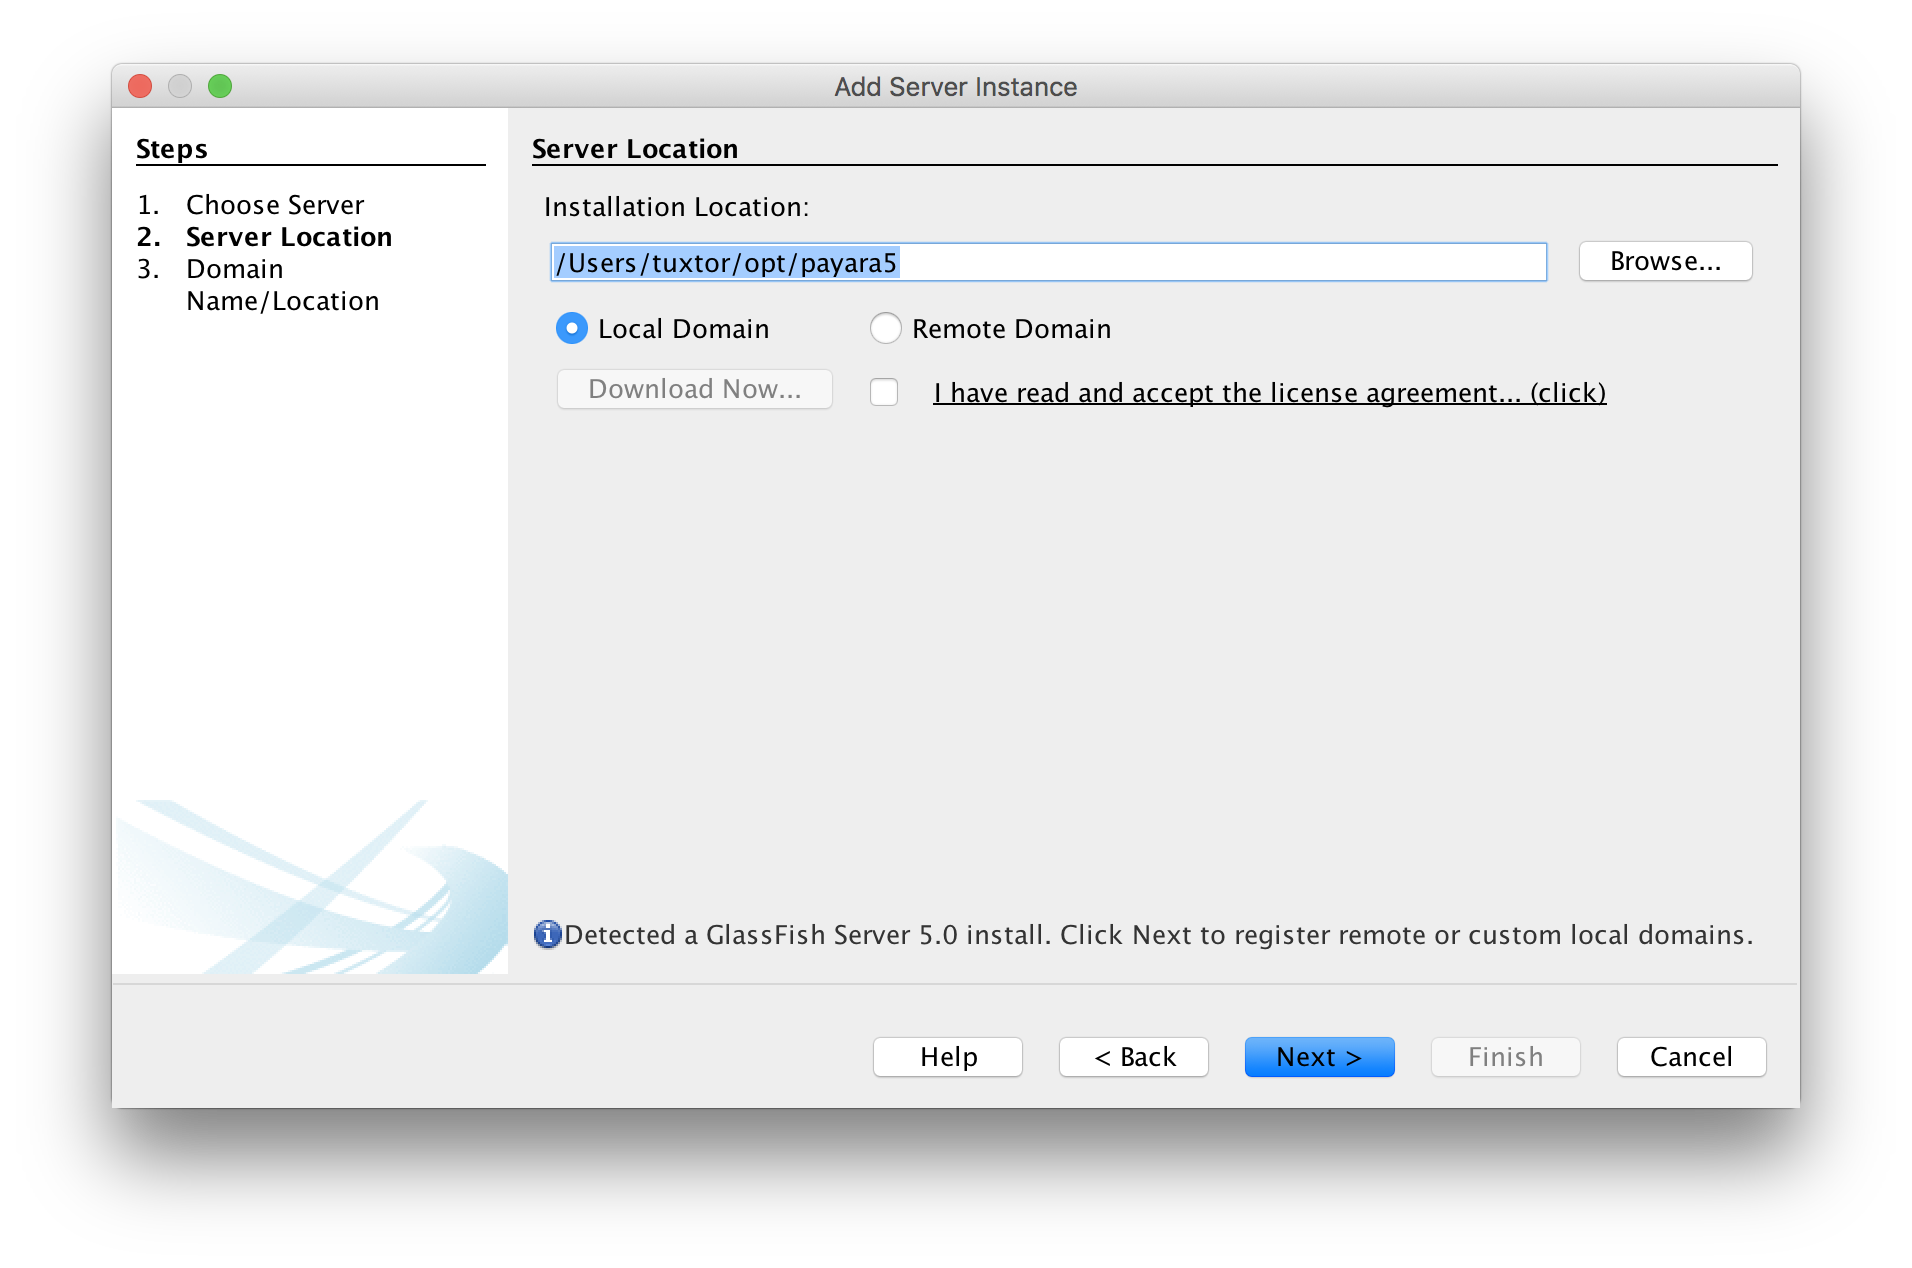
Domain 1 default configuration should be ok
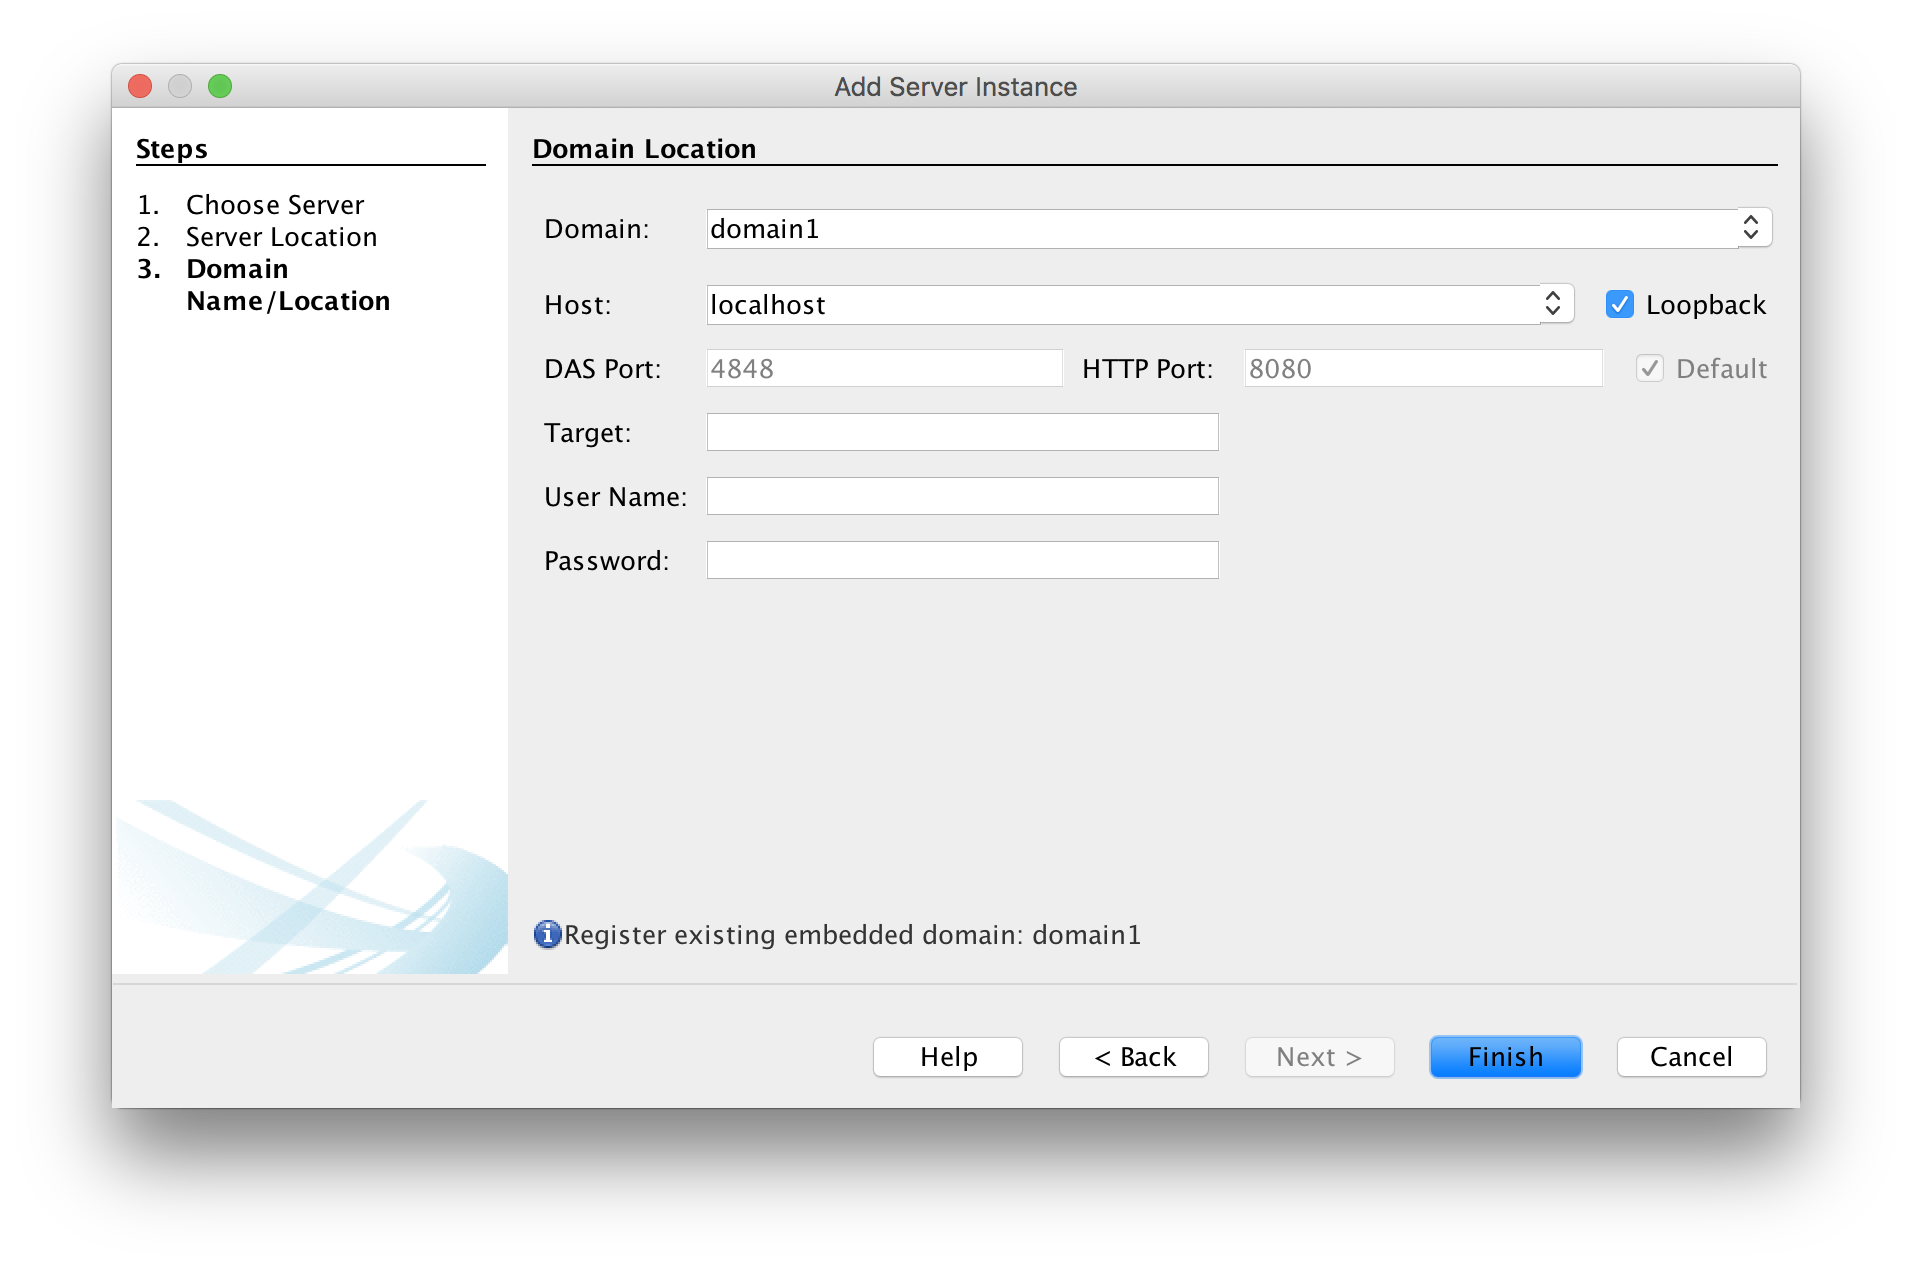
Since Payara and Glassfish only support Java 8 (Java 11 support is on the roadmap) you have to create a new platform with Java 8. Go to Tools -> Java Platforms and click on Add Platform
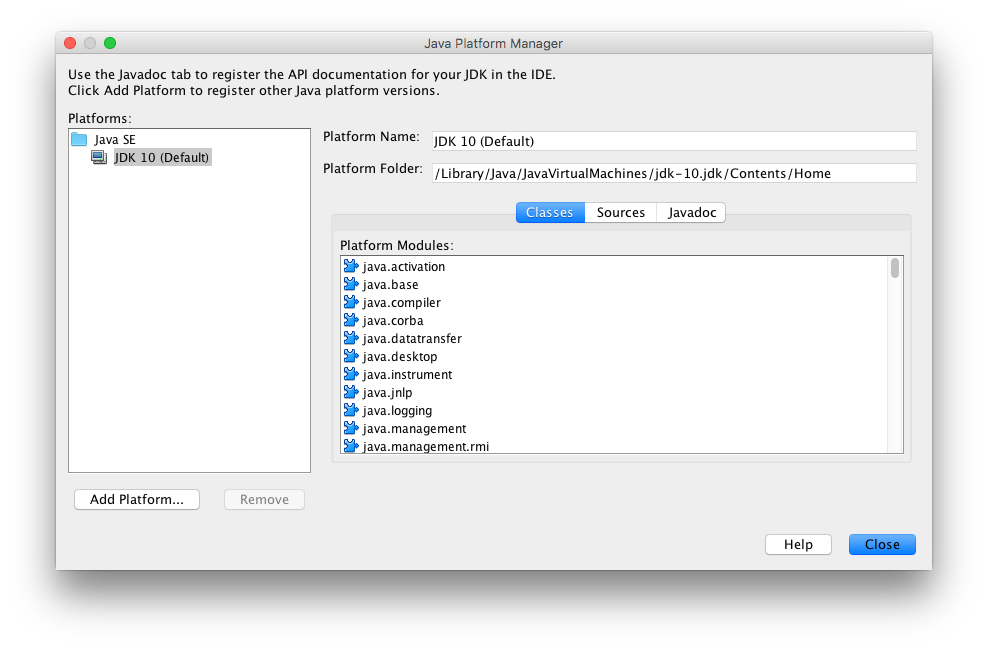
Select a new Java SE Platform
Pick the home directory for Java 8
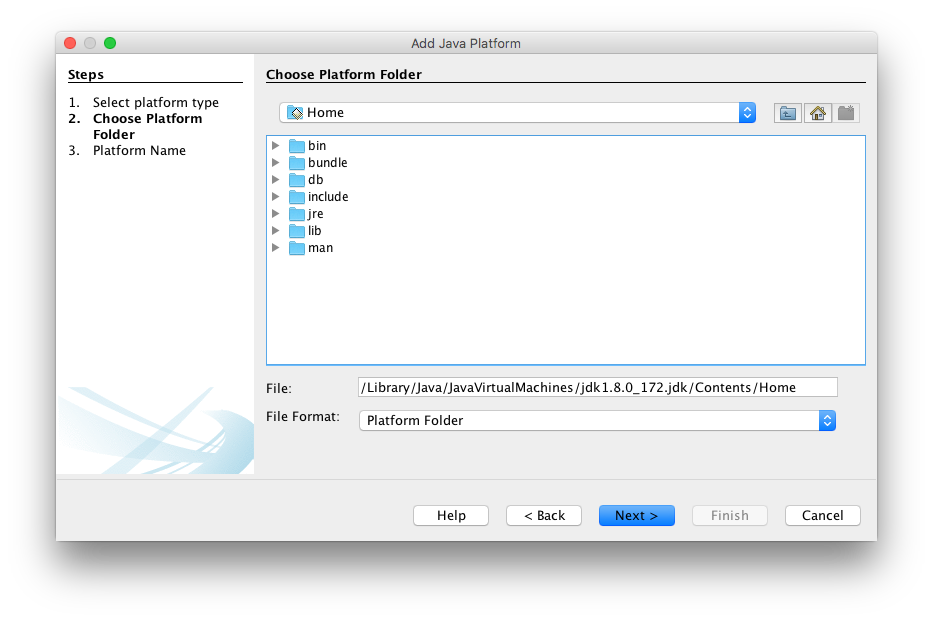
Finally, go to server properties and change Java Platform
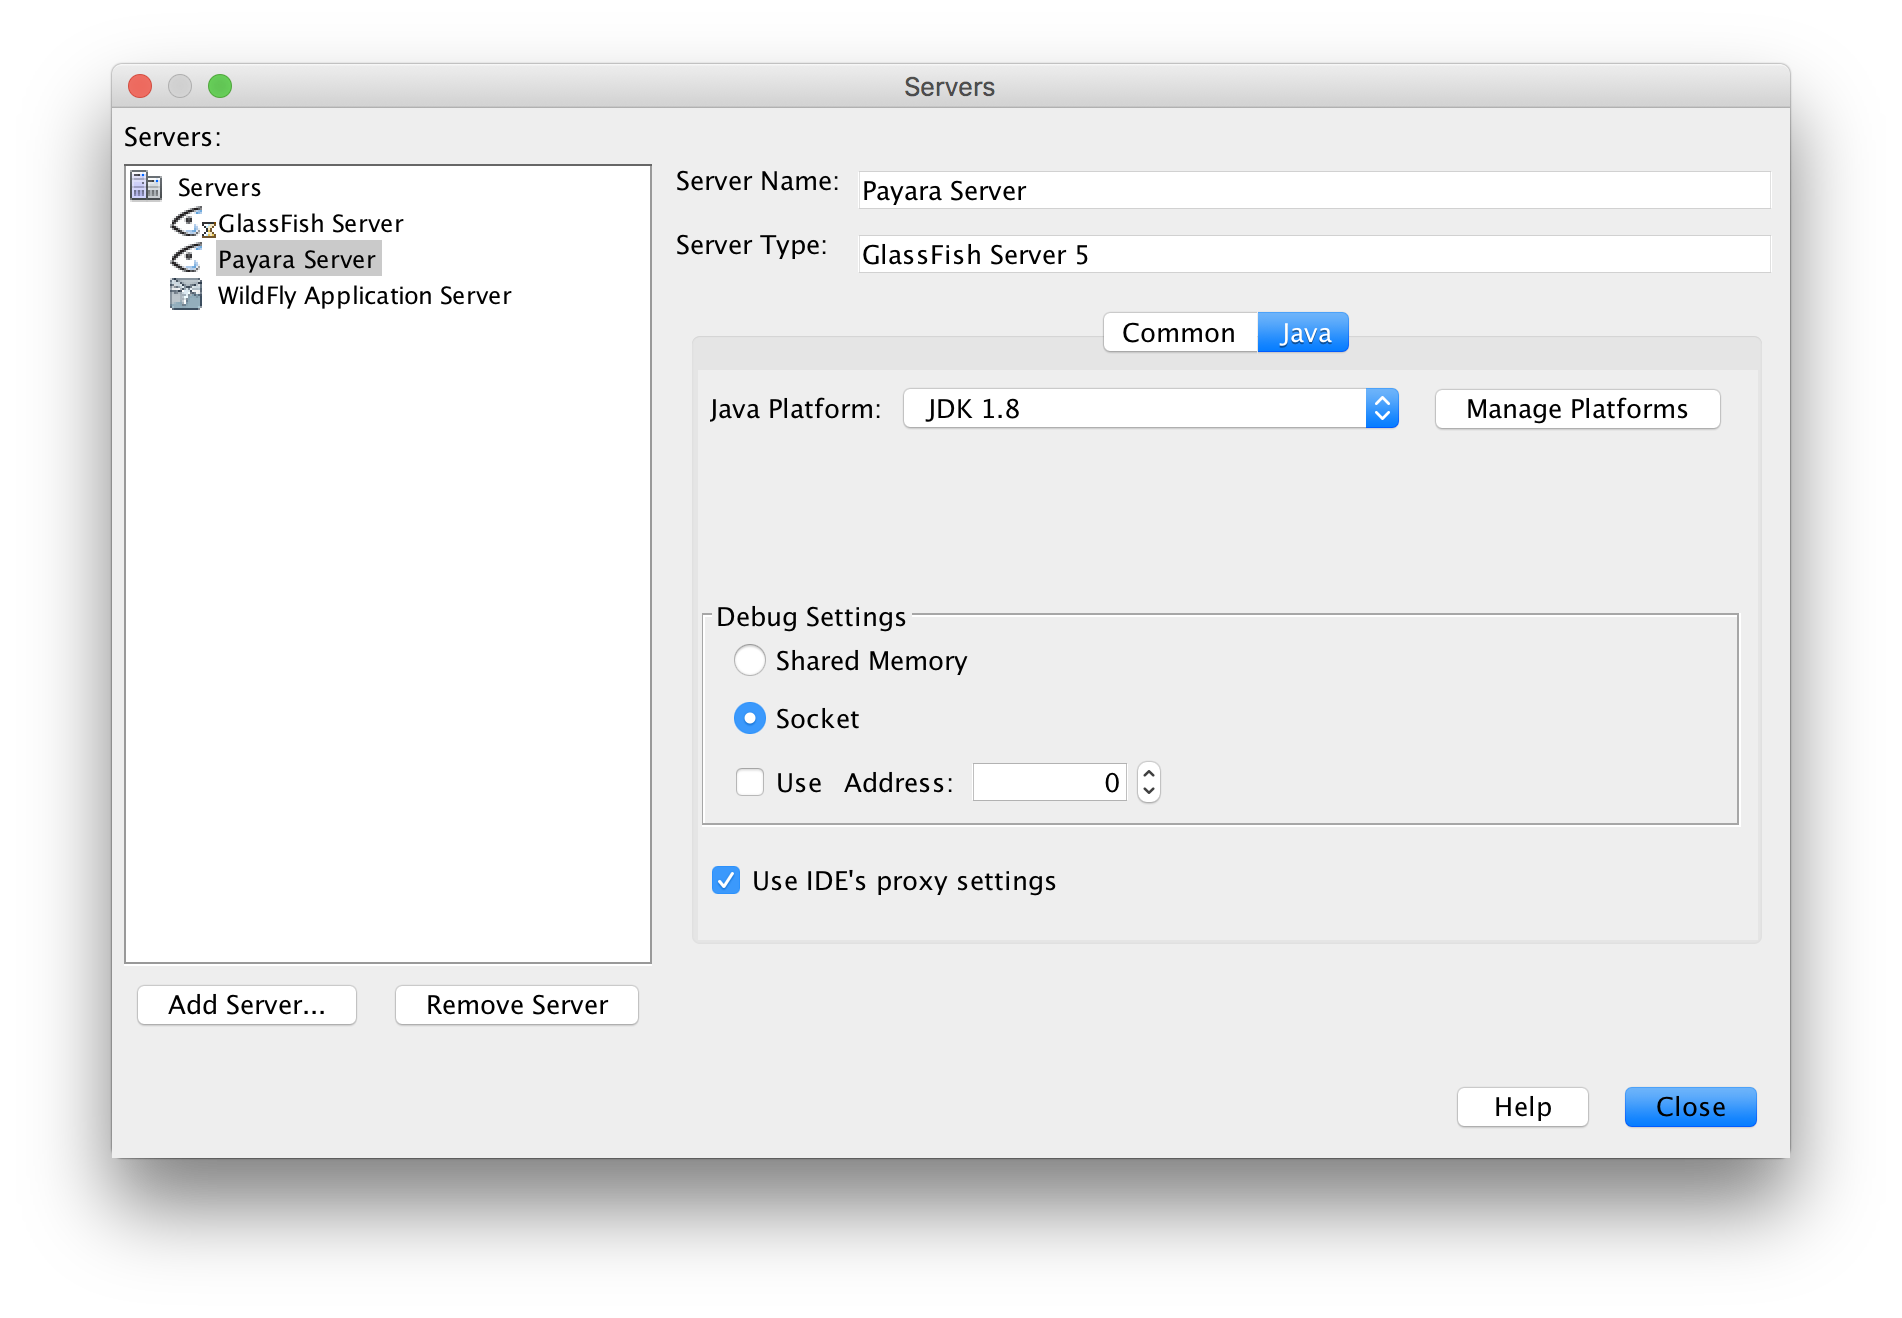
At this time, it seem that NetBeans should be running on Java 8 too, otherwhise you won't be able to retrieve server's configuration and logs, there is a similar report on Eclipse Plugin.
Test 3: Glassfish 5 and Payara 5 on Java 8 (NetBeans) and Java 8 (App server platform)
Finally, I configured NetBeans to use JDK 8 as NetBeans JDK, for this, you sould edit etc/netbeans.conf file and point the netbeans_jdkhome variable to JDK 8, since I'm using jenv to manage JVM environments the right value is netbeans_jdkhome="/Users/tuxtor/.jenv/versions/1.8"
With this NetBeans 9 is able to run Payara 5 and Glassfish 5 as expected:
I'm Still not sure about TomEE, OpenLiberty, WebSphere and WebLogic, but it seems like it would be a matter of hacking a litle bit on JDK versions.
Long live to NetBeans and Jakarta EE!
Testing JavaEE backward and forward compatibility with Servlet, JAX-RS, Batch and Eclipse MicroProfile
18 June 2018
One of the most interesting concepts that made Java EE (and Java) appealing for the enterprise is its great backward compatibility, ensuring that years of investment in R&D could be reused in future developments.
Neverthless one of the least understood facts is that Java EE in the end is a set of curated APIs that could be extendend and improved with additional EE-based APIs -e.g Eclipse MicroProfile, DeltaSpike- and vendor-specific improvements -e.g. Hazelcast on Payara, Infinispan on Wildfly-.
In this article I'll try to elaborate a reponse for a recent question in my development team:
Is it possible to implement a new artifact that uses MicroProfile API within Java EE 7? May I use this artifact also in a Java EE 8 Server?
To answer this question, I prepared a POC to demonstrate Java EE capabilities.
Is Java EE backward compatible? Is it safe to assume a clean migration from EE 7 to EE 8?
One of the most pervasive rules in IT is "if ain't broke, don't fix it", however the broke is pretty relative in regards of security, bugs and features.
Commonly, security vunlerabilities and regular bugs are patched through vendor specific updates in Java EE, retaining the feature compatibility through EE API level, hence this kind of updates are considered safer and should be applied proactively.
However, once a new EE versión is on the streets, each vendor publish it's product calendar, being responsable of the future updates and it's expected that any Java EE user will update his stack (or perish :) ).
In this line Java EE has a complete set of requrimentes and backward compatibility instructions, for vendors, spec leads and contributors, this is specially important considering that we receive on every version of Java EE:
- New APIs (like Batch in EE 7 or JSON-B in EE 8)
- APIs that simply don't change and are included in the next EE versión (like Batch in EE 8)
- APIs with minor updates (Bean Validation in EE 8)
- APIS with new features and interfaces (reactive client in JAX-RS EE 8)
According to compatibility requirements, if your code retains and implements only EE standard code you receive source-code compatibility, binary compatibility and behaviour compatibility for any application that uses a previous version of the specificiation, at least that's the idea.
Creating a "complex" implementation
To test this assumption I've prepared a POC that implements
- Servlets (updated in EE 8)
- JAX-RS (updated in EE 8)
- JPA (minor update in EE 8)
- Batch (does not change in EE 8)
- MicroProfile Config (extension)
- DeltaSpike Data (extension)
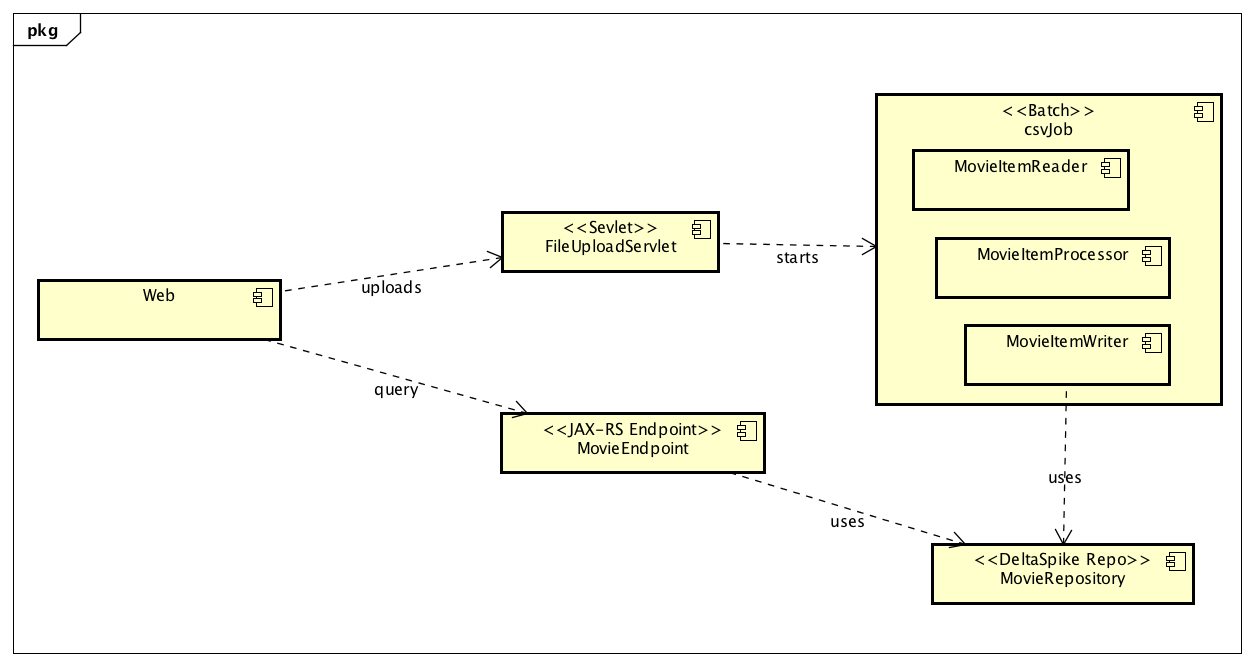
This application just loads a bunch of IMDB records from a csv file in background to save the records in Derby(Payara 4) and H2(Payara 5) using the jdbc/__default JTA Datasource.
For referece, the complete Maven project of this POC is available at GitHub.
Part 1: File upload
The POC a) implements a multipart servlet that receives files from a plain HTML form, b) saves the file using MicroProfile config to retreive the final destination URL and c) Calls a Batch Job named csvJob:
@WebServlet(name = "FileUploadServlet", urlPatterns = "/upload")
@MultipartConfig
public class FileUploadServlet extends HttpServlet {
    @Inject
    @ConfigProperty(name = "file.destination", defaultValue = "/tmp/")
    private String destinationPath;

    @Inject
    private Logger logger;

    protected void doPost(HttpServletRequest request, HttpServletResponse response) throws ServletException, IOException {
        String description = request.getParameter("description");
        Part filePart = request.getPart("file");
        String fileName = Paths.get(filePart.getSubmittedFileName()).getFileName().toString();


        //Save using buffered streams to avoid memory consumption
        try(InputStream fin = new BufferedInputStream(filePart.getInputStream());
                OutputStream fout = new BufferedOutputStream(new FileOutputStream(destinationPath.concat(fileName)))){

            byte[] buffer = new byte[1024*100];//100kb per chunk
            int lengthRead;
            while ((lengthRead = fin.read(buffer)) > 0) {
                fout.write(buffer,0,lengthRead);
                fout.flush();
            }

            response.getWriter().write("File written: " + fileName);

            //Fire batch Job after file upload
            JobOperator jobOperator = BatchRuntime.getJobOperator();
            Properties props = new Properties();
            props.setProperty("csvFileName", destinationPath.concat(fileName));
            response.getWriter().write("Batch job " + jobOperator.start("csvJob", props));
            logger.log(Level.WARNING, "Firing csv bulk load job - " + description );

        }catch (IOException ex){
            logger.log(Level.SEVERE, ex.toString());

            response.getWriter().write("The error");
            response.sendError(HttpServletResponse.SC_BAD_REQUEST);
        }


    }

}
You also need a plain HTML form
<h1>CSV Batchee Demo</h1>
<form action="upload" method="post" enctype="multipart/form-data">
    <div class="form-group">
        <label for="description">Description</label>
        <input type="text" id="description" name="description" />
    </div>
    <div class="form-group">
        <label for="file">File</label>
        <input type="file" name="file" id="file"/>
    </div>

    <button type="submit" class="btn btn-default">Submit</button>
</form>
Part 2: Batch Job, JTA and JPA
As described in Java EE tutorial, typical batch Jobs are composed by steps, these steps also implement a three phase process involving a reader, processor and writer that works by chunks.
Batch Job is defined by using a XML file located in resources/META-INF/batch-jobs/csvJob.xml, the reader-writer-processor triad will be implemented through named CDI beans.
<?xml version="1.0" encoding="UTF-8"?>
<job id="csvJob" xmlns="http://xmlns.jcp.org/xml/ns/javaee"
    xmlns:xsi="http://www.w3.org/2001/XMLSchema-instance"
    xsi:schemaLocation="http://xmlns.jcp.org/xml/ns/javaee http://xmlns.jcp.org/xml/ns/javaee/jobXML_1_0.xsd"
    version="1.0">

    <step id="loadAndSave" >
        <chunk item-count="5">
            <reader ref="movieItemReader"/>
            <processor ref="movieItemProcessor"/>
            <writer ref="movieItemWriter"/>
        </chunk>
    </step>
</job>
MovieItemReader reads the csv file line per line and wraps the result using a Movie object for the next step, note that open, readItem and checkpointInfo methods are overwritten to ensure that the task restarts properly if needed.
@Named
public class MovieItemReader extends AbstractItemReader {

	@Inject
	private JobContext jobContext;

	@Inject
	private Logger logger;

	private FileInputStream is;
	private BufferedReader br;
	private Long recordNumber;

	@Override
	public void open(Serializable prevCheckpointInfo) throws Exception {
		recordNumber = 1L;
		JobOperator jobOperator = BatchRuntime.getJobOperator();
		Properties jobParameters = jobOperator.getParameters(jobContext.getExecutionId());
		String resourceName = (String) jobParameters.get("csvFileName");
		is = new FileInputStream(resourceName);
		br = new BufferedReader(new InputStreamReader(is));

		if (prevCheckpointInfo != null)
			recordNumber = (Long) prevCheckpointInfo;
		for (int i = 0; i < recordNumber; i++) { // Skip until recordNumber
			br.readLine();
		}
		logger.log(Level.WARNING, "Reading started on record " + recordNumber);
	}

	@Override
	public Object readItem() throws Exception {

		String line = br.readLine();

		if (line != null) {
			String[] movieValues = line.split(",");
			Movie movie = new Movie();
			movie.setName(movieValues[0]);
			movie.setReleaseYear(movieValues[1]);

			// Now that we could successfully read, Increment the record number
			recordNumber++;
			return movie;
		}
		return null;
	}

	@Override
	public Serializable checkpointInfo() throws Exception {
	        return recordNumber;
	}
}
Since this is a POC my "processing" step just converts the movie title to uppercase and pauses the thread a half second on each row:
@Named
public class MovieItemProcessor implements ItemProcessor {

  @Inject
  private JobContext jobContext;

	@Override
  public Object processItem(Object obj)
          throws Exception {
      Movie inputRecord =
              (Movie) obj;

      //"Complex processing"
      inputRecord.setName(inputRecord.getName().toUpperCase());
      Thread.sleep(500);

      return inputRecord;
  }
}
Finally each chunk is written on MovieItemWriter using a DeltaSpike repository:
@Named
public class MovieItemWriter extends AbstractItemWriter {

	@Inject
    MovieRepository movieService;

	@Inject
	Logger logger;

    public void writeItems(List list) throws Exception {
        for (Object obj : list) {
        	logger.log(Level.INFO, "Writing " + obj);
            movieService.save((Movie)obj);
        }
    }
}
For reference, this is the Movie Object
@Entity
@Table(name="movie")
public class Movie implements Serializable {

	@Override
	public String toString() {
		return "Movie [name=" + name + ", releaseYear=" + releaseYear + "]";
	}

	private static final long serialVersionUID = 1L;

    @Id
    @GeneratedValue(strategy= GenerationType.AUTO)
    @Column(name="movie_id")
    private int id;

    @Column(name="name")
    private String name;

    @Column(name="release_year")
    private String releaseYear;

    //Getters and setters
Default datasource is configured on resources/META-INF/persistence.xml, note that I'm using a JTA Data Source:
<?xml version="1.0" encoding="UTF-8" standalone="yes"?>
<persistence xmlns="http://xmlns.jcp.org/xml/ns/persistence"
             xmlns:xsi="http://www.w3.org/2001/XMLSchema-instance"
             xsi:schemaLocation="http://xmlns.jcp.org/xml/ns/persistence http://xmlns.jcp.org/xml/ns/persistence/persistence_2_1.xsd"
             version="2.1">

    <persistence-unit name="batchee-persistence-unit" transaction-type="JTA">
        <description>BatchEE Persistence Unit</description>
        <jta-data-source>jdbc/__default</jta-data-source>
        <exclude-unlisted-classes>false</exclude-unlisted-classes>
		 <properties>
		      <property name="javax.persistence.schema-generation.database.action" value="drop-and-create"/>
		      <property name="javax.persistence.schema-generation.scripts.action" value="drop-and-create"/>
		      <property name="javax.persistence.schema-generation.scripts.create-target" value="sampleCreate.ddl"/>
		      <property name="javax.persistence.schema-generation.scripts.drop-target" value="sampleDrop.ddl"/>
		    </properties>
    </persistence-unit>
</persistence>
To test JSON marshalling throug JAX-RS I also implemented a Movie endpoint with GET method, the repository (AKA DAO) is defined by using DeltaSpike
@Path("/movies")
@Produces({ "application/xml", "application/json" })
@Consumes({ "application/xml", "application/json" })
public class MovieEndpoint {

	@Inject
	MovieRepository movieService;

	@GET
	public List<Movie> listAll(@QueryParam("start") final Integer startPosition,
			@QueryParam("max") final Integer maxResult) {
		final List<Movie> movies = movieService.findAll();
		return movies;
	}

}
The repository
@Repository(forEntity = Movie.class)
public abstract class MovieRepository extends AbstractEntityRepository<Movie, Long> {

	@Inject
    public EntityManager em;
}
Test 1: Java EE 7 server with Java EE 7 pom
Since the objective is to test real backward (lower EE level than server) and forward (Micprofile and DeltaSpike extensions) compatibility, first I built and deployed this project with the following dependencies on pom.xml, the EE 7 Pom vs EE 7 Server test is only executed to verify that project works properly:
<dependencies>
        <dependency>
            <groupId>javax</groupId>
            <artifactId>javaee-api</artifactId>
            <version>7.0</version>
            <scope>provided</scope>
        </dependency>
        <dependency>
            <groupId>org.eclipse.microprofile</groupId>
            <artifactId>microprofile</artifactId>
            <version>1.3</version>
            <type>pom</type>
            <scope>provided</scope>
        </dependency>
        <dependency>
            <groupId>org.apache.deltaspike.modules</groupId>
            <artifactId>deltaspike-data-module-api</artifactId>
            <scope>compile</scope>
        </dependency>
        <dependency>
            <groupId>org.apache.deltaspike.modules</groupId>
            <artifactId>deltaspike-data-module-impl</artifactId>
            <scope>runtime</scope>
        </dependency>
        <dependency>
            <groupId>org.apache.deltaspike.core</groupId>
            <artifactId>deltaspike-core-api</artifactId>
            <scope>compile</scope>
        </dependency>
        <dependency>
            <groupId>org.apache.deltaspike.core</groupId>
            <artifactId>deltaspike-core-impl</artifactId>
            <scope>runtime</scope>
        </dependency>
    </dependencies>
    <dependencyManagement>
        <dependencies>
            <dependency>
                <groupId>org.apache.deltaspike.distribution</groupId>
                <artifactId>distributions-bom</artifactId>
                <version>${deltaspike.version}</version>
                <type>pom</type>
                <scope>import</scope>
            </dependency>
        </dependencies>
    </dependencyManagement>
    <build>
        <finalName>batchee-demo</finalName>
    </build>
    <properties>
        <maven.compiler.source>1.8</maven.compiler.source>
        <maven.compiler.target>1.8</maven.compiler.target>
        <deltaspike.version>1.8.2</deltaspike.version>
        <failOnMissingWebXml>false</failOnMissingWebXml>
    </properties>
As expected, the application loads the data properly, here two screenshots taken during batch Job Execution:
Test 2: Java EE 8 server with Java EE 7 pom
To test the real binary compatibility, the application is deployed without changes on Payara 5 (Java EE 8), this Payara release also switches Apache Derby with H2 database.
As expected and according with Java EE compatibility guidelines, the application works flawesly.
To verify assumptions, this is a query launched through SQuirrel SQL:
Test 3: Java EE 8 server with Java EE 8 pom
Finally to enable new EE APIs, a little bit of tweaking is needed on pom.xml, specifically the JavaEE dependency
<dependency>
    <groupId>javax</groupId>
    <artifactId>javaee-api</artifactId>
    <version>8.0</version>
    <scope>provided</scope>
</dependency>
Again, the application just works:
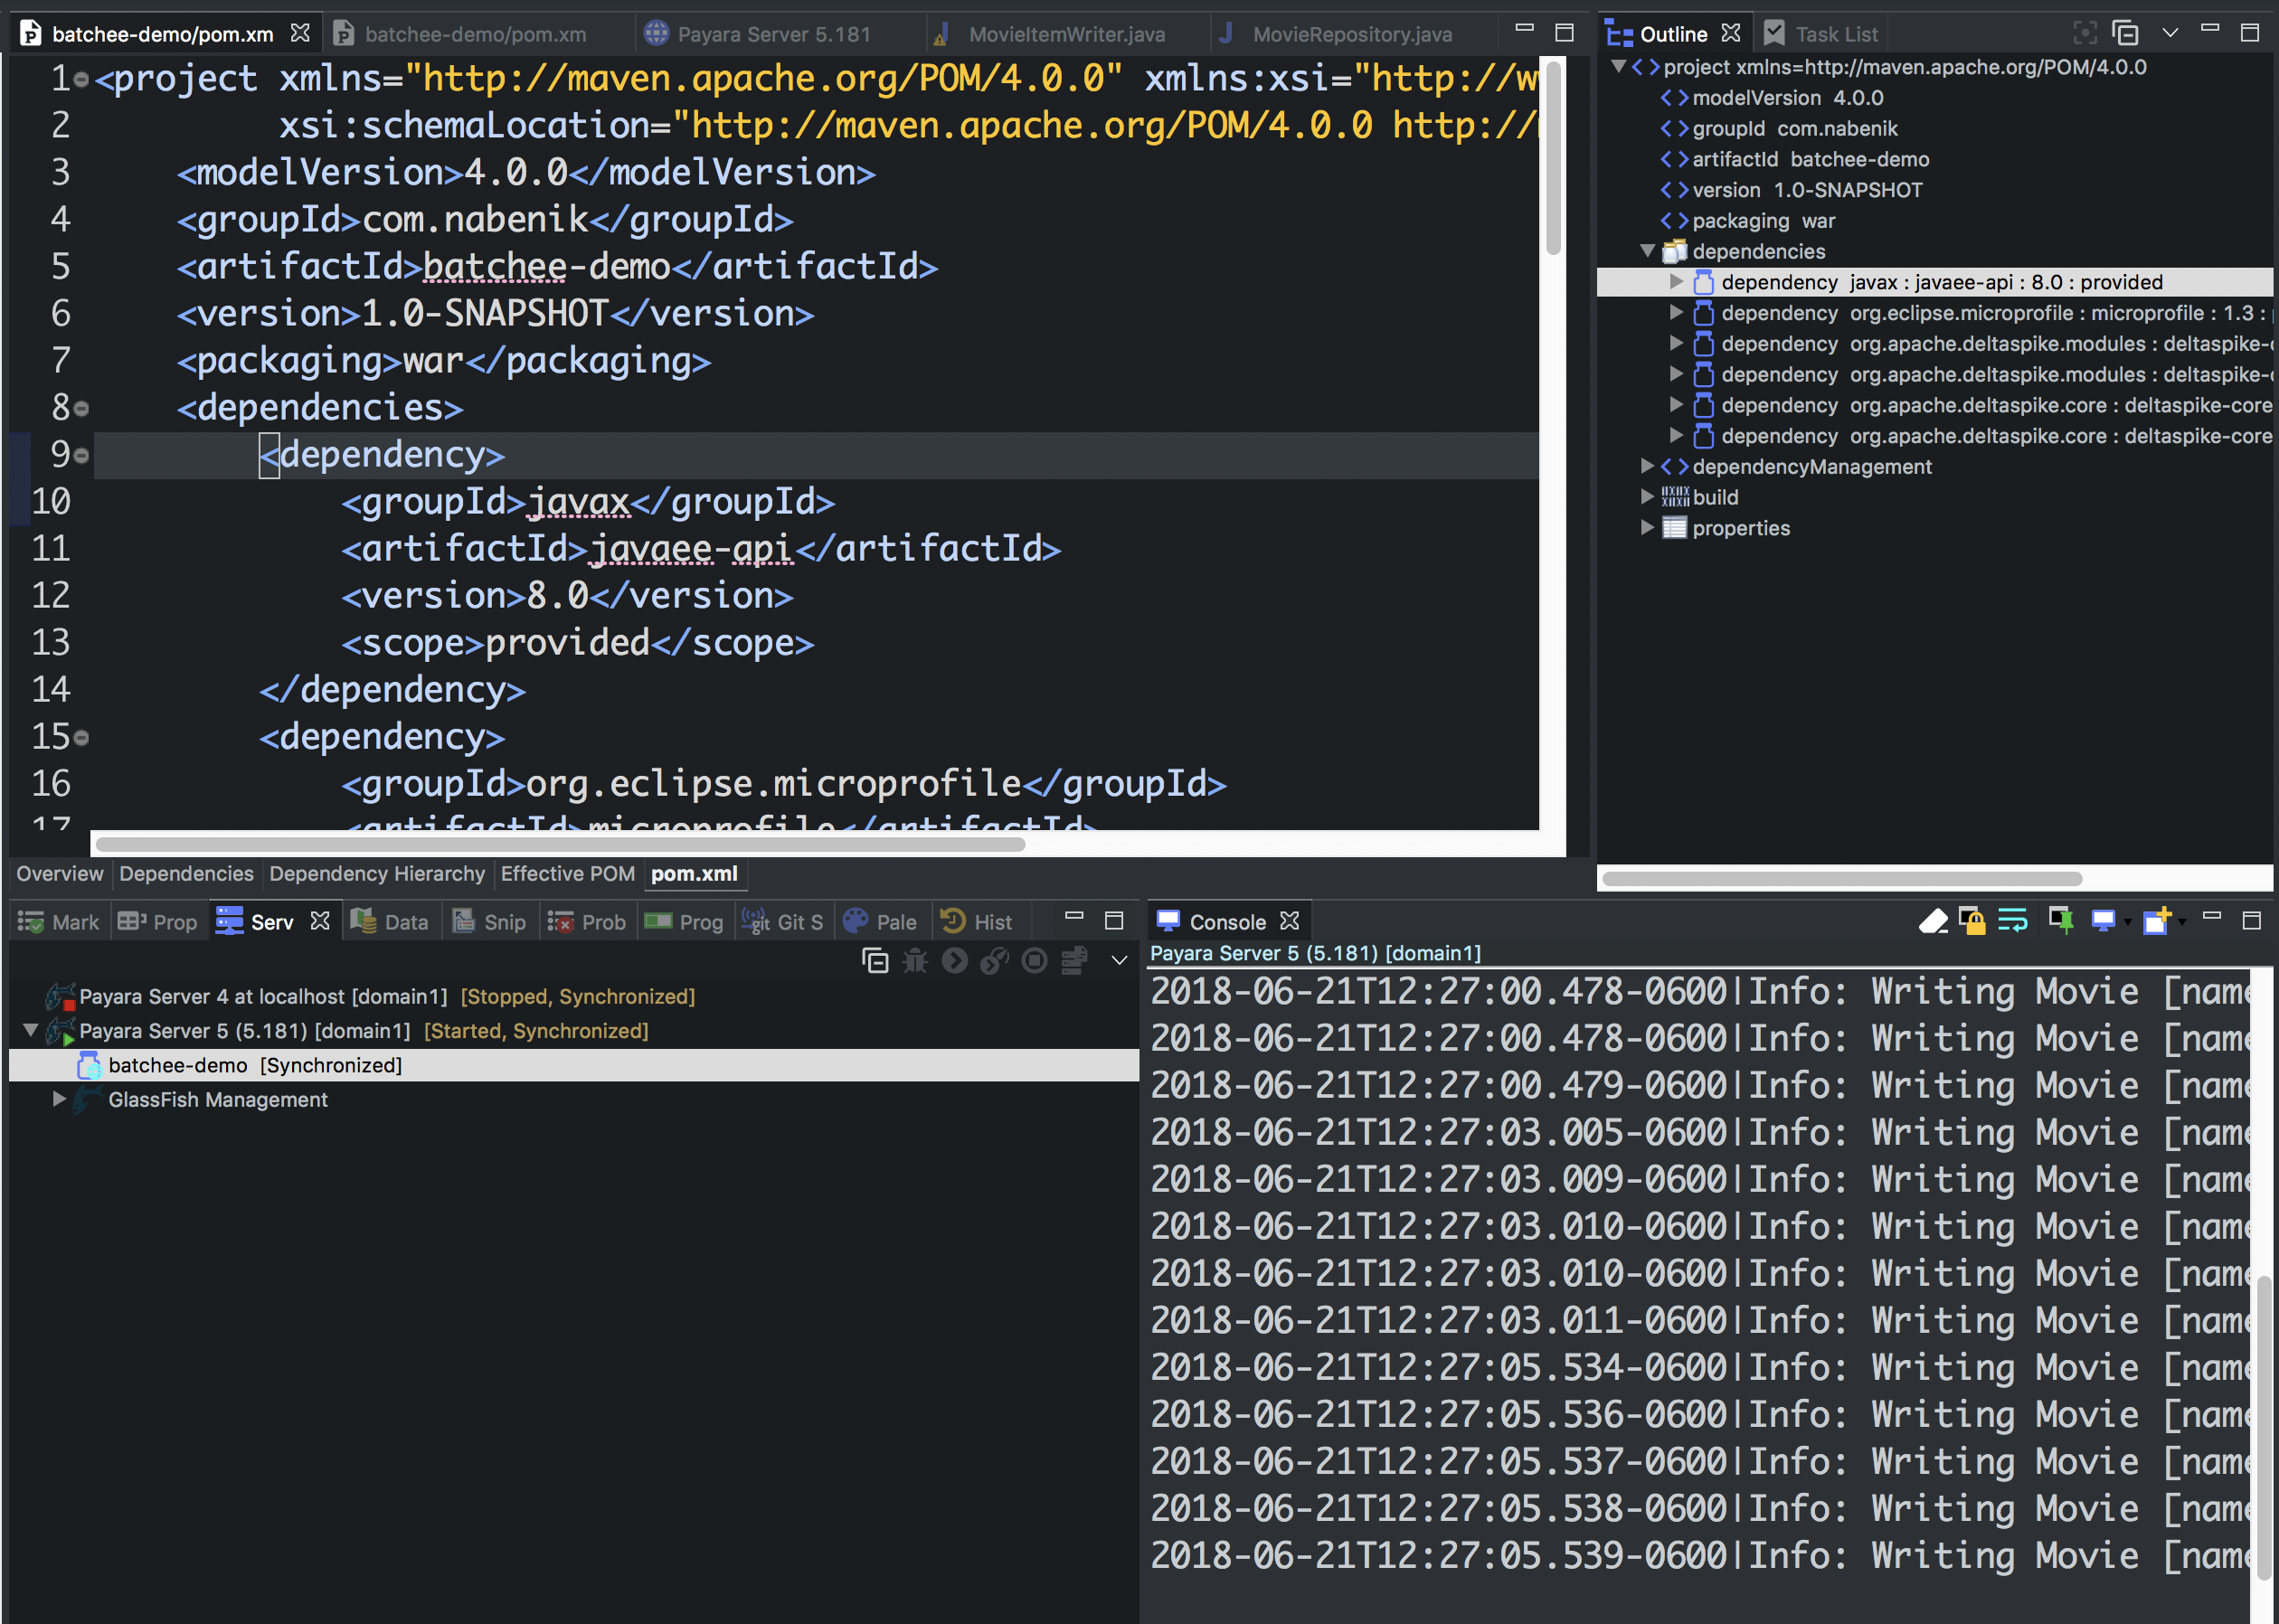
This is why standards matters :).
Getting started with Java EE 8, Payara 5 and Eclipse Oxygen
04 June 2018
Some days ago I had the opportunity/obligation to setup a brand new Linux(Gentoo) development box, hence to make it "enjoyable" I prepared a back to basics tutorial on how to setup a working environment.
Requirements
In order to setup a complete Java EE development box, you need at least:
1- Working JDK installation and environment
2- IDE/text editor
3- Standalone application server if your focus is "monolithic"
Due personal preferences I choose
1- OpenJDK on Gentoo Linux (Icedtea bin build)
2- Eclipse for Java EE developers
3- Payara 5
Installing OpenJDK
Since this is a distribution dependent step, you could follow tutorials on Ubuntu, CentOS, Debian and many more distributions if you need to. At this time, most application servers have Java 8 as target due new Java-LTS version scheme, as in the case of Payara.
For Gentoo Linux you could get a new OpenJDK setup by installing dev-java/icedtea for the source code version and dev-java/icedtea-bin for the precompiled version.
emerge dev-java/icedtea-bin
Is OpenJDK a good choice for my need?
Currently Oracle has plans to free up all enterprise-commercial JDK features. In a near future the differences between OracleJDK and OpenJDK should be zero.
In this line, Red Hat and other big players have been offering OpenJDK as the standard JDK in Linux distributions, working flawlessly for many enterprise grade applications.
Eclipse for Java EE Developers
After a complete revamp of websites GUI, you could go directly to eclipse.org website and download Eclipse IDE.
Eclipse offers collections of plugins denominated Packages, each package is a collection of common plugins aimed for a particular development need. Hence to simplify the process you could download directly Eclipse IDE for Java EE Developers.
On Linux, you will download a .tar.gz file, hence you should uncompress it on your preferred directory.
tar xzvf eclipse-jee-oxygen-3a-linux-gtk-x86_64.tar.gz
Finally, you could execute the IDE by entering the bin directory and launching eclipse binary.
cd eclipse/bin
./eclipse
The result should be a brand new Eclipse IDE.
Payara
You could grab a fresh copy of Payara by visiting payara.fish website.
From Payara's you will receive a zipfile that again you should uncompress in your preferred directory.
unzip payara-5.181.zip
Finally, you could add Payara's bin directory to PATH variable in order to use asadmin command from any CLI. You could achieve this by using ~/.bashrc file. For example if you installed Payara at ~/opt/ the complete instruction is:
echo "PATH=$PATH:~/opt/payara5/bin" >> ~/.bashrc
Integration between Eclipse and Payara
After unzipping Payara you are ready to integrate the app server in your Eclipse IDE.
Recently and due Java/Jakarta EE transition, Payara Team has prepared a new integration plugin compatible with Payara 5. In the past you would also use Glassfish Developer Tools with Payara, but this is not possible anymore.
To install it, simply grab the following button on your Eclipse Window, and follow wizard steps.
In the final step you will be required to restart Eclipse, after that you still need to add the application server. Go to the Servers tab and click create a new server:
Select Payara application server:
Find Payara's install location and JDK location (corresponding to ~/opt/payara5 and /opt/icedtea-bin on my system):
Configure Payara's domain, user and password.
In the end, you will have Payara server available for deployment:
Test the demo environment
It's time to give it a try. We could start a new application with a Java EE 8 archetype, one of my favorites is Adam Bien's javaee8-essentials-archetype, wich provides you an opinionated essentials setup.
First, create a new project and select a new Maven Project:
In Maven's window you could search by name any archetype in Maven central, however you should wait a little bit for synchronization between Eclipse and Maven.
If waiting is not your thing. You could also add the archetype directly:
This archetype also creates a new JAX-RS application and endpoint, after some minor modifications just deploy it to Payara 5 and see the results:
Fixing missing data on Jasper Reports with community Linux distros
14 March 2018
. . . or why my report is half empty in Centos 7.
One of the most common and least emotional tasks in any enterprise software is to produce reports. However after many years today I got my first "serious bug" in Jasper Reports.
The problem
My development team is composed by a mix of Ubuntu and Mac OS workstations, hence we could consider that we use user-friendly environments. Between many applications, we have in maintenance mode a not-so small accounting module which produces a considerable amount of reports. This applications is running (most of the times) on Openshift (Red Hat) platforms or on-premise (also Red Hat).
A recent deployment was carried over a headless(pure cli) CentOS 7 fresh install and after deploying application on the app server, all reports presented the following issue:
Good report, Red Hat, Mac Os, Ubuntu

At first sight both reports are working and equal, however in the Centos 7 version, all quantities disappeared and the only "meaningful" log message related to fonts was:
[org.springframework.beans.factory.xml.XmlBeanDefinitionReader](default task-1) Loading XML bean definitions from URL [vfs:/content/erp-ear.ear/core-web.war/WEB-INF/lib/DynamicJasper-core-fonts-1.0.jar/fonts
/fonts1334623843090.xml]
Fonts in Java
After many unsuccessful tests like deploying a new application server version, I learnt a little bit about fonts in the Java virtual machine and Jasper Reports.
According to Oracle official documentation, you basically have four rules while using fonts in Java, being:
- Java supports only TTF and Postscript type 1 fonts
- The only font family included in JDK is Lucida
- If not Lucida JDK will depend on operating system fonts
- Java applications will fallback to the sans/serif default font if the required font is not present on the system
And if you are a Jaspersoft Studio, it makes easy for you to pick Microsoft's True Type fonts
My CentOS 7 solution
Of course Jasper Reports has support for embedding fonts, however report's font was not Lato, Roboto or Sage, it was the omnipresent Verdana part of the "Core fonts for the web" from Microsoft, not included in most Unix variant due license restrictions.
Let's assume that nowadays MS Core Fonts are a gray area and you are actually able to install these by using repackaged versions, like mscorefonts2 at sourceforge.
In CentOS is easy as 1) install dependencies,
yum install curl cabextract xorg-x11-font-utils fontconfig
2) download the repackaged fonts
wget https://downloads.sourceforge.net/project/mscorefonts2/rpms/msttcore-fonts-2.1-1.noarch.rpm
3) and install the already available rpm file
yum install msttcore-fonts-2.1-1.noarch.rpm
With this, all reports were fixed. I really hope that you were able to found this post before trying anything else.
2017 My Java Community Year
30 December 2017
Yup it's the time of the year when everybody writes about yearly adventures.
This year was one of the best for my wanderlust spirit, basically due opportunities that I received as member of the global Java community, hence I wanna do a little recap of my Java year in my academic and professional journey, so far Java has been the strongest community I've ever participated. This is probably the year where I made most Java-related friends.
As always Java community is awesome and I wanna start this post saying thank you to all the people that made this possible, I really hope that my presentations, tutorials and workshops were at least at the same level of your expectations, I'm always trying to improve the quality and any feedback is more than welcome.
Let's start with the highlights recap . . .
January
January was an interesting month, my first MOOC collaboration -Java Fundamentals for Android Development- was published in partnership with Galileo University. Hence I became an official Edx instructor, with Edx profile and everything.
I really think that course quality could be improved, however feedback was better than I expected. I hope to collaborate in another MOOC in the near future, the simple act to prepare a course in a foreign language for an Edx Micromaster was a truly learning experience that I wanna repeat.
Finally, MOOC will run again this year, motivated by good reception . . . I guess/hope :).
February
In February I discovered my second favorite Java conference. After being accepted I traveled to Atlanta to speak at DevNexus.
With the same quality of Java One speakers but in a more "friendly" atmosphere, DevNexus has a good balance between, speakers, price and quality, I had the opportunity to do a conference on Functional Programming and Functional Java libraries.
I did an interview with night hacking :).
I also met Coca Cola bear at World of Coca Cola, life achievement unlocked.
Finally I'll be speaking again in 2018, hope to see you there.
March
Not a conference but my company -Nabenik- became a Payara reseller and we helped one unit of "Ministerio Publico" (aka Guatemalan FBI) in the migration process from Glassfish to Payara.
This was a combination between training, analysis and of course partnership. Cheers to everyone involved in the process :).
I also repeated my DevNexus presentation for Peru JUG friends (in spanish).
April
After being invited by Jorge Vargas, I joined JEspañol as speaker and collaborator. In short words, JEspañol aims to work as the integration point between Java Community in spanish speaking countries, also as the first spanish Virtual JUG.
This year we created a two-leg conference. Being the first leg the "Primera conferencia virtual JEspañol". With speakers from Guatemala, Mexico, Peru, Colombia and Panama.
May
In a collaboration with other company we trained one unit of the "Nicaraguan Tax administration", my collaboration was focused on secure software development for JavaEE and Android.
A pretty good experience since this was my third visit to Nicaragua.
June
Taking advantage from Nicaraguan trip I did a joint presentation with Managua Google Developers Group, talking about Java Community, Duke's Choice Award, Consultancy and many Java related technologies. Sharing pizza, beer and of course code.
I also had the opportunity to say hi to old friends from free software community, remembering the good old times of unix hacktivism.


July
Busy month, not too much hacktivism :).
August
The second leg of the "JEspañol conference" was carried-on being named "Java Cloud Day Mexico". One of my favorite trips of the year since it took place on the historical "Universidad Nacional Autonoma de Mexico".
With 15 speakers this was my biggest spanish-speaking conference. On the near future we have the intention to take the JEspañol conference to other LATAM countries.


In this opportunity I did a presentation on functional microservices with Payara Micro.
Finally we closed this event with peers from Oracle Developers LA.
About last week. After great talks of modern development at Java Cloud Day México, enjoying a deserved dinner with some of speakers. pic.twitter.com/gWVqEWTHOc
— Oracle Developer LA (@OracleDevsLA) September 6, 2017
I also got a ticket for Wacken Open Air, not Java but still amazing :).

September
I did a joint presentation with Edson Yanaga at Java One 2017, with full room (mostly Yanaga's merit I must say) we discussed the issues of distributed data with microservices and some technology to attain better data distribution, microservices patterns and some tips and tricks.
Not my best presentation, but anyways feedback is appreciated.
JEspañol got a Duke's Choice Award :).
October
I received an invitation from peruvian Universidad Privada Antenor Orrego to participate in their Engineering Congress . . . yup in Latam Software Development is considered Engineering.
This was my first time in South America since 2014, the emotion for the travel was pretty obvious. I had the opportunity to do three presentations, being:
- Getting started with Java community and development career
- The state of the art with JavaEE
- Creating functional microservices with Payara Micro
I also did a little trip to Chan Chan ruins, a UNESCO-Protected Site, mochicas where a non-Inca culture dominated by the Incas that I didn't know about.


On trip's last day I had a long layover on Lima, hence I met with Jose Diaz one of the PeruJUG Leaders to do a joint presentation in "Universidad Nacional Mayor de San Marcos" the oldest University in Latin America. Presenting in their systems engineering congress.
We did a panel about microservices on JavaEE vs Spring Boot.
November
After six years I returned to my "alma mater" to do a presentation on "Getting started with Java 8 and Java EE" for the "Guatemalan systems and computer science students congress". I felt like being at home.
I also took the opportunity to officially launch the partnership with CertificaTIC to introduce Oracle Workforce Development program at Guatemala. The program aims to train with official material but with a fraction of the cost the new generation of Java Architects in Guatemala.
Tip: We'll start classes on January, do not miss the opportunity :).
Finally I was an organizer, committee, waterboy, etc. on the Java Day Guatemala 2017, surprisingly this has been the best edition in attendance. Being a conference organizer is a huge amount of work. I know the huge space to make this conference better and I'm working on it.

December
December is probably the busiest month for any software contractor since it's the month when everyone goes on vacations and you have wider "maintenance windows" to update, replace and implement software systems.
However I took a day to do a presentation with MitoCode, one of the famous Java youtubers in Latin America. My presentation was focused on the state of the art in JavaEE and Microprofile.
I also got the opportunity to wrote a JavaEE article for my "alma mater" software magazine, the pre-print is available on my spanish blog.
Again thanks to God, friends, family and everyone who made this possible.
[Quicktip] How to install Oracle Java 9 on Fedora 26
28 September 2017
Yey! It's time to celebrate the general availability of Java 9.
Since I'm the guy in charge of breaking the things before everyone else in the company, I've been experimenting with JDK 9 and Fedora 26 Workstation, hence this quick guide about installing Oracle JDK 9 using the "Fedora Way".
Getting the JDK
As always when a JDK reaches general availability, you could download a Java Developer Kit from Oracle website.
Here http://www.oracle.com/technetwork/java/javase/downloads/index.html
Conveniently Oracle offers a .rpm package that it's supposed to work with any "Hat" distribution. This guide is focused on that installer.
Installing the new JDK
After downloading the rpm, you could install it as any other rpm, at the time of writing this tutorial, the rpm didn't required any other dependency (or any dependency not available in Fedora)
sudo rpm -ivh jdk-9_linux-x64_bin.rpm
This command was executed as super user.
Configuring the JDK
"Hat" distributions come with a handy tool called alternatives, as the name suggests it handles the alternatives for the system, in this case the default JVM and compiler.
First, set the alternative for the java command
sudo alternatives config --java
It will list the "Red Hat packaged" JVM's installed on the system, for instance this is the output in my system (Oracle JDK 8, Oracle JDK 9, OpenJDK 8):
Later, you should also pick a compiler alternative
sudo alternatives config --javac
Configuring JShell REPL
JShell is one of the coolest features in Java 9, being the first official REPL to be included. However and since it's the first time that the binary is available in the system, it cannot be selected as alternative unless you create it manually.
First, locate the JDK install directory, Oracle JDK is regularly located at /usr/java, being in my system.
As any other JVM binary program, JShell will be located at bin directory, hence to create an alternative (and consequently to be prepared for other Java 9 options . . . and to include the executable in the path):
sudo alternatives --install /usr/bin/jshell jshell /usr/java/jdk-9/bin/jshell
From now on you could use jshell on any regular shell, just see my first Java-9 hello world, it looks beautiful :-).
Java Cloud Day México 2017 trip report
04 September 2017
I'm not accustomed to do "trip reports" of conferences, but I think this conference deserves the report.
Java Cloud Day 2017 was the result of a dream from the JEspañol community, a simple one in phrase but very difficult to achieve "unite Java Leaders from Spanish speaking countries in Latin America", dream that started three years ago. Although I'm not one of the "original members", last year I joined the effort after some pub-discussions in Java One.
Honor to whom honor is owed, one of the key sponsors who made this possible was CertificaTIC, a mexican Java-Oracle certification services provider who believed in the project and put a lot of resources for the event. Adrian, Mirza and the whole team . . . you rock!
The previous virtual conference
The event as a whole was carried as two conferences. The first leg called "conferencia virtual JEspañol" with VirtualJUG-Like conferences but in Spanish with speakers from Guatemala, Mexico, Panama, Peru and Colombia, being the first of its kind.
Java Cloud Day Mexico 2017
And the day finally came . . .
Celebrated in conjunction with the 40th anniversary of the computer science program in the mythical Universidad Nacional Autonoma de México (UNAM), the event was a huge success.
With talks from Java Champions, Oracle Developer Champions, Oracle ACE, JUG Leaders, Oracle Technology Network and "Javatars", this is the biggest IT Spanish-speaking event I've ever attended, raising the bar for all of us in our next events.
Kudos, bitcoins, stamina, japanese ki and whatever is valuable for all participants and speakers. Events like these are my favorite since (and taking a famous phrase from DevNexus) this was an event from developers, by developers for developers.
The pictures
Some selected pictures from the event, dinner, and Teotihuacan.


My presentation
I presented some tip and tricks for the creation of Microservices with Payara Application Server, the presentation starts at minute ~45
See you in the next conference . . . or tour, who knows :)?
Payara 4.1 install guide on CentOS 7
25 August 2017
In this "back to basics tutorial" I'll try to explain how to install properly Payara 4.1 on Centos 7 (it should be fine for Red Hat, Oracle Unbreakable Linux and other *hat distributions).
Why not Docker, Ansible, Chef, Puppet, . . .?. Sometimes the best solution is the easiest :).
Pre-requisites
The only software requirement to run Payara is to have a JDK installed. CentOS offers a custom OpenJDK build called "headless" that doesn't offer support for audio and video, perfect for cli environments.
You can install it with Yum.
yum install java-1.8.0-openjdk-headless
Create a Payara user
As mentioned in the official Glassfish documentation, it is convenient to run your application server in a dedicated user for security and administrative reasons.
adduser payara
Although you could be tempted to create a no-login, no-shell user, Payara saves many preferences in user's home directory and the shell/login is actually needed to execute administrative commands like asadmin.
Download and unzip Payara
Payara is hosted at Amazon S3, please double check this link on Payara's website, for this guide I'm installing Payara at server's /opt directory.
cd /opt
wget https://s3-eu-west-1.amazonaws.com/payara.fish/Payara+Downloads/Payara+4.1.2.173/payara-4.1.2.173.zip
unzip payara-4.1.2.173.zip
You should execute the above commands as super-user, after that you should change permissions for the Payara directory before any domain start. Otherwise you won't be able to use the server with payara user
chown -R payara:payara payara41
systemd unit
Centos 7 uses systemd as init system, consequently it is possible and actually quite easy to create a systemd unit to start, stop and restart Payara default domain
.
First, create a file that represents Payara systemd unit.
/etc/systemd/system/payara.service
And add the following content:
[Unit]
Description = Payara Server v4.1
After = syslog.target network.target

[Service]
User=payara
ExecStart = /usr/bin/java -jar /opt/payara41/glassfish/lib/client/appserver-cli.jar start-domain
ExecStop = /usr/bin/java -jar /opt/payara41/glassfish/lib/client/appserver-cli.jar stop-domain
ExecReload = /usr/bin/java -jar /opt/payara41/glassfish/lib/client/appserver-cli.jar restart-domain
Type = forking

[Install]
WantedBy = multi-user.target
Note that Payara administration is achieved with payara user. You could personalize it to fit your needs.
Optionally you could enable the service to start with the server and/or after server reboots.
systemctl enable payara
Check if all is working properly with the systemd standard commands
systemctl start payara
systemctl restart payara
systemctl stop payara
Payara user PATH
As Payara and Glassfish users already know, most administrative tasks in Payara application server are achieved by using cli commands like asadmin. Hence it is convenient to have all tools available in our administrative payara user.
First log-in as Payara user, if you didn't assign a password for the user you could switch to this user using su as root user.
su payara
Later you shoud create or edit the .bashrc file for the Payara user, the most common location being user's home directory.
cd /home/payara
vim .bashrc
And add the following line:
export PATH=$PATH:/opt/payara41/glassfish/bin
Final result
If your setup was done properly you should obtain an environment like in the following screenshot:
Note that:
- I'm able to use systemd commands
- It actually restarded since PID changed after
systemd restart asadminworks and displays properly the running domain
[Quicktip] Move current JVM on JBoss Developer Studio
28 January 2017
After a routinary JVM update I had the idea of getting rid of old JVMs by simply removing the install directories. After that many of my Java tools went dark :(.
For JBoss Developer Studio, I received the following "welcome message".
At the time, I deleted the 1.8.111 version from my system, preserving only the 1.8.121 version as the "actual" version.
Fixing versions
Different from other tools, Eclipse-based tools tend to "hardcode" the JVM location with the install process inside eclipse.ini file. However and as I stated in a previous entry, JBoss Developer Studio converts this file to jbdevstudio.ini, hence you should fix the JVM location in this file.
Finding the file in Mac OS(X?)
If you got JDevStudio with the vanilla installer, the default location for the IDE would be /Applications/devstudio and the tricky part is that configuration is inside "Devstudio" OSX Package.
If you wanna fix this file from terminal the complete path for the file would be:
/Applications/devstudio/studio/devstudio.app/Contents/Eclipse
Of course you could always open packages in Finder:
After opening the file the only fix that you need to do is to point to the installed virtual machine, being in my PC (Hint: You could check the location by executing /usr/libexec/java_home):
/Library/Java/JavaVirtualMachines/jdk1.8.0_121.jdk/
And your file should look like this:
Join Me at @devnexus
19 December 2016
Devnexus is probably (and according to this video) the second biggest Java Conference in United States, hence one of the top ten Java conferences in America.
Organized by the Atlanta Java Users Group, you could choose between 120+ presentations, 14 tracks and 7 workshops, in order to catch-up with recent topics on Java and Enterprise development world, a must for any Java Developer looking for knowledge.
Devenexus 2017 will be my first attendance and I'm honored to share that one of my presentations was accepted :).
Reaching the lambda heaven - https://devnexus.com/s/devnexus2017/presentations/17131
In this presentation i'll give a practical introduction to functional/reactive programing in Java for the "street developer" and we'll be reviewing a list of useful libraries to make elegant and functional (as in the paradigm) web applications.
Why this and not other conferences?, in my opinion:
- It's held on a cheaper city compared to California conferences
- It's a conference from developers for developers
- Atlanta Jug guys are awesome
- Java still rocks
I hope to see you there
[Quicktip] Add Eclipse Marketplace Client to JBoss Developer Studio
11 October 2016
Recently I'm in the need to do some reporting development. Although I've used iReport in the past I'm pretty comfortable with having a one stop solution, being at this time Red Hat JBoss Developer Studio (RHJDS).
Despite the fact that it contains an small marketplace, at this time it lacks a proper reporting solution like JasperSoft Studio, hence I was in the need of installing it over my current RHJDS install.
For those in the need of installing Eclipse Marketplace plugins, you can get it with two simple steps:
Add support for Eclipse Update Sites
Create a new repository with the following sequence
Help -> Install New Software -> Add
The update URL for Eclipse Neon is:
http://download.eclipse.org/releases/neon/
And choose a good name for the repo ("Eclipse Neon" maybe?)
Search for Eclipse Marketplace Client
So far I'm not pretty sure about the potential impacts of this mix of repositories, however you'll be able to install any Eclipse Marketplace plugin, and it looks good.
See you at Java One and WITFOR 2016
08 September 2016
The last quarter of the year is maybe my favorite period of time, since 2012 I try to attend at least to one "big" conference and this year won't be an exception.
For me conferences are an opportunity to meet new people, have fun, and of course travel to new/favorite places, and this year I'll have the opportunity to attend two big conferences.
From September 12 to 15 I'll be attending WITFOR 2016 as a member of the guatemalan academic community. Since my Msc. I've missed the serious academic environment, conferences, CFP, basically because my country(Guatemala) is still creating an academic system. Hence I have to help (a little bit at least) in my University.
Later jumping from one plane to another (literally) I'll travel to attend J1. As I previously stated, J1 was a "TODO in life" I had the opportunity to attend the past year and collaborate with some community activities, however this year(between other good news) one of my proposals was accepted, so I'm trying to be ready to chill-out with some Java community peers and share the things that we are doing in Guatemala's software industry.
See you at J1 and WITFOR 2016.
Java Day Tour 2016 Recap
14 July 2016
A year ago I talked about GuateJUG's Java Day Tour in this blog, one year has passed (time flies!) and it's time to do another recap of GuateJUG activities.
As a matter of fact the tour wasn't a tour in first place, we created it as a coincidence of multiple IT conferences where GuateJUG was invited where we promoted our yearly conference, however at this year we formalized the concept opening a "Call for JUG" in our website and social networks with a clear mission and vision:
>Mision: Help universities, high schools and IT development centers with Java-centered conferences in order to update IT knowledge in the not-so developed regions of Guatemala

>Vision: Travel through Guatemala and have fun while promoting our conference and Java
Why is this important?
Guatemala is one of the Central American countries with less college graduates, only 10% of the population could access to college education and only 10% of that population (hence 1%) actually gets a degree, with the addition that most of the people choose a non-STEM degree.
Anyways as most of you probably know, you actually don't need a degree to be a rockstar in Software Development, and for this many people in the country is gaining interest in Computer Science in order to get better job opportunities and GuateJUG is glad to be a part of that change.
The tour
To finance the tour expenses we created an inverted call for papers, any group, association, university, high school could choose between a bunch of speakers and a fixed set of talks, being:
- Maria Castillo (@marycoder)
- Jorge Cajas (@jac_mota)
- Mario Batres (@mariobatres7)
- Mercedes Wyss (@itrjwyss)
- Me (@tuxtor)
GuateJUG put the time plus experience and they put the venue and accomodation. Contrary what we initially expected (and sadly with most success than our yearly conference), GuateJUG tour was a hit. We successfully participated in many talks in the following cities:
- San Pedro Sacatepequez, San Marcos (sponsored by Universidad Mariano Galvez)
- Totonicapan, Totonicapan (sponsored by Universidad Mariano Galvez)
- Quetzaltenango, Quetzaltenango (sponsored by Universidad Mariano Galvez)
- Cobán, Alta Verapaz (sponsored by Universidad Mariano Galvez)
- Salama, Baja Verapaz
- San Miguel Petapa (sponsored by Colegio Valle del Saber)
- Universidad InterNaciones (sponsored by itself)
Some random photos from the trips


With new dates in the following cities:
* Huehuetenango, Huehuetenango (sponsored by Universidad da Vinci)
* Chiquimula, Chiquimula (sponsored by Universidad de San Carlos)
So far we've promoted Java with more than 800 assistants between all regions, a huge success for guatemalan parameters.
Lessons that we've learnt
Although GuateJUG was supposed to be a central part to teach Java, as speakers we've learnt more than we expected in the first trip.
Quality comments aside, most of the people that made this tour possible were glad with us, and they wish that more IT communities could have an impact for all country regions.
You can't be sure if an informal chit-chat in a IT conference would become a great opportunity, in our case an informal chit-chat in a Java meeting finished with the first independent technological tour in our country (AFAIK).
For us the Java Day Tour was an opportunity to rediscover our country, make friends in every country region, and have not only IT but life experiences that I'm pretty sure I wouldn't have without a proper excuse to take my backpack, laptop, and share a little bit of knowledge that I've had the opportunity to acquire.
For the students, Java Day Tour was an opportunity to ask any question about Software Engineering, Computer Science, Women in STEM, Android, Life outside their regions, IT careers, and or course Java, and I'm glad for being part of that.
Long live to Java!
First impressions of Zulu on OSX
11 February 2016
Although my first development box at this time is an Apple PC, I'm pretty comfortable with Open Source software due technical and security benefits.
In this line, I've been a user of Zulu JVM on my Windows+Java deployments, basically because Zulu offers a zero-problems deployment of OpenJDK, being at this time the only Open Source and production ready JVM available for Windows (in Linux you also have OpenJDK distro builds or IcedTea).
As my previous experiences in Windows and considering that Zulu is at some point a supported compilation of OpenJDK (basis for HotSpot aka OracleJDK), using Zulu in OSX has been so far a painless solution.
Compared to HotSpot you have an additional security "feature" only available at Server JRE, the lack of the infamous web plugin, however you will lose Java Mission Control because is a closed source tool.
If you are interested in formal benchmarks this guide (by Zulu creators BTW) could be helpful: http://www.azulsystems.com/sites/default/files/images/Azul_Zulu_Hotspot_Infographic_d2_v2.pdf
In a more "day by day" test, no matter if you are using Eclipse
Wildfly
Or maybe Vuze
Zulu simply works.
¿Why should you consider Zulu?
- Is based on OpenJDK Open Source project
- You obtain nearly the same performance of HotSpot
- You can bundle it on your apps (like Microsoft in Azure)
¿Why avoid Zulu?
- If you need Java Mission Control
- If you need the Java Browser Plugin, pretty dead BTW
[Quicktip] Fix font size in JBoss Developer Studio and OSX
02 February 2016
One of the most annoying things of using JBoss Developer Studio on OSX is the default configuration, specially the font size.
By default Eclipse (and consequently Jbossdevstudio) has a startup parameter called "-Dorg.eclipse.swt.internal.carbon.smallFonts" and as its name suggests, it enforces the usage of the smallest font at the system.
Although default settings are tolerable on retina displays:
The problem gets worse on regular 1080p screens (like external non-mac displays):
As you probably guess the solution of this issue is to delete the parameter, but the tricky part is that JBoss Developer Studio renames the eclipse.ini file (default Eclipse configuration) to jbdevstudio.ini, making most of the how-to guides at internet "complicated".
Anyway the file is located at:
${JBDEVSTUDIO_HOME}/studio/jbdevstudio.app/Contents/Eclipse/jbdevstudio.ini
Being the default location:
/Applications/studio/jbdevstudio.app/Contents/Eclipse/jbdevstudio.ini
With this your eyes will be gratefull (actual 1080p screenshot):
20 years of Java in Java One and Java Day Guatemala
23 November 2015
For me 2015 hacktivism is officially closed, this year I had the opportunity to attend my first Java One and met some of my development heroes, folks from another JUGs, being trapped at Patricia's hurricane (no kidding), and bring a huge amount of Java t-shirts to Guatemala. I must say thanks to the people that made this trip possible, special acknowledgments to Nichole Scott from Oracle, my peers at Nabenik that gratefully sponsored my trip and the Guatemala Java User Group for allowing me to take advantage of the Java One ticket :-D.
I think that every techie has a list of conferences to attend before die, as 2015 my top five is:
- JavaOne (2015 finally)
- Gentoo Miniconf
- OSCON
- Forum Internacional de Sofware Livre - FISL (2013 as a speaker yey!)
- Convención de Informatica Guatemala (2005 - now dead, but it made the list for nostalgia)
Although I had some health issues due stress, Java One and San Francisco were lifetime experiences. As each conference I've attended, it has its goods and bads but in general you can feel a strong sense of community between attendants, from Pivotal to Red Hat (and Microsoft), from the peer that shares a beer with you and turns out to be a Java Champion to the people that speaks another languages with you, Java One is about community making awesome things in IT. Programming languages aren't eternal but I can state that the differential factor that raised 20-year languages like Java and JavaScript among the others is the community.
Random photos:


In a different scale but in the same sense of community, the Guatemala Java User Group held its yearly conference Java Day Guatemala.
I've been involved directly in the organization of 2 Java Days and spoken in three. As I said in our keynote, for me GuateJUG has been the most successful user group where I've participated. Characterized by pragmatism, openness and community structure since its inception, GuateJUG became one of the strongest user groups in Central America, the integration between industry, academia, Open Source communities, Free Software communities and HR people looking for the next generation of developers is unique.
As a special occasion we held a traditional birthday celebration, including birthday cake and mexican piñatas. It was great to share words with some old friends and meet new IT enthusiasts, as a matter of fact we also sang "Happy birthday Java and happy birthday GuateJUG".
Video and some more random photos:


I hope to see you the next year in Java One and Java Day :-).
[Book Review] Java EE 7 Essentials, O’Reilly
12 November 2015
About the book
Pages: 362
Publisher: O’Reilly Media
Release: Aug 2013
ISBN-10: 978-1-4493-7016-9
ISBN-13: 1-4493-7016-0
Book details
I received this book as a part of the now dead O'Reilly users group program. When I asked for this book I was specially interested due comments from my development peers . . . and most importantly because I was in the middle of a Software Architecture definition.
I'm writing this review after 7 months of using it on daily basis, basically because our development stack is composed by AngularJS on the front-end and JavaEE 7 on the back-end (with a huge bias to the Hat company). At the office we have a small books collection (because IT books are pretty dead after five years), and Aurun's book is our prefered book for the "Java EE 7 rescue kit".
If I have to choose two adjectives for this book I must say "quick and versatile", this book deserves all of its fame because it has the balance between a good reference book and a user friendly introductory book, most of the IT books don't achieve it.
I don't wanna copy the index page but I have the following favorite chapters:
- Servlets
- RESTFul Web Services
- SOAP Web Services
- JSON Processing
- Enterprise Java Beans
- Context and Dependency Injection
- Bean Validation
- Java Transactions
- Java Persistence
Most of the book samples are based on Glassfish, and is easy to guess why looking at the publication date. However, talking from my true-heavy-metal-monkey-developer-architect experience, this book uses only pure JavaEE 7 apis and I've been able to run/use the samples on Wildfly without issues.
For those that are looking a good book for JavaEE 7 development, on any of the certified Java EE 7 servers this is a must.
Highlights
- Good balance between tutorial and reference.
- Few content compared to the Java EE Tutorial but still in the point.
- The samples should work on any Java EE 7 server.
Could be better
- WebSockets section is small in relation to the other chapters, it feels incomplete.
- The cover brings to my mind the good old days when Glassfish was that application server that everybody is talking.
GuateJUG Tour 2015 First Leg
22 October 2015
As I described previously, GuateJUG held a conference circuit promoting its yearly conference Java Day Guatemala 2015.
This activity was motivated by Java's 20th anniversary and specially due GuateJUG's 5th anniversary.
So... how do you achieve a tour that traverses Guatemala?. Easy, with the right sponsors and contacts :).
An special acknowledgment for the people that made this first leg possible:
- Jorge Cajas (Universidad de San Carlos de Guatemala)
- Dhaby Xiloj (Universidad Rafael Landivar - Quetzaltenango)
- Rene Alvarado (Universidad de San Carlos de Guatemala - Chiquimula)
In this first leg (not the only one . . . I hope) GuateJUG team went from the center of the country to the east and later to the west, like in this ugly map:
Covering the following topics
First conference
Place: Universidad de San Carlos de Guatemala - Guatemala City
* Java 8: Functional programming principles (me)
* 20 years of Java (Wences Arana - DebianGt)
Second conference
Place: Universidad Rafael Landivar - Quetzaltenango
* Source code control with Git - (me)
Third conference
Place: Universidad de San Carlos de Guatemala - Chiquimula
* HTML5 applications with Java EE 7 and AngularJS - (me)
* Android 101 - (Mercedes Wyss - GuateJUG)
Random photos:


Some years ago I did a similar tour with the FLOSS community in my college years. The sensation of going back to the same cities, hanging out with good old friends and other new friends is always pleasant.
Every time anyone asks me why I do this, I have the same answer "why not? At least each time I know the country a little bit more :)".
With this I'm in the best mood for Java Day Guatemala and most importantly to attend Java One 2015 willing to collaborate with some User Groups activities, I hope to see many of you in both conferences.
GuateJUG Tour 2015
26 September 2015
In GuateJUG we arrived to our fifth year, consequently I must start this post with a "thanks to everybody that made this possible (developers, advocates, supporters, sponsors, friends, family, and other-UG)".
This year has been a special year for GuateJUG and Java in general, in February we were very excited about being featured at Java Magazine (a little step for .gt developers, a great step for our user group), and as every inch of the web knows 2015 is the year of the 20 years of Java, another anniversary that came in hand to believe that 2015 is the year of Java reborn.
Hence, at GuateJUG we added to our regular activities a conference circuit called GuateJUG Tour.
As many of our activities, this is some kind of spontaneous tour, hence we'll be adding dates as new cities are confirmed (Guatemala is a small country so it's possible to confirm in very short notice).
The tour started on September 26 and I'm confirmed as a speaker in three cities, so I'll be collecting my slides in this post for quick reference :).
Java 8: Más funcional que nunca
Git 101 (with Java)
Aplicaciones HTML5 con AngularJS y JavaEE
Welcome
08 August 2015
Hi, If you're reading this probably you are one of my few twitter followers, so thanks for your visit. For those that don't know me I wanna share a little story with you :).
As an IT guy, I started my main website/blog El abismo de tux (in spanish) in 2006 during my college years, mostly as an experiment that grew as the blog phenoma exploded, gaining great experiences like:
- Being featured in a nation-wide newspaper;
- Being invited to morning talk shows due my tech/politics rants;
- Getting opportunities like my first job using my tech blog as a "certification" of my expertise in Unix and Java.
So . . . what's the point of starting a new website in 2015?
I consider my old blog as a chronological reflection of my life experiences, like my stupidity at college, my involvement in FLOSS communities, my musical taste, EVERYTHING that I could talk about technology, politics, society, academia, the life in the countries where I've lived (Guatemala, Brazil), and in recent years using it as an scratchpad of my day to day coding.
During this year at Nabenik, while I was struggling to improve my coding skills I noticed that most if not all the times I search for tech content exclusively in English, and I've noticed also a debacle on my readers due the change of focus at my old blog. because I simply killed some topics that I don't care anymore (politics, Free Software as a social movement, the country where I live), so I've decided that is time to put the "Tux Abyss" in mantainance mode.
Killing a website is more difficult than it looks, specially a website that has been online since 2006, however at this point of my life/carreer I'd like to share deeper facts and knowlege about fewer topics, specially:
- Gentoo Linux and Unix in General
- JVM Languages (Java, JavaScript)
That's why I'm welcoming you to "The J*", the name is inspired in three facts
- I write code in JVM Languages (specially Java) and JavaScript on daily basis
- I was born in June
- The second name of a child that means a lot to me starts with J
For this site and considering my past experiences with Wordpress and Jekyll . . . I decided to try JBake, mainly because I'm familiar with Gradle, and for me is easier to write posts in markdown. Also because I fell in love with the results at Vert.x and Hawkular to name a few.
At this time this blog is hosted at GitHub pages being built by Travis-CI with gradle, saving me hosting costs.
I think that starting a web site in the AOL 2.0 era is some kind of digital rebellion, so please grab a seat and feel free to drop comments :).
Older posts are available in the archive.


